 |
|
|
FilmFix
226 W. Ojai Ave., Ste 101 #455 Ojai, CA 93023 Phone: (805) 640-8883
We are sorry, but this blog has not yet been translated into English.   Timeline of Hardware Updates at FilmFixReflecting back on the 18 years we've been in business, we've consistently stayed on the cutting edge of transfer technology. This commitment comes at a cost, but it's necessary for us to continue delivering work we're proud of. Below, we outline the advancements in our services, specifically categorized by the type of transfer: 8mm and Super-8 film, VHS tape, slide transfer, and 16mm film. Please note that this list excludes the numerous software upgrades and extra services we've introduced over the years. Important Note: The list is in descending order, showcasing our most recent advancements first. 8mm and Super-8 Film Transfer2023

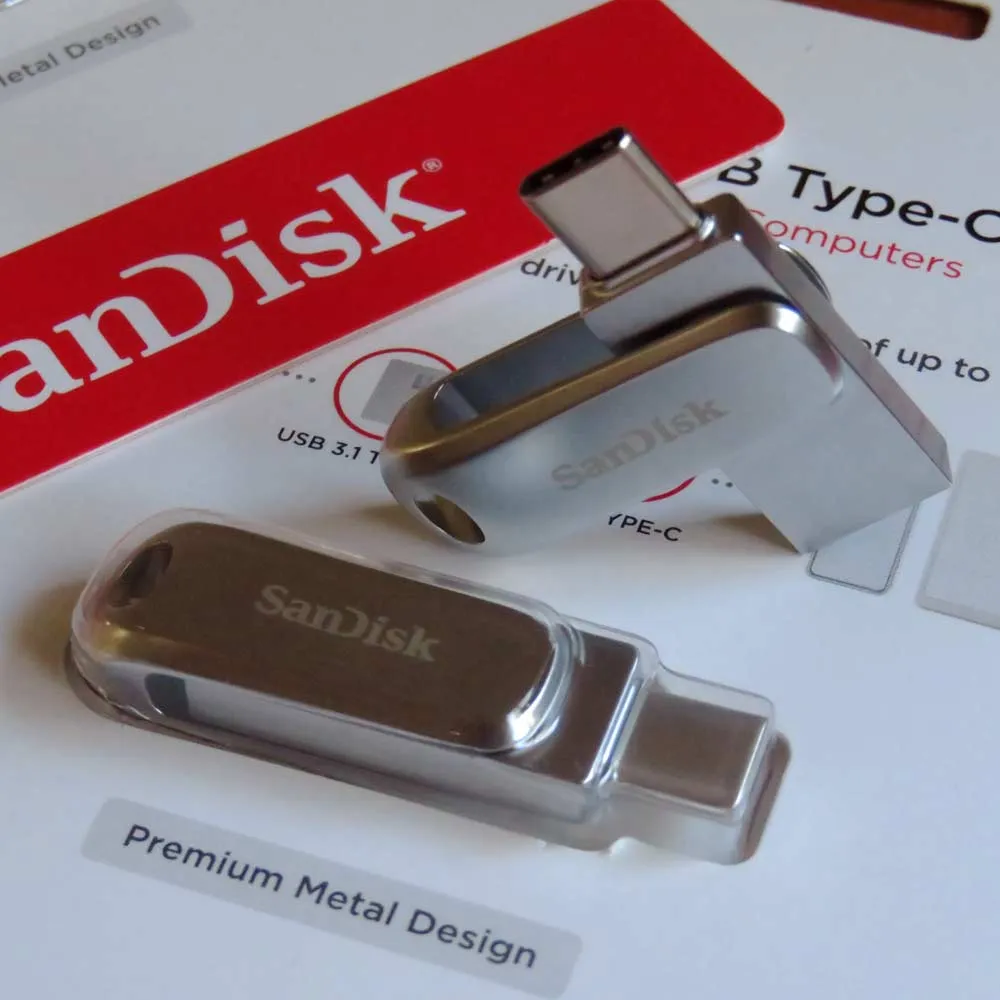
Preferred Target Media - a high quality USB Stick (or an SSD drive)
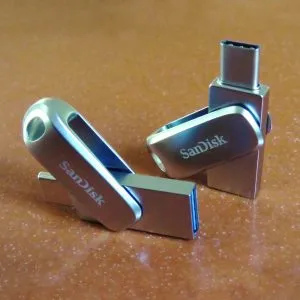
SanDisk Dual Drive (swivel casing to gain access to the traditional Type-A, or the newer smaller Type-C USB plug) 2020
2019
2018
2017
2016
2012
2010
2005
Initially we offered "real-time" film transfers of 8mm and Super-8 mm film using a Hitachi 3CCD SD camera. If film has sound, we include that in the transfer cost (few other companies even capture the sound, when films have it.) This type of "real-time" transfer was in standard definition (in PAL or NTSC) and had "mixed" frames. The transfer was set to 16.68 frames per second, a frame rate speed known to reduce the flicker effect. Having mixed frames had the disadvantage that post-processing of image stabilization resulted a sub-standard outcome. Further, any panning camera movement resulted in an undesirable effect and made the image have a ghost-like double image following the main image. The target media seems archaic to us now! We performed these transfers directly to VHS, Mini-DV and DVDs. Rather than having a computer involved, like it is today, the DVD was recorded "live" directly to a player. It makes us smile when we see how far we come since 2005.
VHS Tape Transfer
2019
2005
Slide Transfer
2023
2020
2009
2006
16mm Film Transfer
2014
of 1 small, 3-inch reel FilmFix - we have mastered analog to digitalDuring the past 18 years, we have noticed that one can never start too early in preparation for holiday gifts. Our customers have gotten wise to our traditional "Christmas Rush" season and have started getting their memories transferred -- now! 
It's OK - it's not your eyes! Our USB stick image is not to scale. (Our stock is the good stuff -- durable, versatile, metal USB sticks.) We have mastered the art of going digital in transferring 8mm film, 35mm slides and tapes.    If notable customer care, quality, and price matters to you, we've been told: "... there is no need to look any further. " Just check out our copious verified testimonials; we think they tell all. of 1 small, 3-inch reel FilmFix - Our Top 5 TestimonialsWhen you take the time to write a testimonial for a small business like FilmFix, you are helping us more than you might realize, and we appreciate your efforts beyond what words can express. Here, we share this handful of just five of our most treasured testimonials, while sending out our most sincere gratitude to the many others of you who have also written testimonials on our behalf — Thank you! In date order: Lee McEachern from Greenbrae, CA - October 14, 2020 Michael Kanfer from Playa del Rey, CA - July 27, 2020 Roberto Cazzaro from Kirkland, WA - June 17, 2019 Meredith from Pittsburg, CA - January 30, 2018 Jerome S. Strand from Erskine, MN - May 6, 2017 (Our testimonials are verified: Since our start in 2005, both the testimonial and any personal identification seen below them is posted only after attaining our customer's written permission.)

Click to read our 18 Google Reviews For current testimonials, on our website, please click here. (We have hundreds of personal, verified testimonials -- 17 years worth.) FilmFix.com Google ReviewsAll can be found here on Google. FilmFix.net Google ReviewsThey can be found here on Google. of 1 small, 3-inch reel For now -- We can no longer Include a Localized Webpage for MP4 FilesUpdate -- Monday, November 21, 2022 We are very sorry to inform you that, as of Sep 8, 2022, our Localized Webpage is no longer being supported by modern browsers. We hope you will "stay tuned", because once the Isolated Web Apps (IWAs) standards are available, Nathaniel will see if the concept can be ported into an "IWA" environment. Here is more information about why our Localized Webpage is no longer supported (excerpt): Loading a local file (link) --
Local files from the same directory and subdirectories were historically treated as being from the same origin. This meant that a file and all its resources could be loaded from a local directory or subdirectory during testing, without triggering a CORS error.
ORIGINAL BLOG -- created in December of 2021: In response to your requests on all 8mm or Super8 film transfer orders, FilmFix is now providing you (at no charge) your own private, secure, and localized webpage. This webpage is not accessible via the Internet! We know how sensitive and personal most customers’ transfers are, so we never allow your transfers outside of our controlled environment. Rest assured that we never trust anyone else with your data. Aside from privacy considerations, storing data in the “cloud” can involve extra expense, which none of us needs. Instead, we include a simple, secure webpage directly onto your own personal thumb drive (or hard drive, in some cases).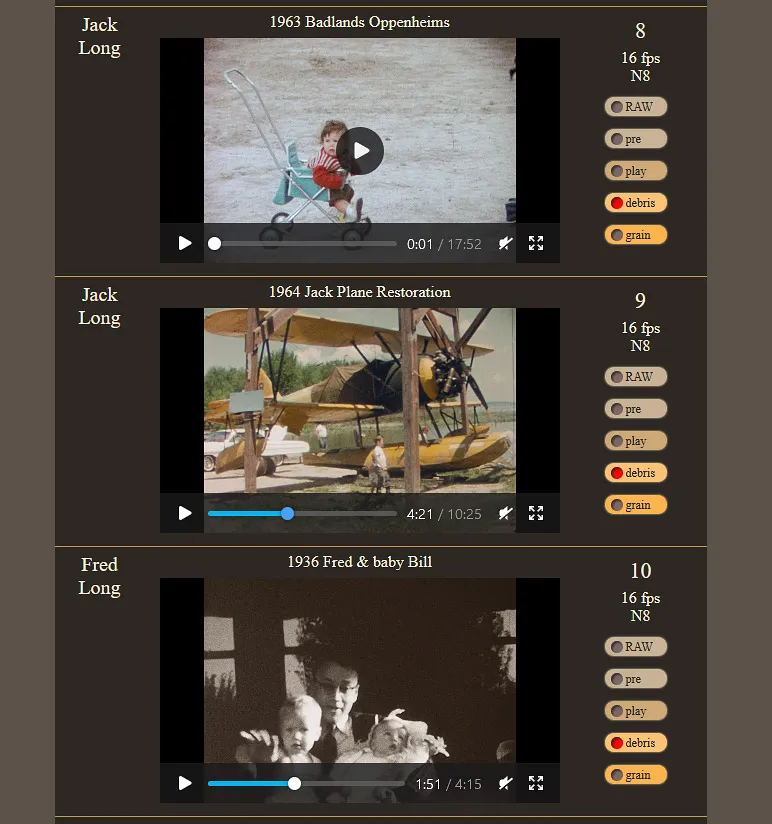
(All images courtesy of our customer - Katie Myers) A simple webpage is included on your storage media. From this webpage, you can easily browse your transfer. You can add and edit titles and text; and you can change the order in which these sections show, all controlled from within a spreadsheet. Background: Having consulted our customers with larger orders, we realized that we needed to provide something more than just high-quality transfers. Customers were asking for a simple way to catalog these 3-inch reels into a spreadsheet, from which they could link back to their final MP4 files. * We listened to you, and Nathaniel devoted close consideration to your request. He has now successfully reverse-engineered it into code, producing one master HTML page that links to a dedicated spreadsheet. As a result of his efforts, you can now easily add notes and dates to the provided spreadsheet. Then, from the HTML page, you can generate a page that includes your notes. Provide us with your first spreadsheet, and we will transpose your data into our field-sensitive spreadsheet. This spreadsheet will give you a solid head start on your cataloging. 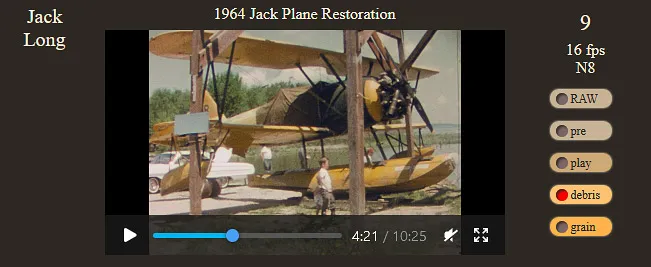
Jump between the different stages of provided files to see what improvements we were able to make: RAW, pre, play, debris and grain. Moreover, this interface offers you a way to cross-compare the different steps that we went through, thereby refining your final outcome. You can now easily jump around between our different versions by selecting them on the right:
(Please note that only the "Image Enhancements" which you initially ordered will be available for you to select. You specify these “image improvements” preferences during your order placement.) 
From within that simple webpage you can select to view it in a full screen, and jump around as you please. To Access Your Personal Webpage:
How to Share: Sharing your personal webpage requires you to make a copy of your thumb drive, after which you can send the copied drive to that someone special. Your personal webpage and its supporting files — including your spreadsheet — are easy to copy, along with the rest of your transfer. Update Your "START HERE" HTML Page: For past customers, we have been improving some of the functionality of that personal webpage. If you desire to update your page, feel free to download the latest version of your page and spreadsheet, all ready to go: Link to ZIP file. * If you have a larger collection, (more than 30 small reels) this localized website works best on a computer that is less than 4 years old. of 1 small, 3-inch reel Rare Double 8mm Film with SoundFew 8mm transfer houses do sound. Fewer still do sound from Regular 8mm film. Well, we do sound from Regular 8mm and Super-8 film. Moreover, we do it at no extra cost to you! Double-8, eight-millimeter film normally does not have a sound strip. However, we have had the opportunity to help a few customers with this very rare type of transfer. Super-8 audio and Normal-8 audio differ from each other in that they locate their main audio strips on opposite edges of the film: The main audio strip on Super-8 film is on the side away from the perforation holes, whereas Normal-8 film has the magnetic sound strip on the same side as the perforation holes. Thus, the few transfer houses that can transfer Super-8 film with sound will probably not be able to transfer Normal-8 film with sound. Only transfer houses with a special sound head can transfer the sound from Normal-8 film for you. 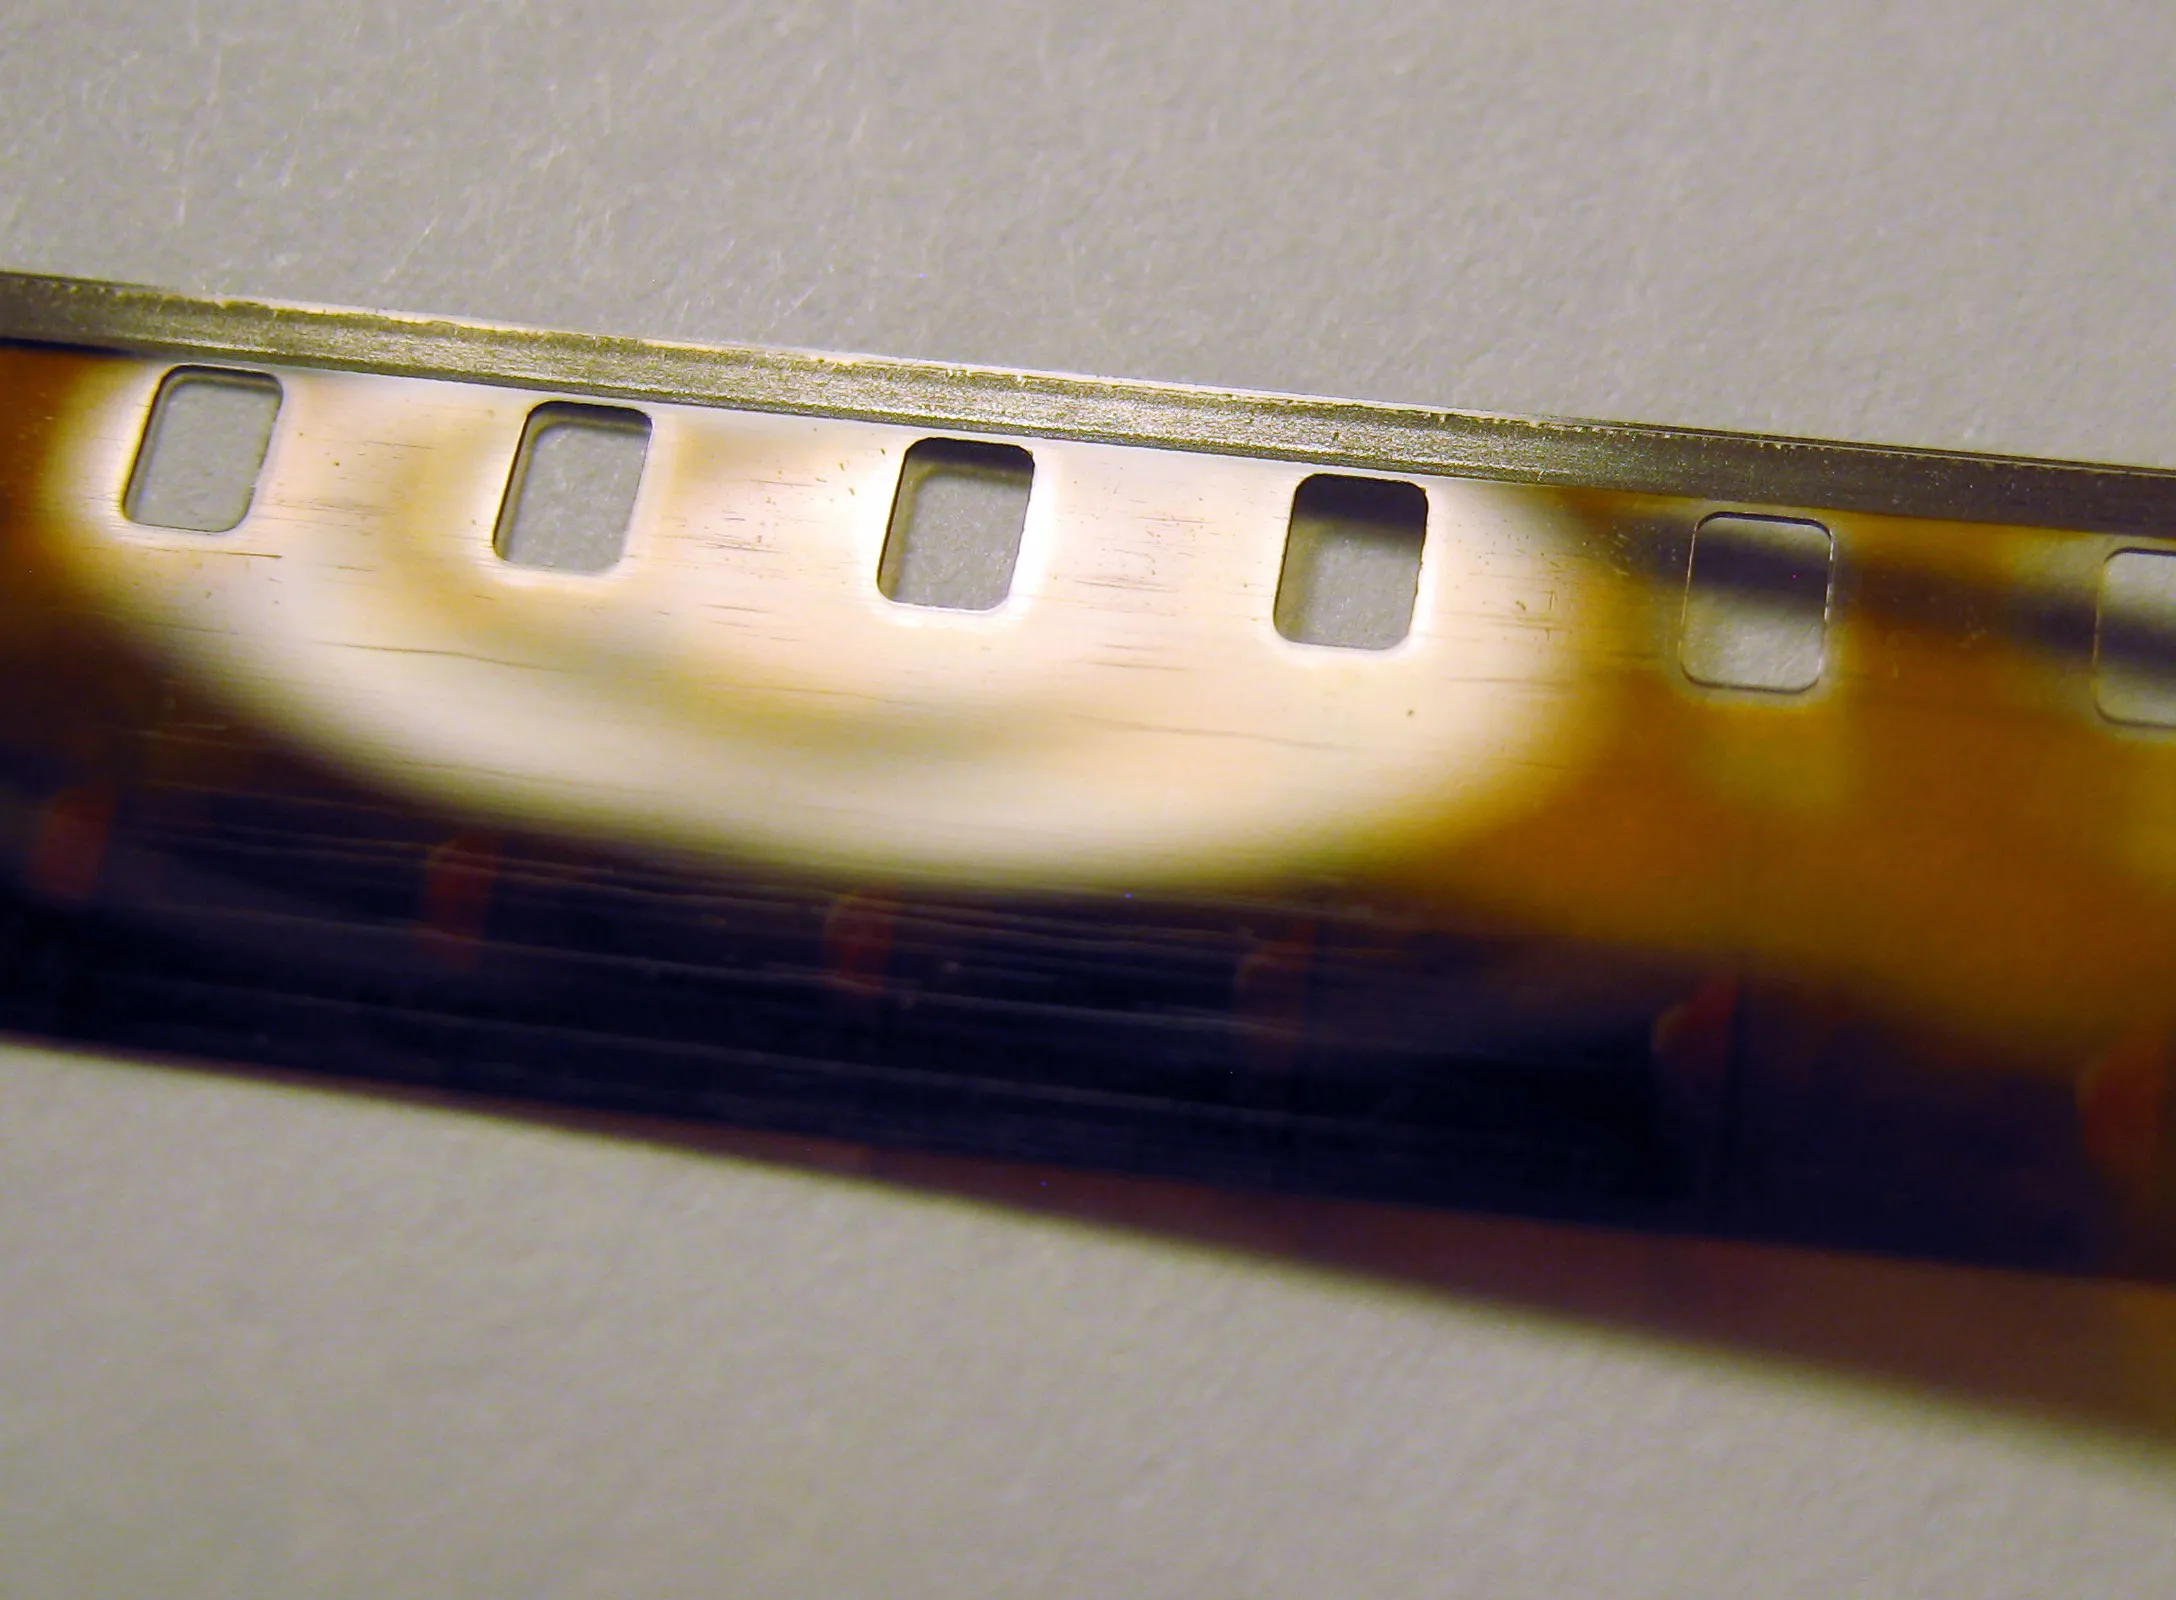
Double 8 film (Normal 8) with rare sound strip. Super-8 film is normally the format that would have sound. Our transfer unit — a modified Bauer brand (Studio Class) German projector — is equipped with a DUOPLAY sound head. The stock DUOPLAY sound head only plays back Super-8 film; however, we have modified our unit to allow for both Super-8 and Normal-8 film. Morover, the head on our projector allows for stereo recording and playback, and for individually capturing both tracks. Read more about our transfer unit. 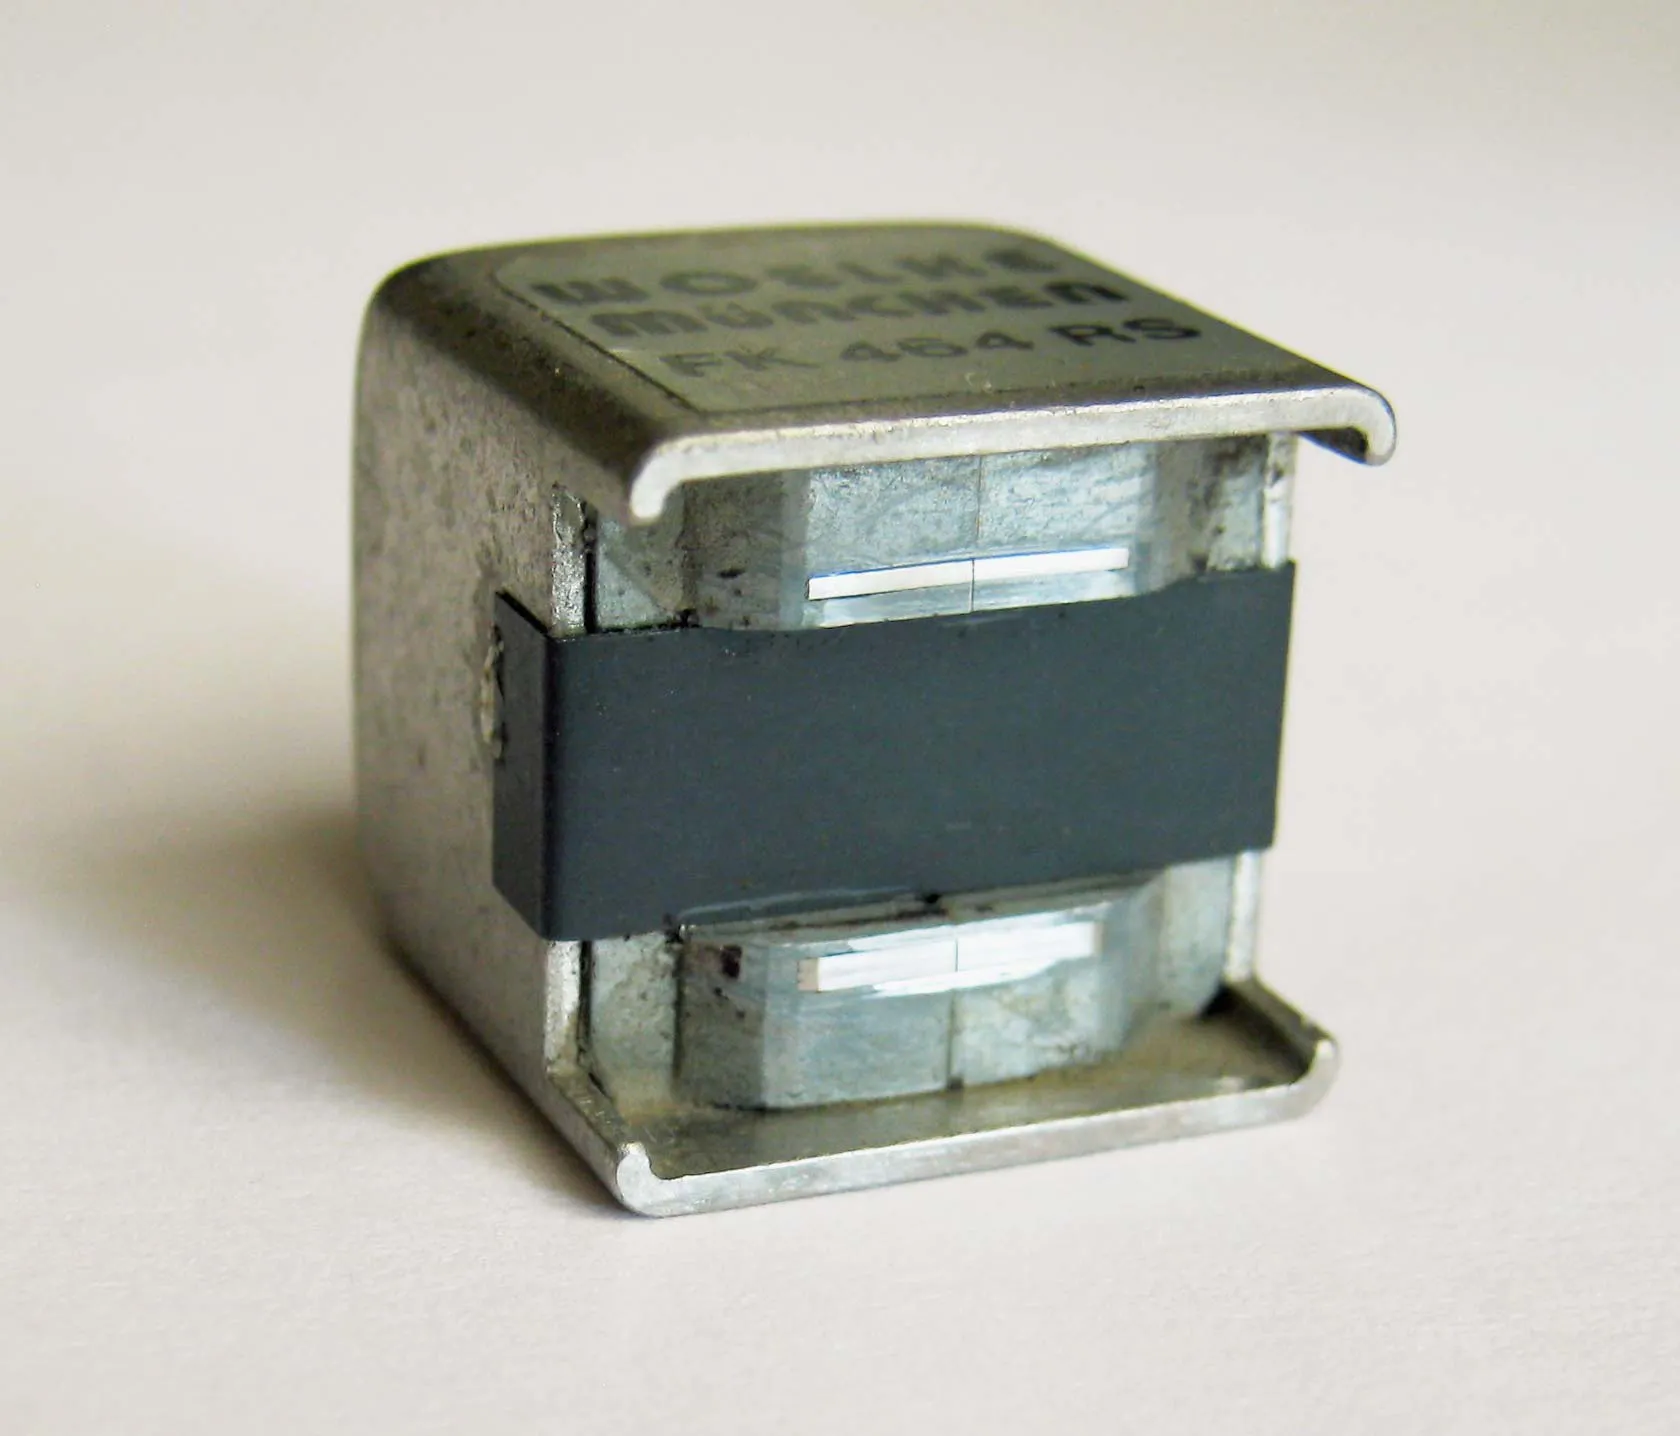
Magnetic sound head WOELKE MüNCHEN FK 464 RS. This head has two tracks; one for either side of the film's edges; the sprocket hole side and the opposite side, which is sometimes referred as the balance strip.
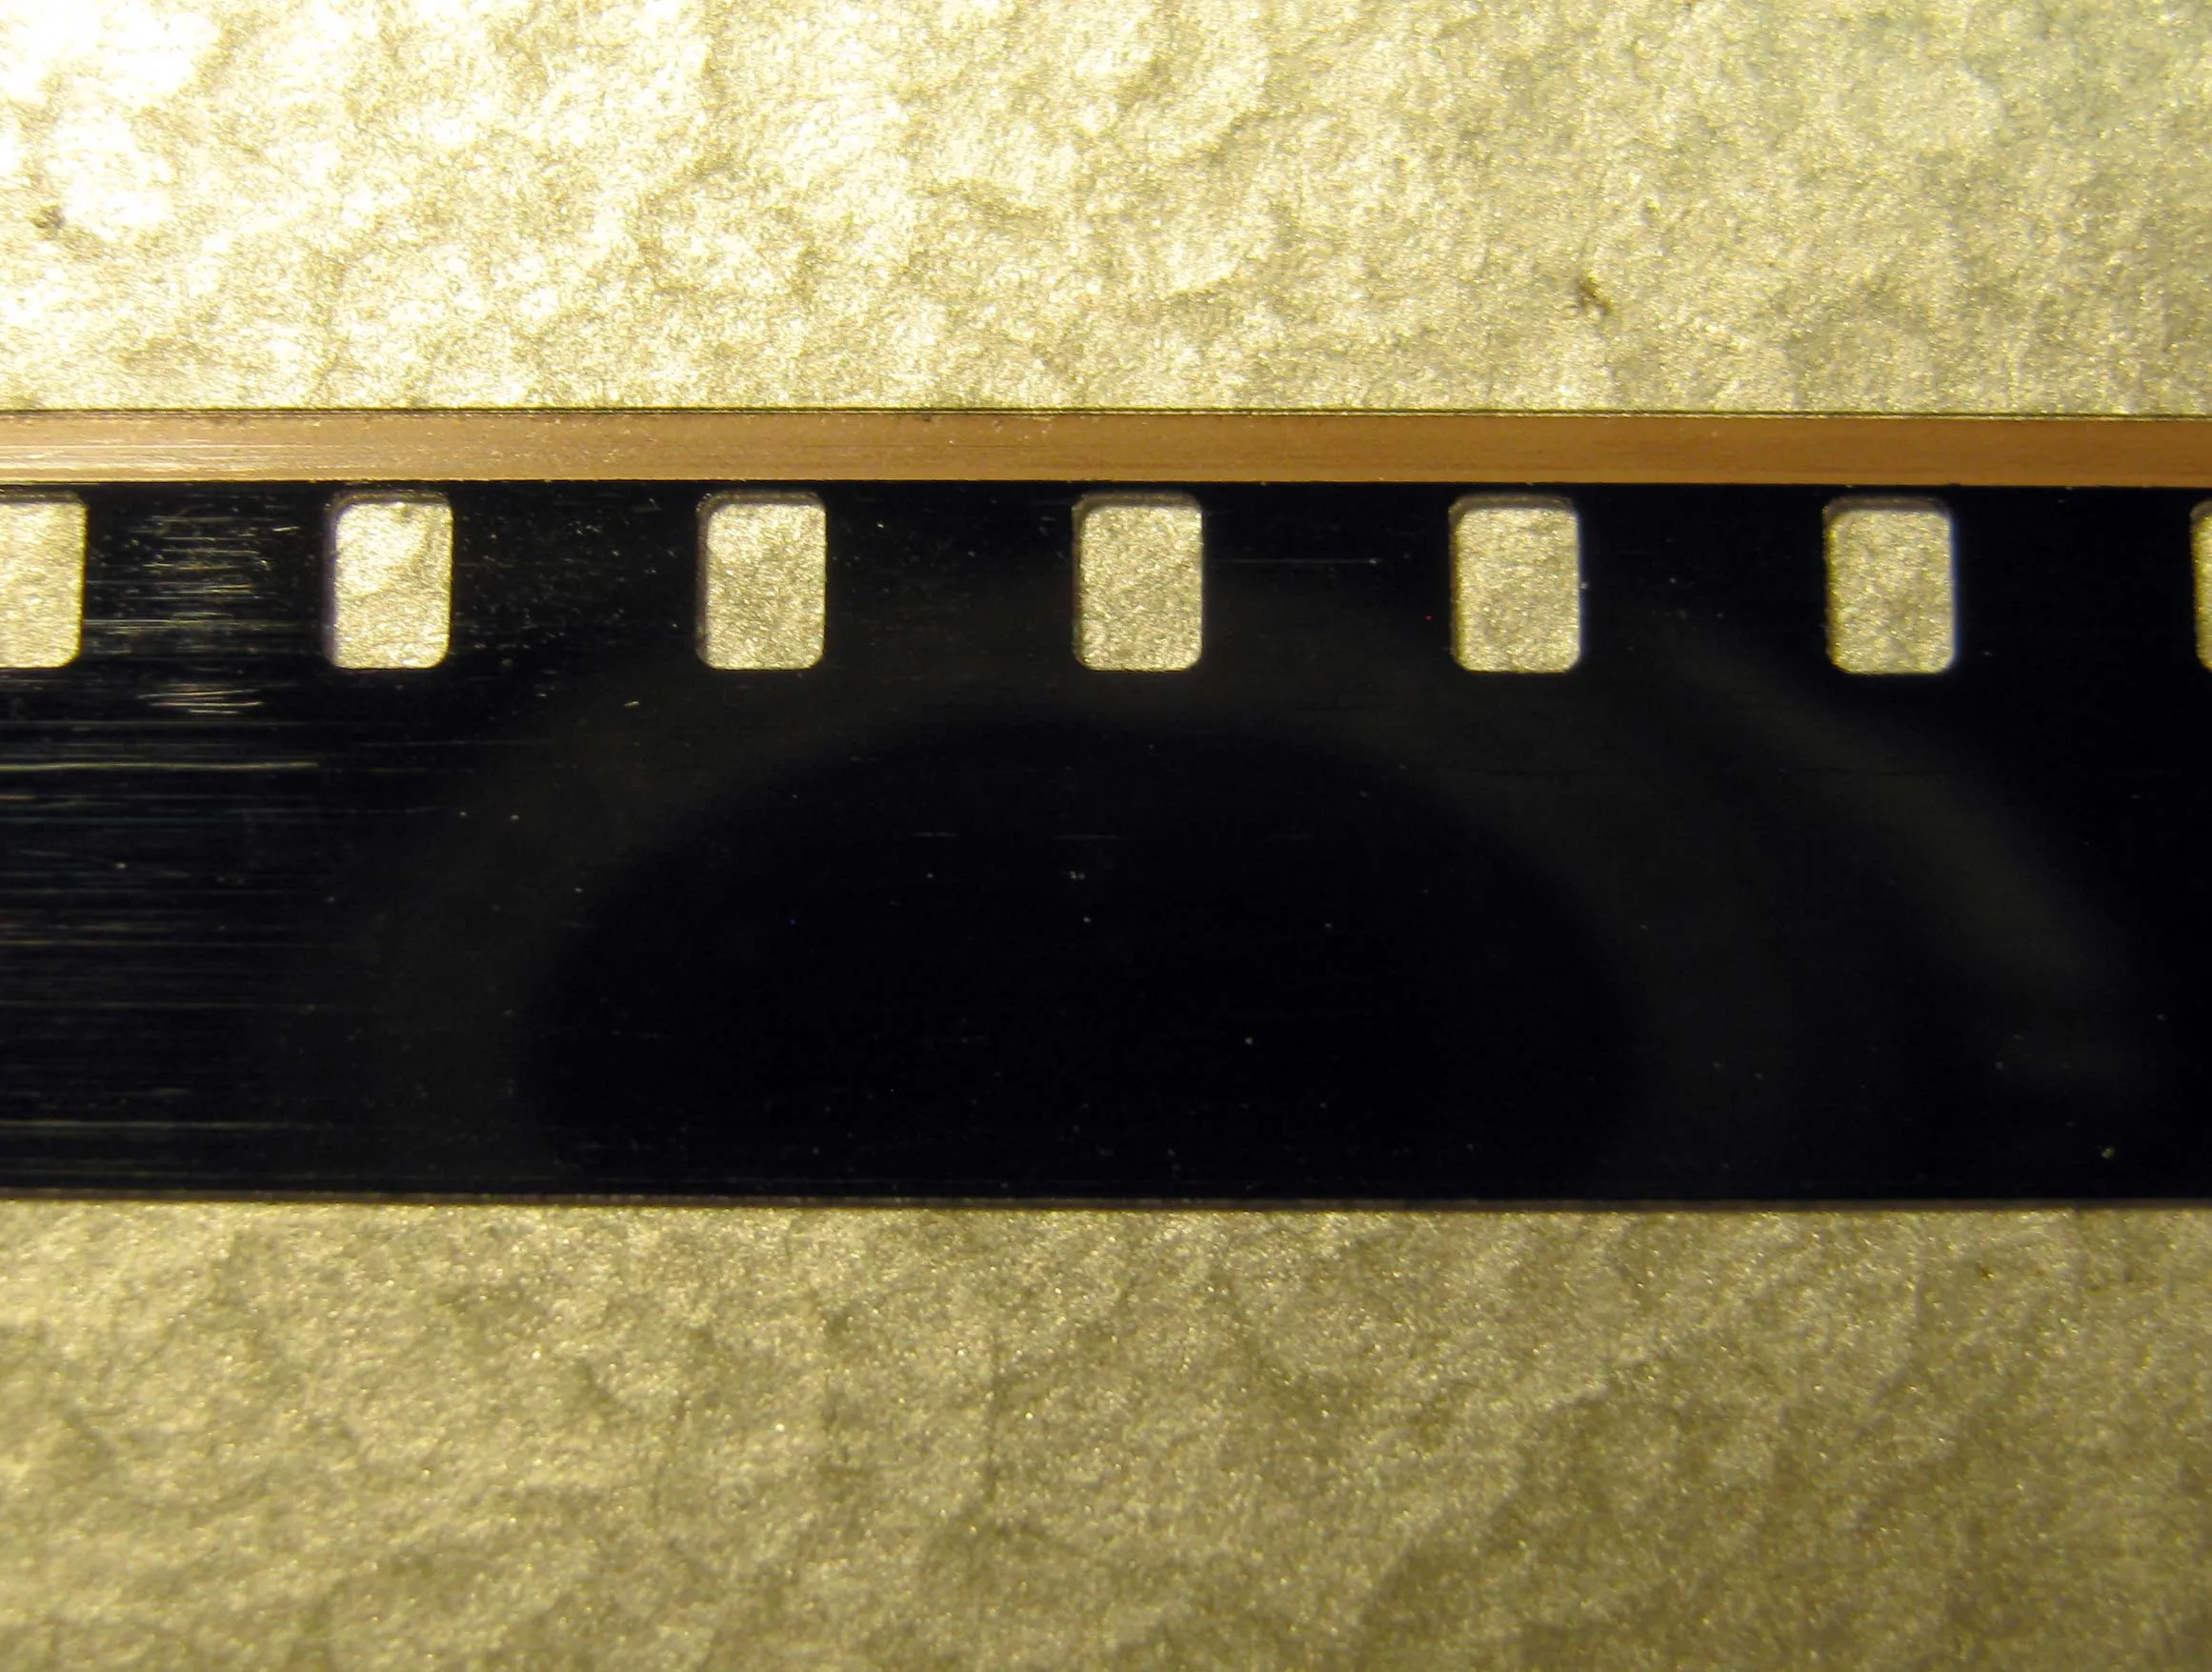
Double-8 film with magnetic sound strip (and no balance strip) Super-8 film with sound normally has two sound tracks: a wider main sound track and a slimmer balance track. The main sound track and the balance track are located on opposite edges (but on the same side) of the film. The balance track helps the film spool-up more evenly onto larger reels. Generally, nothing is recorded on the balance track, but it can be used to record additional sound. More refined film hobbyists would sometimes lay down music on the balance track, without losing the original audio recording. (This technique is more commonly practiced in Europe than in America.) Side note: The Normal-8 sound head was located about 13.7mm ahead of the Super-8 sound head. This discrepancy requires us to adjust for the sound placement when we finalize an 8mm transfer order. 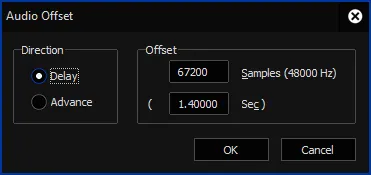
Audio offset needs to be delayed by about 1.4 seconds Wikipedia states that the sound is 38 frames behind the Super-8 head, but we have found the offset to be 36 frames ... with our unit. In addition, Normal-8 with sound was usually shot at 24 frames per second — an all-around more professional speed at which to film.
of 1 small, 3-inch reel Are We Big?Occasionally we feel like a big transfer house. In reality we are a small Mom-and-Pop store … without the “store” part! Back to our Delusion of Grandeur: It kicks in when we need to replenish our slowly dwindling 8 mm plastic reels stock. We order our reels directly from the manufacturer, Tayloreel. Tayloreel will not sell in quantities less than their one case minimum — we are talking many, many reels, here — requiring us to order more of these 400-foot reels than we might immediately need. Just to spice things up a bit — and to keep us on our toes — Tayloreel sells the cans that house these reels in a case-quantity differing from that of the reels, themselves! Thus, we always end up with either extra reels or extra cans. 
New, 400-ft plastic Tayloreel with blue case. When ordering from Tayloreel, we often wonder if we will ever use up all those reels! After all, it takes 8 small 3-inch reels (50-ft film reels) to fill up one Tayloreel 400-ft reel. Occasionally, if needed, we will squeeze an extra small reel onto that full reel, but doing so makes the handling of the wound-up film a bit more precarious. We figure it's no fun to have an extra small reel, or two, sitting around loose in a collection of these tidy, new, larger 7" reel cans. Whenever we receive a big case of reels, we always wonder how much more film is really out there, waiting to be spliced together and stored onto these plastic reels. It appears that many of you still do have precious 8mm film awaiting transfer; because, eventually, we need to re-order from Tayloreel! 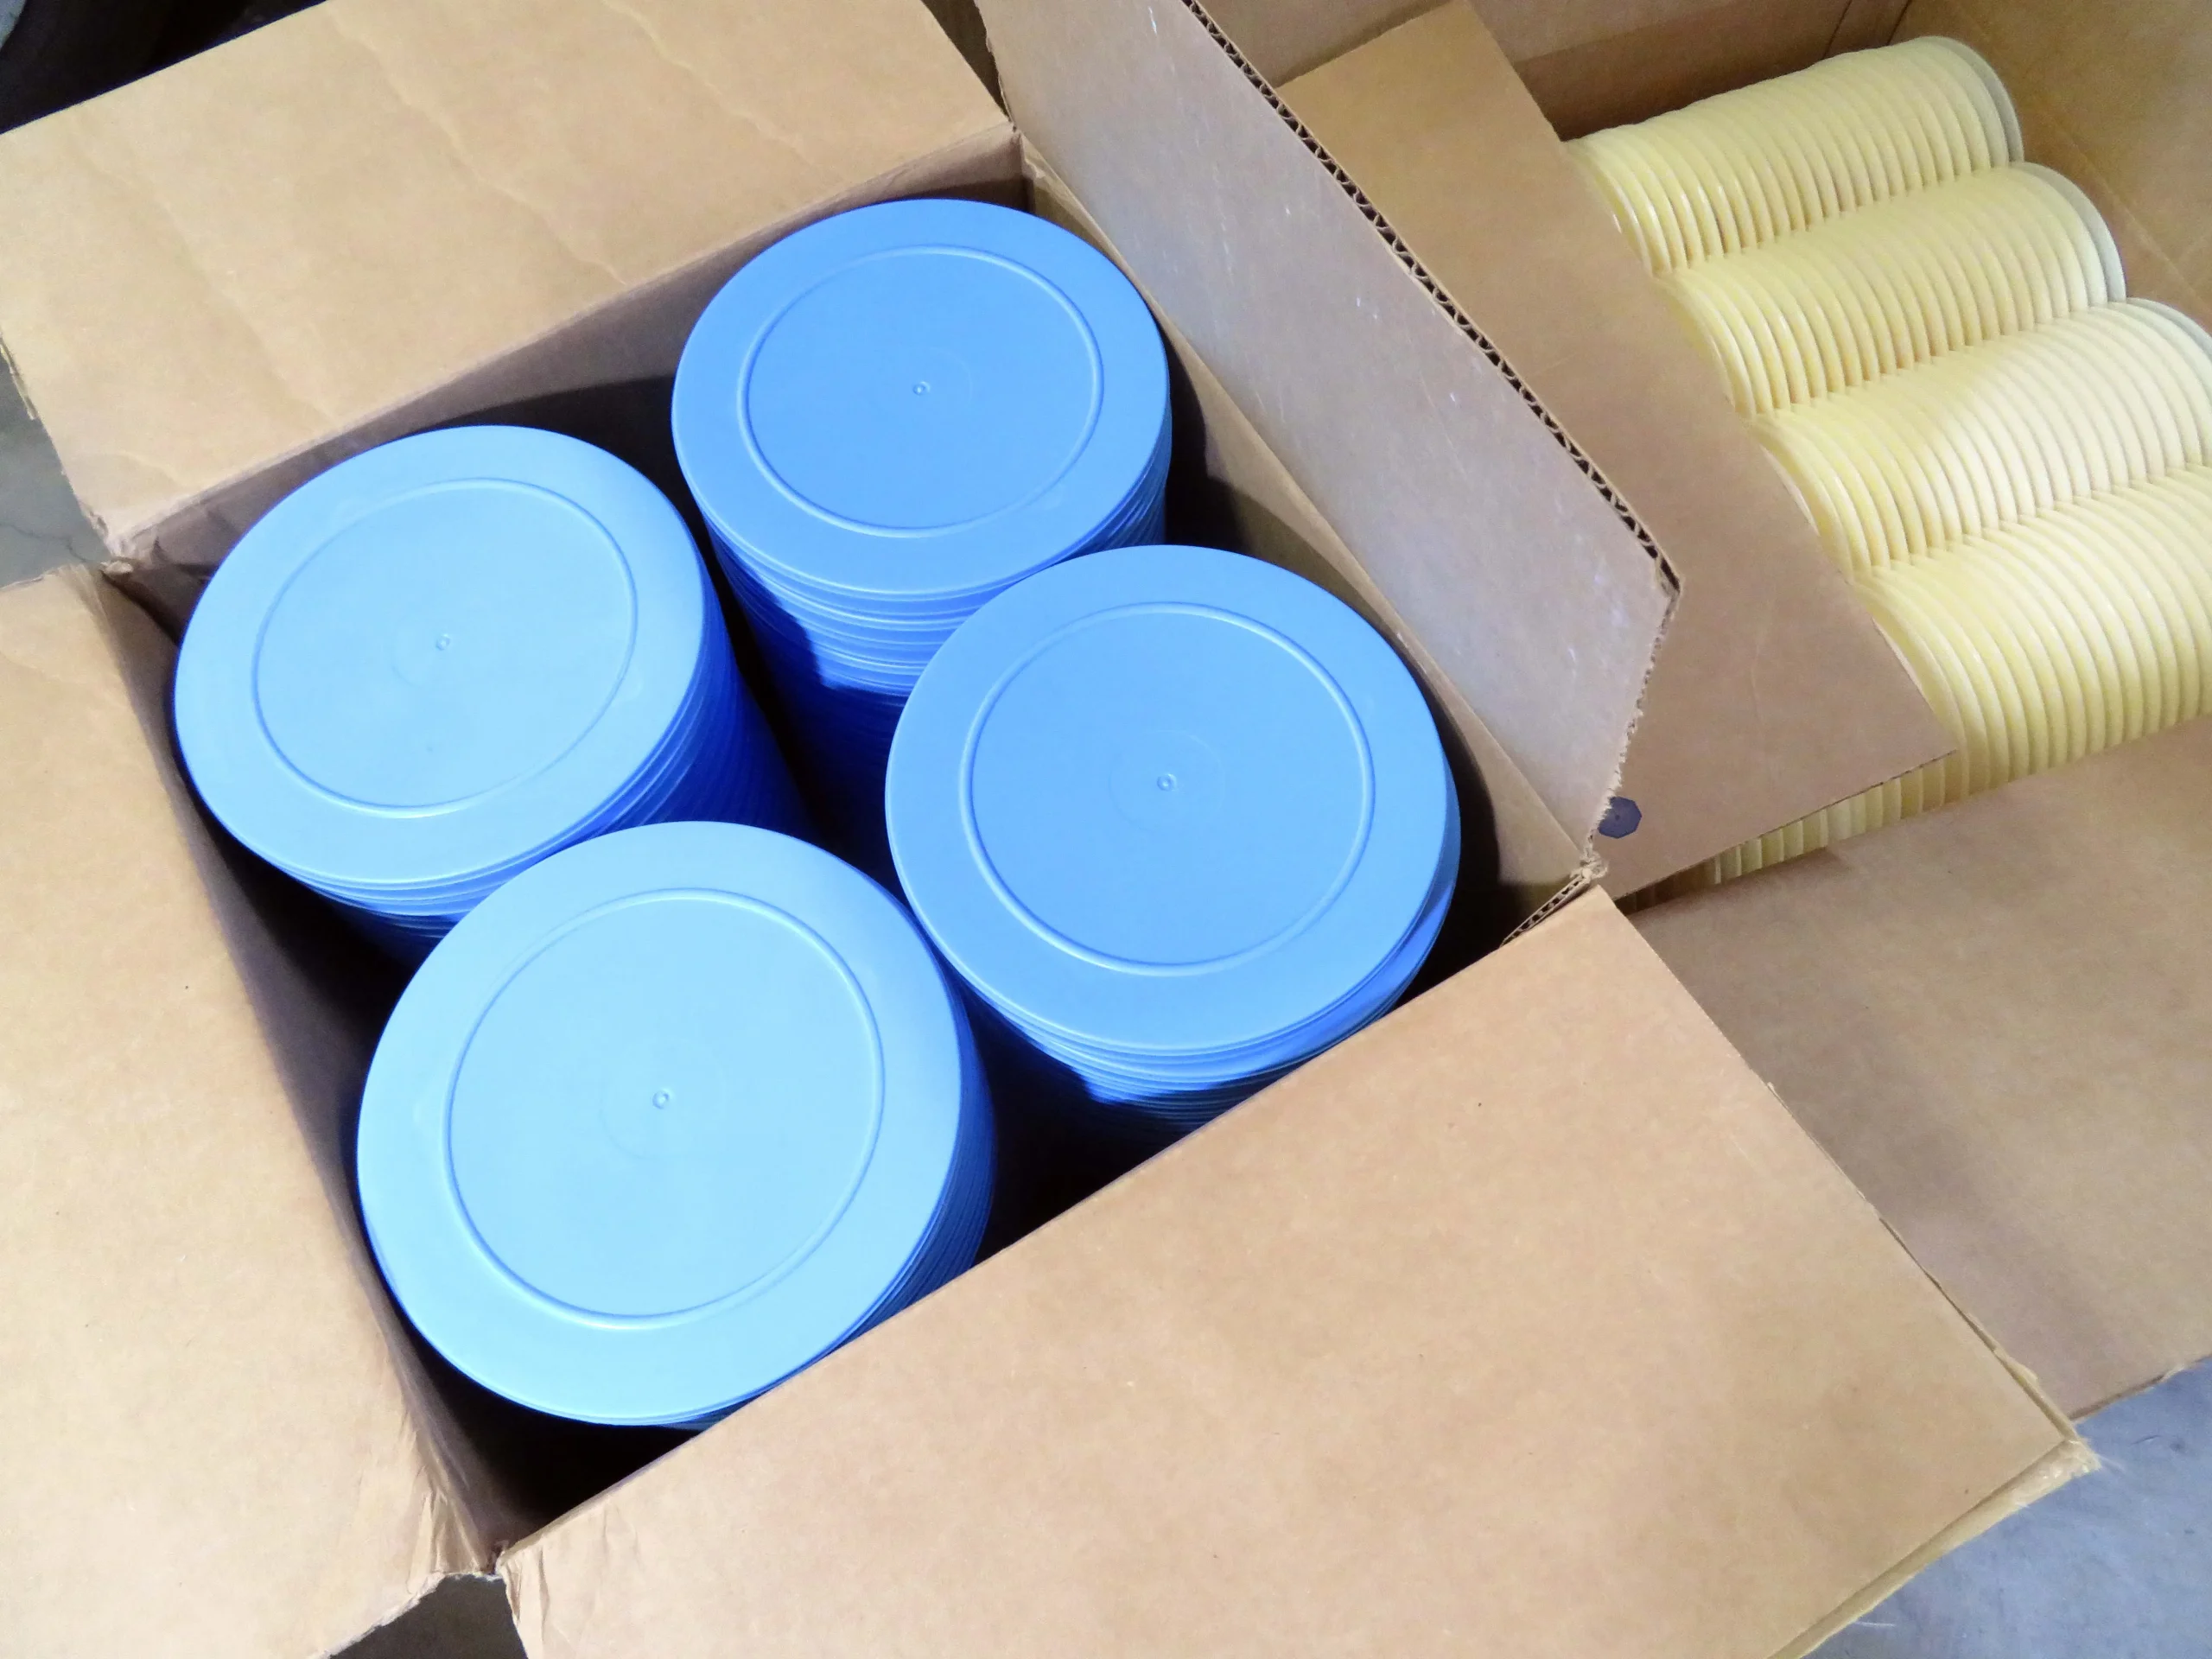
400-ft blue plastic cases from Tayloreel - cases are needed. We see low-budget transfer houses leave the case out, but that leaves the reel vulnerable to warping and the film exposed to the elements. By the way: Plastic reels are not inferior to metal reels. In fact, metal reels can degrade your film’s longevity by accelerating its deterioration. This is especially true when metal reels start showing the first signs of rust. Like with these, they are way past their prime. of 1 small, 3-inch reel Celebrating Another Year in Business!It feels good to be a part of our community and in our 16th year of business. 
of 1 small, 3-inch reel How Much Film is on My 8mm Reel?
FilmFix 8mm film reel measurement chart Let us help you by providing this downloadable PDF. Simply print it out and start measuring away! Please call if you have any questions, whatsoever. of 1 small, 3-inch reel How Best to Edit 18 fps Video FilesIt is best to maintain video at its true frame rate of 18 fps, especially when editing and outputting work to a final project. Keeping with the 18fps frame rate ensures the best and most natural looking playback experience of film originally captured at 18fps–this includes both Super 8 or Double 8 film (if the Double 8 was shot at 18fps.) The same holds true for film captured at 16fps–it's best to preserve it at 16fps. Double 8 film is also referred to as: Standard 8, Regular 8, Normal 8, and just 8 mm. Editing 18 fps (or 16 fps) video is easy, and can be done with any video editorHowever, keeping the original frame rate consistent with the final output frame rate, can be challenging. Please note that it is not absolutely necessary to have that final output set to that same frame rate to edit your video. Changing the frame rate of the output file to a different frame rate, will inevitably introduce new frames in order to maintain the natural playback speed. In general this is not an issue; but, in order to retain ALL image details, it's highly recommended to keep the original frame rate. This way, you retain a true frame-by-frame standard, without introducing duplicate frames. Click here for more on the subject. Further, it's best to keep all your options open, for any future image improvement work you may consider. You will be best served by keeping that original frame rate of the file, and keeping it as a "progressive" video stream (progressive vs interlaced video.) I imagine that not too far in the future, motion interpolation software will get more sophisticated and will allow for a better and cleaner interpolation of grainy film images. As it stands right now, the software produces undesirable artifacts that show up as a 'granularity snow storm' in the grain -- an undesirable effect. As we await advancements in software interpolation (sometimes referred to as "optical flow"), we look forward to it opening up the possibility of doubling the frame rate from 18fps to 36fps, thus allowing for smoother-looking playback experiences during pans, tilts, and moving objects. Tricks on how to retain an 18fps frame-rate throughout a project, including the final MP4 fileThe most obvious way to preserve frame rate is to use a video editor that supports 18fps frame rates. Unfortunately, only a few editors support 18fps. Although professional editing software will import 18fps files into a project, the programs will only generate output files that are set to the project frame rate. Importing 18fps files will not cause a speed issue during playback. However, the editor will add duplicate frames here and there to make up for the difference in speed, and that's exactly what should be avoided. So, use a video editor that supports 18fps projects. Cinelerra GGCinelerra GG, is free, professional, and allows end users to start a project using any frame rate. Cinelerra GG runs on Ubuntu (a powerful Linux operating system that can be installed for free on any PC). The following is a screenshot of Cinelarra GG's “New Project” settings: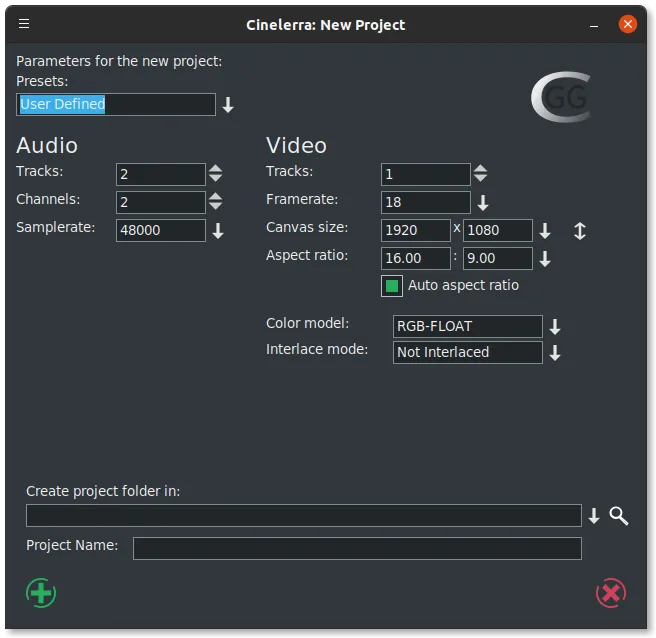
These are the project presets to start a project with a ProRes file set to 18fps. Ubuntu Cinelarra GG also supports the AVI HQX codec right out of the box without first having to install the Grassvally codec. DaVinci ResolveDaVinci Resolve, from Black Magic Design, also supports 18fps frame rates. Professionals use it to color grade, but Black Magic also offers a free version of the software, which has some limitations, but the limitations will have no affect on the types of projects covered here. Note: this software comes with a steep learning curve. DaVinci Resolve will run on Windows, Mac, and Ubuntu, and it allows projects to be set to 16fps and 18fps!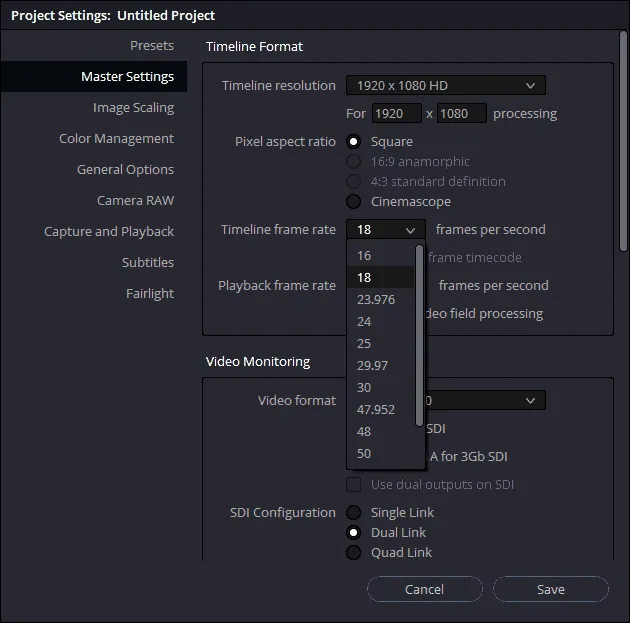
If you know of any other software that supports 18fps project frame rates, please send us an email, and we'll compile a list.
A second option is geared more towards professionals who insist on using their preferred video editor (even if it doesn't support 18fps projects). It is a workaround, and a bit cumbersome if the end user plans on syncing music with the image. In short: use the ffmpeg software library (open source, free) to convert a file from 18fps to say, 24fps. Edit using a preferred editor at 24fps and set the output of the final project to 24fps. Then, convert the frame rate of the output file from 24fps, back to 18fps using ffmpeg. ffmpeg changing frame rate from 18fps to 24fps, a step by step workflowTo convert a silent ProRes file from 18fps to 24fps, use the following command line:
To convert a silent ProRes file from 24fps back to 18fps, use the following command line of 1 small, 3-inch reel The 80/20 Rule Applied to Color GradingHow best to structure our color grading services here at FilmFix has presented us with a challenging dilemma. On the one hand, all 8mm film benefits from some color grading, so that the transfer will look more natural on your TV. On the other hand, the sticker shock for "Hollywood-Treatment" (referred to as the 'Swiss-finish') color grading option can be prohibitive for some of our customers. Color grading is — always and unconditionally — laborious. For the sake of our customers, we had to find a way to make it more affordable in the smartest way possible. This is where the 80/20 Rule came to the rescue. Before I get into the 80/20 Rule and how we applied it to reducing the cost of color grading for you, I need to elaborate a bit on what is required to color grade 8mm film, and why it normally costs so much. By way of example — without showing you the film's image — I have reproduced below a screen capture showing how a strongly discolored film displays in a videoscope. (The videoscope — waveform and vectorscope — is the tool that I use to inspect the image upon which I am working.) This particular clip had a strong magenta discoloration. 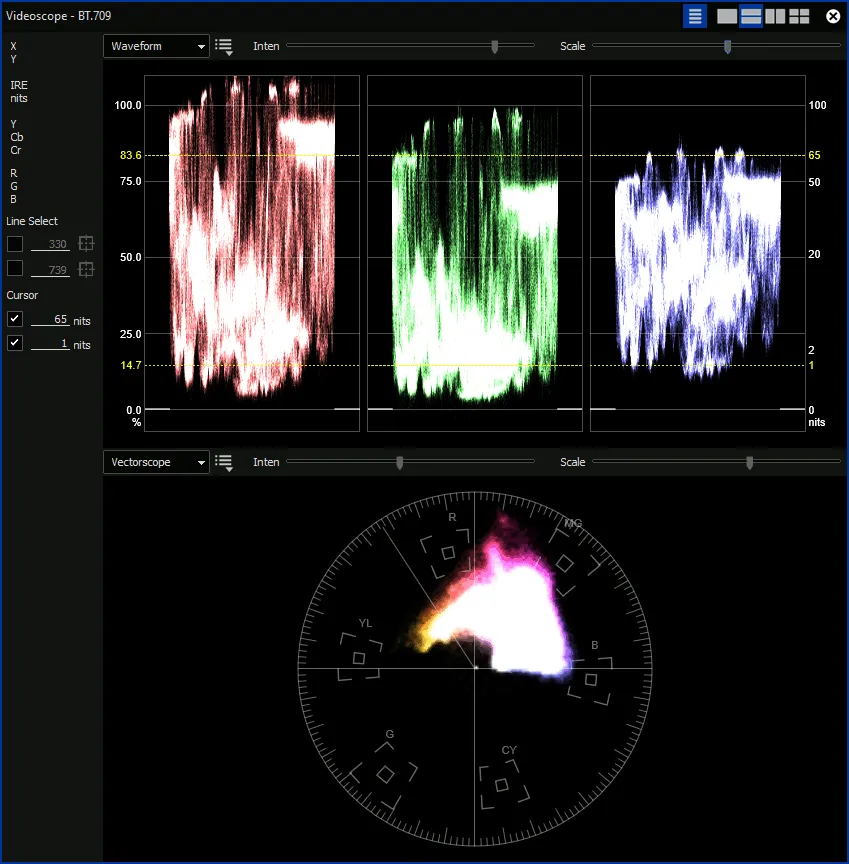
Before color grading: A magenta-discolored film clip I do not need to explain here how I interpret this information. Just notice that the red waveform on the top left is much taller than the blue waveform on the top right. In comparison, the videoscope image below shows that same video clip after I have applied color grading to it: 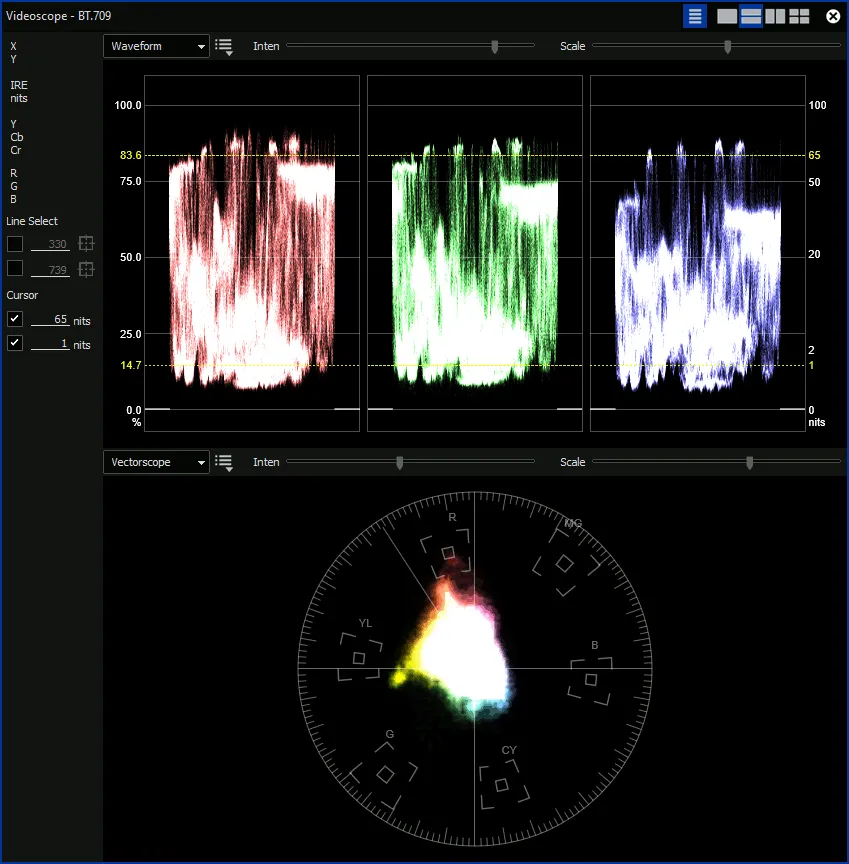
After color grading Notice how, in all three of the color waveforms, the high points and the low points are now relatively even, with adequate margins separating them from both the 0-mark and the 100-mark. These margins prevent your MP4 image information from being “clipped” by your TV, thereby preserving image detail in both shadows and highlights. In order to obtain the above corrections, I had to apply 3 adjustment filters to the image, using the following 2 color grading tools:
Here, briefly, is how these three adjustments worked (in this example) to improve the transfer result:
As you can see, color correction requires many fine adjustments — as well as a trained and experienced eye (if I do say so myself) — to get each clip right. When preparing a transfer for color grading, I start off by spotting where color adjustments are needed along the filmstrip. The following list shows you some of the considerations that I take into account when applying a color grading adjustment, while elucidating some other reasons for color grading: Color grading is used to:
Now — referring back to our color-grading challenge and how we applied the 80/20 Rule to it — keep in mind that addressing items #1 and #2 can have a big impact without excessive effort and time expenditure at my end. In particular, item 1 only requires one setting per small 3-inch reel. Item #4 is also essential, since you will likely be playing our film transfers on your TV. For this reason alone, all transfers should at least get some minor color grading. Items #1 and #2 are strongly linked together, as both of these adjustments address unwanted color shifts in the film. Similarly, items #4 and #5 are also linked in my workflow, since they both address exposure challenges. As you will see, these links come into play when we apply the 80/20 Rule. I have not yet mentioned in the above breakdown about how frequently in each film reel I might need to apply one or more of these adjustments. This is where my time expenditure — and the cost to you — can soar, depending on the condition of your film. Sure, we could copy-&-paste presets to save time, but doing so would likely result in a poor-quality color grading for your film transfer. The following excerpt from a timeline illustrates how often I might typically need to make a new adjustment during a film transfer: 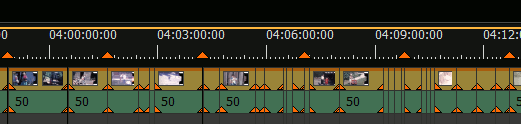
Excerpt of timeline in Edius video editor Here is how I set up my timeline, focusing on the individual parts: As seen below, the top section has six orange triangle markers, each of which indicates the start of a new 3-inch reel. You will notice that an orange marker occurs about every 3:40 minutes in the timeline. Orange markers indicate the start of a new reel The gold strip represents the film image section. (The green strip represents the sound track.) Each vertical black line along the gold strip marks where I applied a new color adjustment filter setting during the transfer. (See the above discussion of the "3-Way Color Correction" tool and the "YUV Curve" tool.) Film’s image strip: Each vertical black line along the gold strip indicates a new color grading transition. As you can see from this example, color grading at FilmFix is far from an automated process. On the contrary, it is highly labor-intensive, involving many experience-driven decisions made frame-by-frame. Put another way: We customize the color grading of each-and-every transfer to the unique condition of our customers’ film. In fact, the above example shows relatively few transitions per minute, compared to some badly deteriorated film. Old film often requires much denser color grading re-sets in order to produce the highest quality transfer. You can see how quickly color grading can become an onerous task. This predicament frequently occurs with the older Normal 8 film format, because the older cameras did not have exposure assistance, and because people using those cameras were filming economically, avoiding longer takes. Film was expensive! The 80/20 Rule Now that we have laid some foundation about the color grading process, we can get to the subject of this article: What is the 80/20 Rule, and how can we use it to optimize that process? Background: Samuel Blume — a close friend from my childhood, and a programmer at heart — introduced me to the 80/20 Rule. The 80/20 Rule (a.k.a the Pareto Principle) can be applied to many things. The rule states: "It takes 20% of effort to get 80% done, and an additional 80% of effort to complete the remaining 20% of work." You can see how this rule might apply to deep-cleaning a messy room. Like Murphy’s Law, the Pareto Principle has many corollaries and variations, but the overall concept holds true for color grading film transfers. When applying the 80/20 Rule to color grading, I will mostly focus on items #1 (correcting for film degradation), #2 (compensating for incorrect film choice), #3 (applying artistic filters to B&W film transfers), and #4 (optimizing for TV) from the above breakdown. Confining myself to those four objectives allows me to significantly reduce the number of adjustments that I need to apply when color grading film. (Item #5 — exposure correction — represents the final 20% of the color grading process that demands an extra 80% of my time! I will not elaborate here on the reason for this anomaly — it gets a bit technical — but here is the good news: When I apply the #4 adjustment, that often conveniently takes care of many exposure problems without having to do the frame-by-frame editing that custom exposure correction entails.) This, in turn, shortens the time that I need to spend on each project, while still getting us 80% of the way towards the highest-quality color grading possible. It does not yield the perfect result that a much more expensive process would, but it does provide you with a very good — and far more affordable — outcome. By eliminating the last, most time-consuming, 20% of the process, we can save you 80% of the cost.
Please Note: We can only provide an effectively 80/20 grading on reels holding one type of film stock, like any 50ft reel would -- or for large reels, reels holding spliced together 50ft reels. Whereas, if you have large reels holding edited film (short clips) from differing film stocks, you may be better served not using the 80/20 rule, as we limit our self's on doing only one to two corrections per 50ft reel. Please keep in mind that I do not need to apply the 80/20 Rule to color grading your film transfer: I can give you the whole shebang! (Blame it on my Swiss background and my propensity to always aim for perfection.) Let us know if you want the full color grading process applied to your film transfers. If you choose for me to apply the 80/20 rule to your color grading, please consider ordering not only an MP4 file. MP4 files are only 8-bit files. We recommend allowing us to also provide you with a 10-bit file (ProRes or AVI.) This way, any additional future color grading will have a better outcome. The following illustration shows how an 8-bit compares with a 10-bit file. You will see how the 10-bit file has many more available colors, allowing for a significantly smoother gradient: 
ProRes or GV-HQX files are 10 bit files, with many more available colors than what 8-bit MP4 files can provide.
Summary Here at FilmFix, we can offer you two options for color grading your film transfers, based on your budget constraints and quality requirements. The best quality color grading requires a lot of extra time, and therefore costs significantly more than our more economical option. However, by judicious application of a principle known as The 80/20 Rule (which, incidentally, has relevance in many aspects of life!), we have devised a modified color grading technique that will deliver to you 80% of top-quality film transfer for 20% of top-quality cost. On the other hand, if you can afford a film transfer with top-quality color grading, we can provide it. Moreover, we love to do it, because we are perfectionists! P.S.: Please like us on Facebook. Every bit helps. Thank you. of 1 small, 3-inch reel Slide Transfer SamplesA very special thank you to Dr. Greg Ruggerone who gave us permission to use these 35mm film slide scans on our website. You can read his enthusiastic and helpful testimonial right here. Please note this testimonial arrived after we had just updated our equipment (lens and camera) and produced even sharper brighter, more true-to-color 35mm slide scans, than we had before. 
35mm slide digitized by FilmFix: "Awaiting the Storm" With all our slide scanning projects, we send you 3 files of each slide: a TIFF (used for printing), a JPEG (small-sized for emailing) and a JPEG (for viewing on a TV or computer.) 

of 1 small, 3-inch reel 4K vs 2K 8mm Film TransferHearing customers ask us, "Do you transfer in 4K?" has inspired me to write this somewhat technical blog. If you are considering getting an 8mm-to-4K film transfer — or if you just like reading geeky film stuff — you might want to peruse this information. Let us first establish how much detail 8 mm film grain can hold, and also cover some of the 2K vs 4K technical aspects (camera limitations and transfer workflow considerations). Then, let us explore if offering upscaling from 2K to 4K is something that FilmFix should consider.
Legend:
8 mm Film ResolutionDue to its very small size, 8 mm film cannot physically hold more detail than 2K holds. So, by going with 4K — hoping to extract more detail from your image — you will only achieve more detailed grain, but not a better image. (A different story applies for the larger format films of 16 mm and 35 mm sizes.) In the illustration below, the red rectangle represents a section captured during a transfer. A 2K transfer has a frame ratio of 16-to-9, containing 1920 by 1080 pixels. Now, let us calculate the DPI (Dots Per Inch) of that section. (For our purposes, consider “dots” and “pixels” to mean the same thing.) This way we can check if, with 2K, we can accommodate all the granular detail that the film can hold. Under ideal circumstances, film can hold up to 4,000 DPI of information. (Learn more about film resolution.) 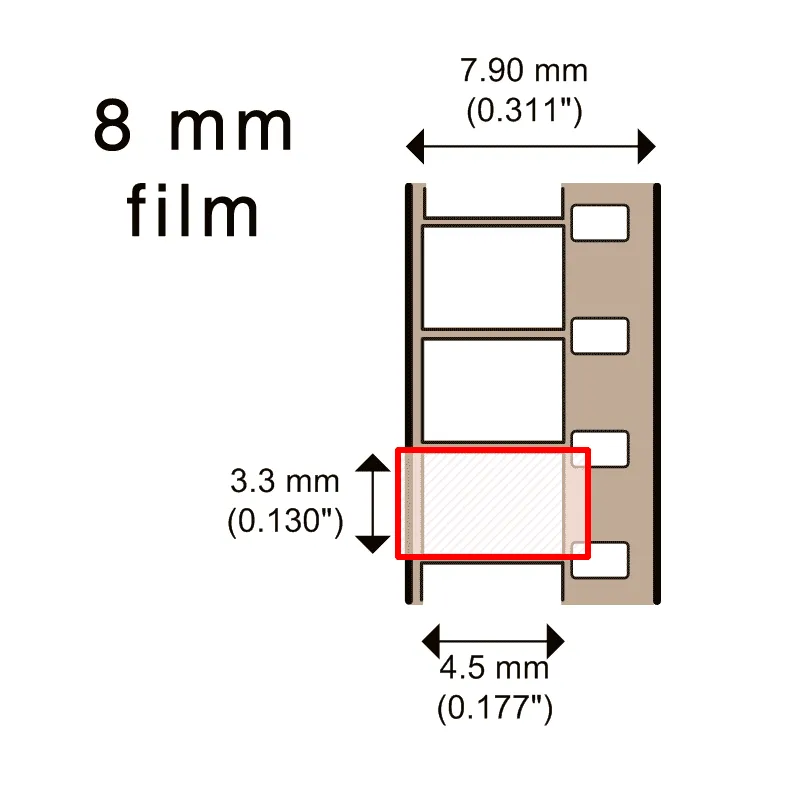
The first generation of 8 mm film (aka "Regular 8" (R8), “Normal 8” (N8), or “Double 8”) has a very small image size. Learn more about various film formats. We will base our DPI calculation on the height of that red frame, because that is where we hit the image’s limit: Zooming in will crop out parts of the image, while zooming out will reveal parts of the film frame. We need to avoid both loss of image content and inclusion of non-image film content when we make the transfer. (Side note: A few years ago, it became fashionable among serious and professional photographers to include the film edges in prints of their images. This practice sent two messages to the viewer: 1. “I have not cropped this image. See: I composed it perfectly in camera.” 2. “I am using a large- [or medium-] format camera, proving that I am a serious photographer.” Nowadays, in this era of digital photography, that practice has mostly fallen by the wayside; but it never would have applied to 8 mm film, in any case.) (A Transfer Setup Note: Before we transfer a reel, we need to fine-tune the film’s positioning, in order to achieve proper framing. So, at the start of every new reel, we calibrate our equipment to accommodate your film’s frame height. The position can vary, because the exact positioning of the camera's pull-down claw can vary. Also, film shrinkage affects positioning.) Now we can do the math. Remember that we are basing our DPI calculation on the film’s frame height. Notice in the illustration above that 8 mm film has a frame height of 0.130 inches. For a 2K transfer, the digital rendering of your image will hold 1080 pixels of information per 0.130 inches of film frame height. 1080 pixels ÷ 0.130 inches yields approximately 8,300 DPI. Remembering that film holds only 4,000 DPI, at best, these results show that a 2K transfer contains over twice the information that the original 8 mm film held. With Super-8 film, we have a bit bigger frame to work from than we do with 8 mm film. This larger frame area yields slightly better image quality than Normal 8 mm film could offer. Let us check to see if a 2K transfer can still hold that extra information. The second generation of 8 mm film is Super-8 film (aka S8), and it has a bit larger frame. In this case, Super-8 film has a frame height of 0.158 inches. The 2K digital transfer of a Super-8 film frame will still contain 1080 pixels of information in the vertical dimension. Thus, we can calculate the transfer resolution as follows: 1080 pixels ÷ 0.158 inches yields approximately 6,800 DPI. This result still puts us well above our film’s 4,000 DPI capacity. These simple calculations show that 2K transfers from 8 mm film offer more-than-adequate image resolution, and that upgrading to 4K could not extract greater detail from your 8 mm film. In the old days of 8 mm film transfer, we used to say that 8 mm is fully captured using the smaller 1280 × 720 HD camera standard. This is why the very first professional film flash scanners were equipped with a 720p camera. Only later did manufacturers start offering 2K transfer systems. Let us check to see if 720p can hold an 8 mm image. We use the same math to calculate 720p transfer quality as we did for 2K transfers. Thus: • For Normal 8 mm film, 720 pixels ÷ 0.130 inches yields approximately 5,500 DPI. • For Super-8 film, 720 pixels ÷ 0.158 inches yields approximately 4,500 DPI. Super-8 film at 720p is starting to push the limits, but it is still within what is considered acceptable. (Remember that 4,000 DPI is the highest resolution that film can deliver under ideal conditions.) Some transfer houses transfer all their film at 720p, because doing so allows for more productivity: they can transfer it all at high speed. After that, they upscale your transfers to 2K, and you never know about their trick. We do not do it that way. We capture in 2K from the outset. (Important side note: a "Wolverine", or "Reflecta", is not a Professional Film Transfer System. It is a lower-end consumer transfer unit. The file that it records is a highly compressed 8-bit MP4 file. It still produces a 1920-by-1080 pixel frame size, but with inferior image quality. We will discuss the difference between pixel count (the empty vessel) and image quality (the vessel’s contents) in another post. For now, just remember that it is what is put into the file — the quality of that stored image — that counts, not just the pixel count of the frame.)
4K Monitors and UHD TVsOver the years, monitors keep growing in size. These days, Netflix requires all shows to be shot in 4K. In order for you to see that higher 4K resolution, you need a 4K monitor, and you need to pay Netflix extra for that better image quality. Once these monitors found their way into our living rooms, naturally our customers started inquiring about 4K transfers. A long time back I did some 4K camera research. Just for curiosity’s sake, I started looking to see what is out there in the way of new consumer 4K cameras. Technology keeps improving, while people's film in storage keeps deteriorating. 4K Cameras with a CCD sensorResearching the topic, I found that I would lose the extended 10-bit color depth capability if I used a 4K prosumer camera. Those with a CCD 4K sensor only offer 8-bit color depth. This is not good! I knew that this would not work for me, because I rely heavily on 10-bit color-depth during the color grading process, which I do by hand. Ten bits of color depth is critical to improving the color and exposure issues of strongly discolored film. 
The above 4K video camera offers 10-bit color depth, but only when using a highly compressed 50Mbps file format, which does not yield a favorable image. Besides that, its sensor is a CMOS sensor, not a CCD sensor. For a flash scanner like we use, we require at least a CCD sensor, or — better yet — a 3-CCD sensor, like ours. I continued researching, and found myself looking into $28,000 - $35,000 cameras that have some interesting 4K capabilities, but they would not permit me to perform the workflow that I need for your transfers. In short, while these expensive cameras do capture 4K at 10-bit, using one of them for film transfer applications would add so many workflow steps that I would need to charge over 4 times what I am currently charging for transfers. Worse, the expensive camera could only capture the initial footage. All the tasks after the capture would then require much more intensive computer time, because jumping from 2K to 4K does not double the data volume, but quadruples it. Moreover, all the remaining processing and copying of data would take 4 times longer. Video Newscasters Upscale 2K to 4KLater, I found myself reading about what some professional newscasters do. In one of their forums, I learned that — still today — a lot of them are shooting in 2K. Since the broadcast stations require all footage to be delivered to them in 4K, the videographers then upscale their 2K footage to 4K prior to delivery. This revelation brought me to a FULL STOP. Upscaling! I have a lot of experience with upscaling. We have been offering upscaling of video tape transfers — to bring SD (Standard Definition) to Full-HD — for years now. Upscaling from 2K to 4K can be configured in the same way as upscaling from SD to HD. Moreover, upscaling is more efficient than 4K capture, because no de-interlacing is required when processing two progressive images. 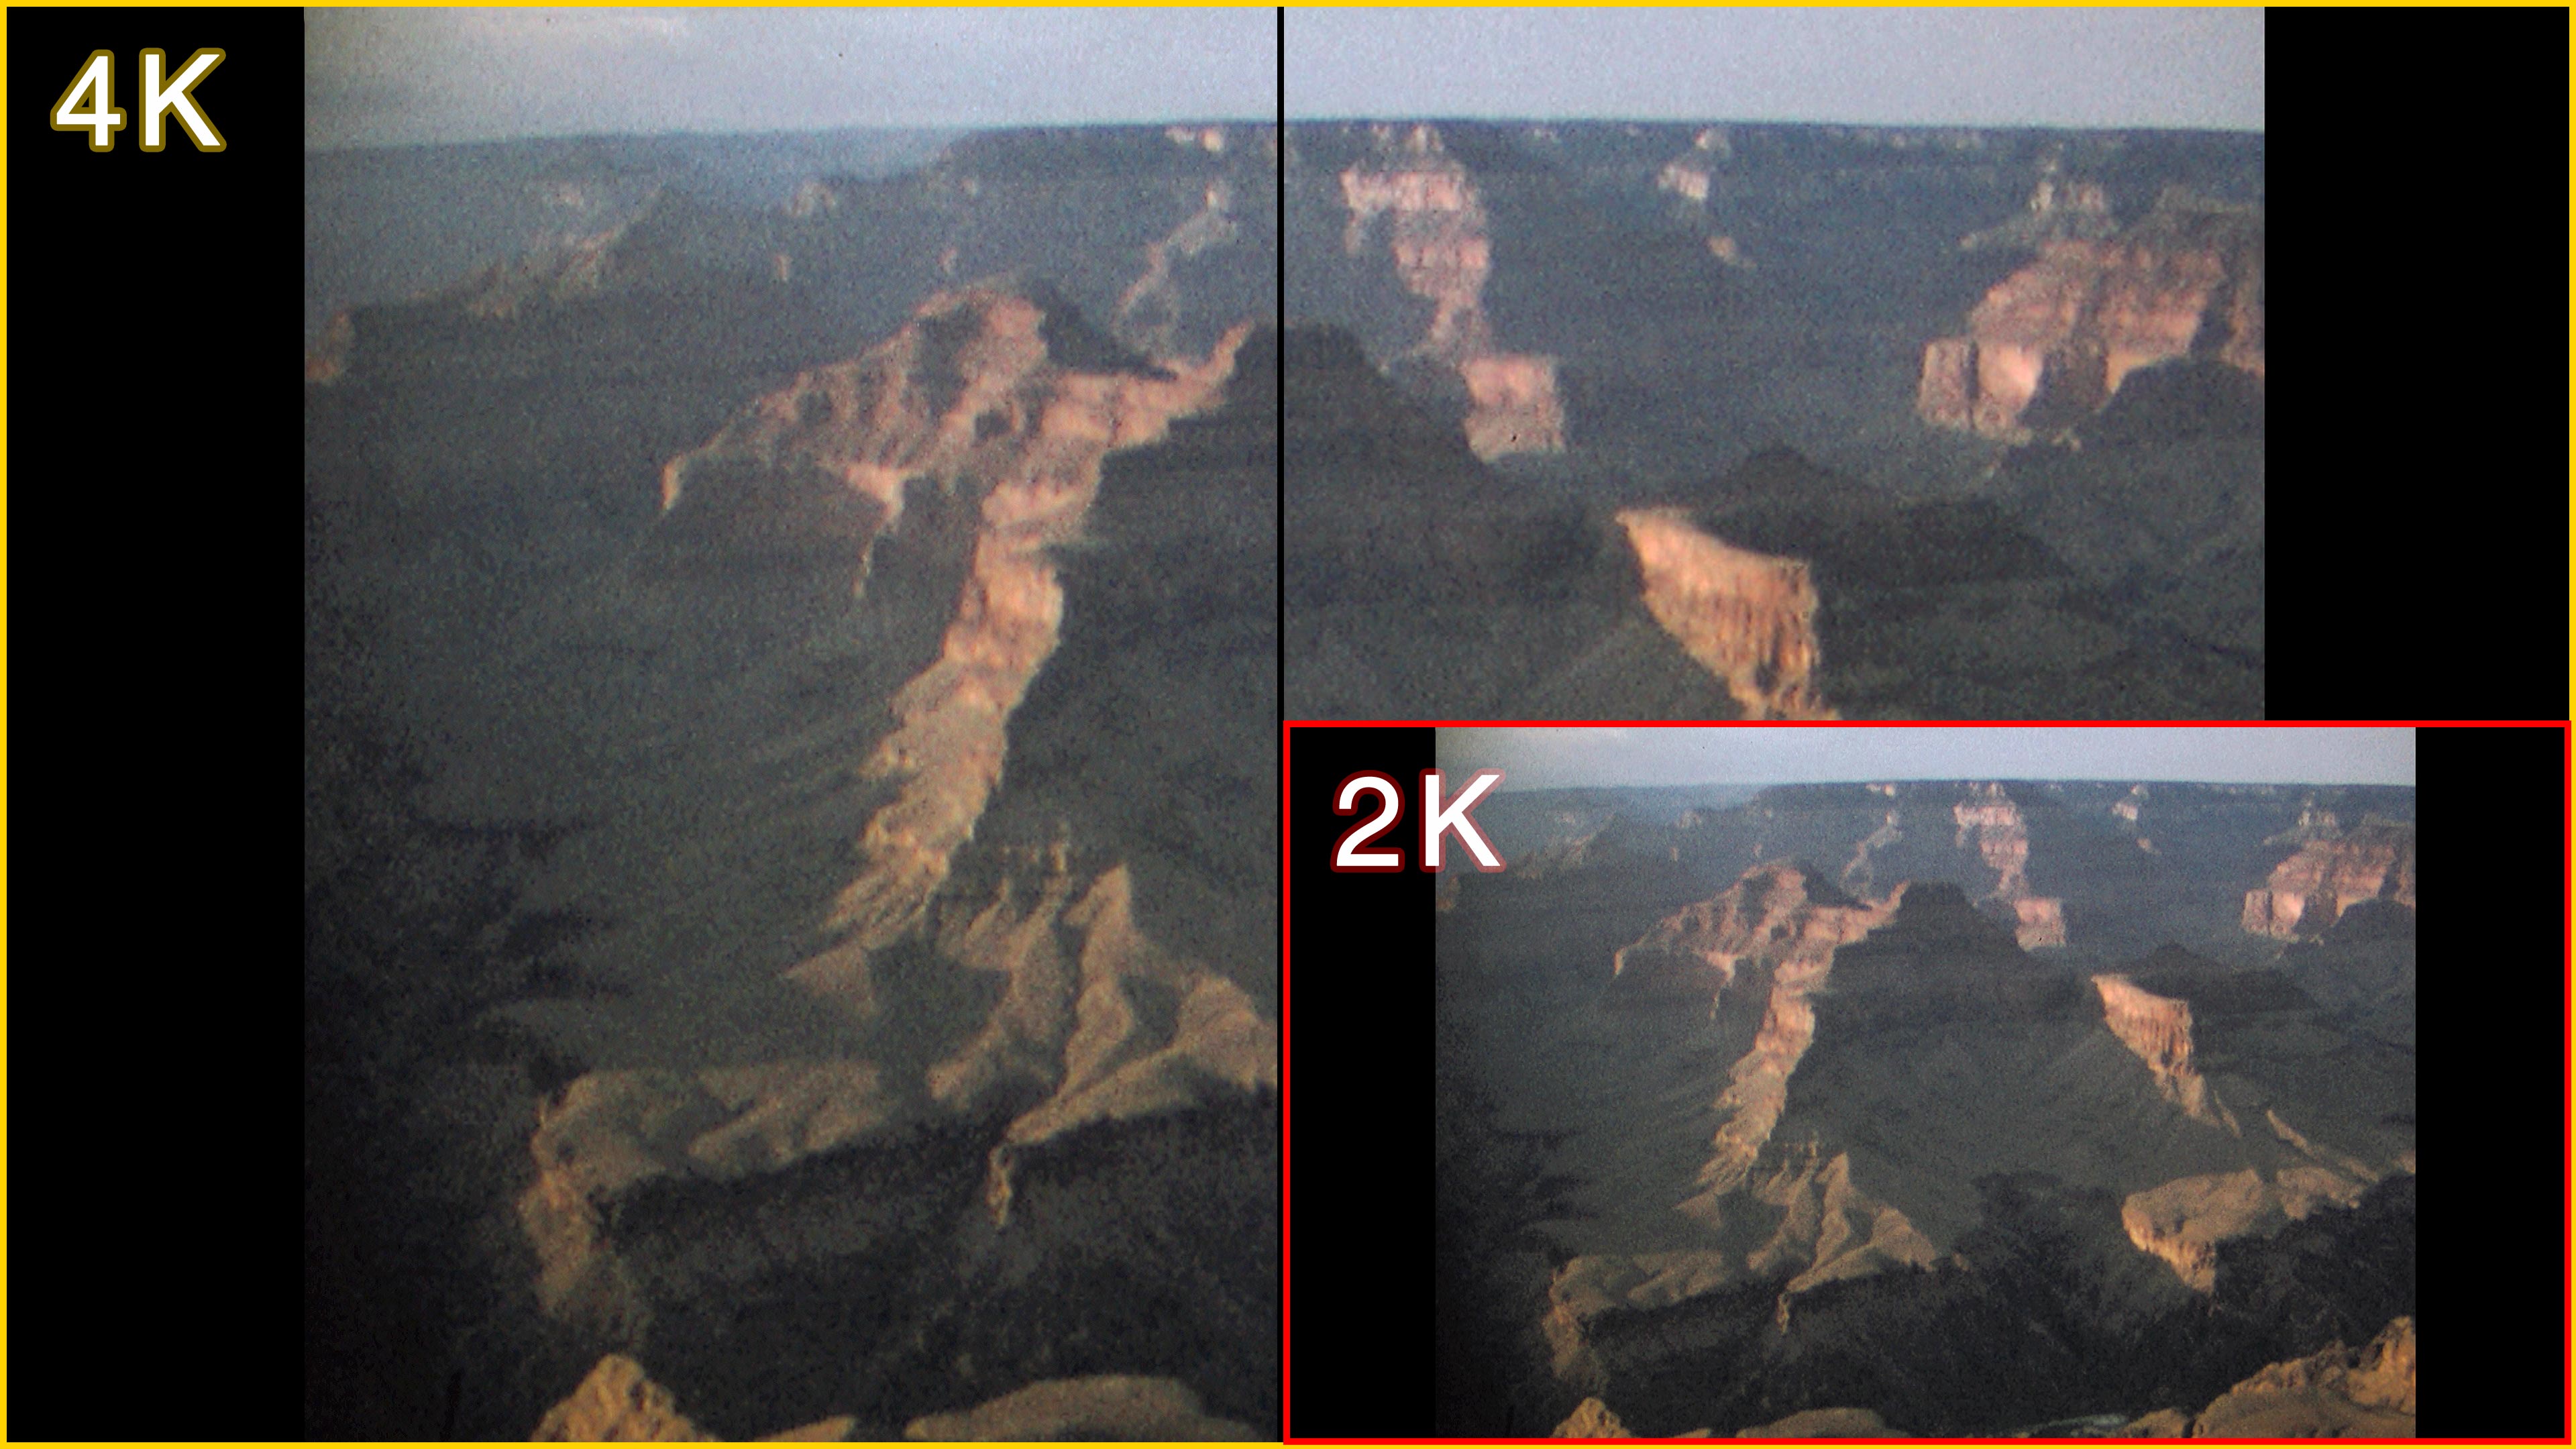
Upscaling 2K to 4K doubles the image pixel count in both height and width. I found myself reevaluating each and every step of my transfer process, as I described here on our website From RAW to FINAL. Sure enough, I found an instance where I could, conceivably, justify a 4K up-scaling. When is it best to upscale to 4K?You will probably notice that this topic is a bit technical, but nonetheless worthy of perusal. During the image stabilization process, the image's grain gets seriously remapped. Here is the reason for that "remapping": The image stabilization process necessitates temporarily enlarging the image by 4% — from 100% to 104%. Later that enlarged image's border gets cropped off back to 100%. To finalize the image stabilization process, a very light sharpening is required to retain the grain's sharpness. If applied during this image stabilization process, upscaling might retain some of the image’s very fine grain structure. In order to test this idea, I produced two clips, and I placed them side by side. How the 4K vs 2K images stabilization sample was madeFor the 4K side, I performed the image stabilization process within a 4K project. For the 2K side, I performed the image stabilization outside the 4K project, within a separate 2K project. Here are the steps in detail: 4K sideI created a 4K project, into which I imported a 2K clip. The 2K clip was automatically upscaled to fill out the larger 4K frame. Then I applied the image stabilization process to the clip, including some light sharpening.2K sideIn a separate 2K project, I performed the image stabilization and light sharpening.• Later, I opened the above 4K project, into which I imported that already pre-processed 2K image-stabilized clip. • I then upscaled the 2K project and placed the 4K and 2K side by side, as seen below. 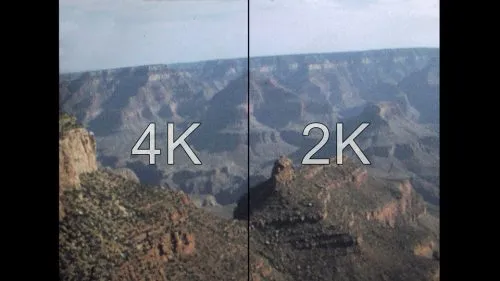
A side by side 4K / 2K composite is a large 611 MB file — the file is a 4K resolution size (3840 width by 2160 height). Note that the quality of very fine grain can really only be judged in a video clip that is being played back in real-time. A still image does not work ideally for this demonstration. Click and zoom in to see the image in full 1:1 pixel display. Note that these large frames double the grain size, making the grain look splotchy. You might notice that the 4K image looks slightly less cloudy. In theory, one would expect the 4K side to have kept more of it's finer grain structure — but to my summation, it turned out to be insignificantly better. How can I assess the difference without a 4K monitor?One can only discern the difference of this 4K sample by viewing it on a 4K monitor. Since most people do not have a 4K monitor hooked up to their desktop computer, I decided to provide you with a link to the file so that you can download it onto a USB stick. If you have access to a 4K monitor, use it to compare the two transfers. If you only have access to your computer's monitor, here is a 1920 × 1080 frame center portion of the 4K file. It is the red rectangle seen in the image below. You can play this clip on your desktop to compare the difference in grain. The grain is the same as what you would see on your 4K monitor. The sample below is only a zoomed-in, close-up portion of what you will see on your screen. The final transfer will not look like this. However, this sample will give you an idea of the difference between a 4K transfer and a 2K transfer. The 4K transfer does bring more crisp edges, but it adds substantial blotches of grain patches during live playback. It looks busier than the 2K version, and the induced crispness actually distracts the viewer. The red section is cropped to 1920 × 1080 pixel size for viewing on a desktop monitor. Download MP4 SampleTo download the center, zoomed-in, 2K section of the 4K sample, click here. It is 303 MB, so it will take some time to download. To download the full-size, 4K sample clip, click here. (Again, this is a 611 MB file) These sample clips have been encoded using the new "High Efficiency Video Codec" aka H.265 codec. Some older players might not be able to play back this type of mp4.
Considerations and ConclusionsBottom line: If you have 8 mm film, we do not recommend that you get a 4K transfer. 1 - The benefit of getting a transfer in 4K is not very noticeable. Only a trained eye might see a difference, and it costs twice our regular price. 2 - If you will be considering our image enhancement option of grain reduction — “debris removal”, as we now refer to it — you do not want a 4K transfer. Since with a 4K transfer you are after the grain, we would not apply any grain reduction to the file. 3 - If you are going to want to share this large file, it will first need to be highly compressed. In that compression process you will lose all the benefit of the grain captured in a 4K transfer. 4 - If you want to be mindful of your carbon footprint, 4K transfer is not a good choice. It takes a tremendous amount of electricity to process these very large files. Conclusion: A 4K transfer will not benefit the image captured from 8 mm film. The finest grain might look a bit sharper; but — for all the reasons explained in detail above — the slight improvement in grain quality does not usually justify the extra cost. Still, if you have your heart set on a 4K file, we can deliver it … at a premium price. We would capture your film’s information in 2K (RAW Lossless, instead of using the HQX SuperFine codec), and import that file into a 4K project. There, all the color-grading and image-stabilization work would be performed. This 4K transfer varies from our usual processing, as explained in our step-by-step breakdown of our transfer process: From RAW to FINAL. of 1 small, 3-inch reel What is a Burn Hole?A burn hole is nothing you want on your film! And, they're rare. It means that at some point while viewing your treasured old family films, the projectionist stopped the film from rolling and the film stayed stationary in the gate for too long. The heat from the light source eventually burned a hole right through the film. If your films have these holes, you'll see an odd sight quickly pass by when viewing your transfer. It will be a bright white spot if the film was burned all the way through. Or, it will appear darker and all bubbly, if the film's emulsion nearly got burnt to a crisp. Back in the day, movie houses would sometimes burn to the ground. Why? Because the projectionist was not being mindful and those intense projector lights, with the heat they put off, sadly sometimes started a fire in the projection room. Also back then, the film's emulsion was much more flammable. It doesn't happen today, because film stock is made of a safer base material. And, a fire cannot happen with our equipment, because we use a strobe as our light source. 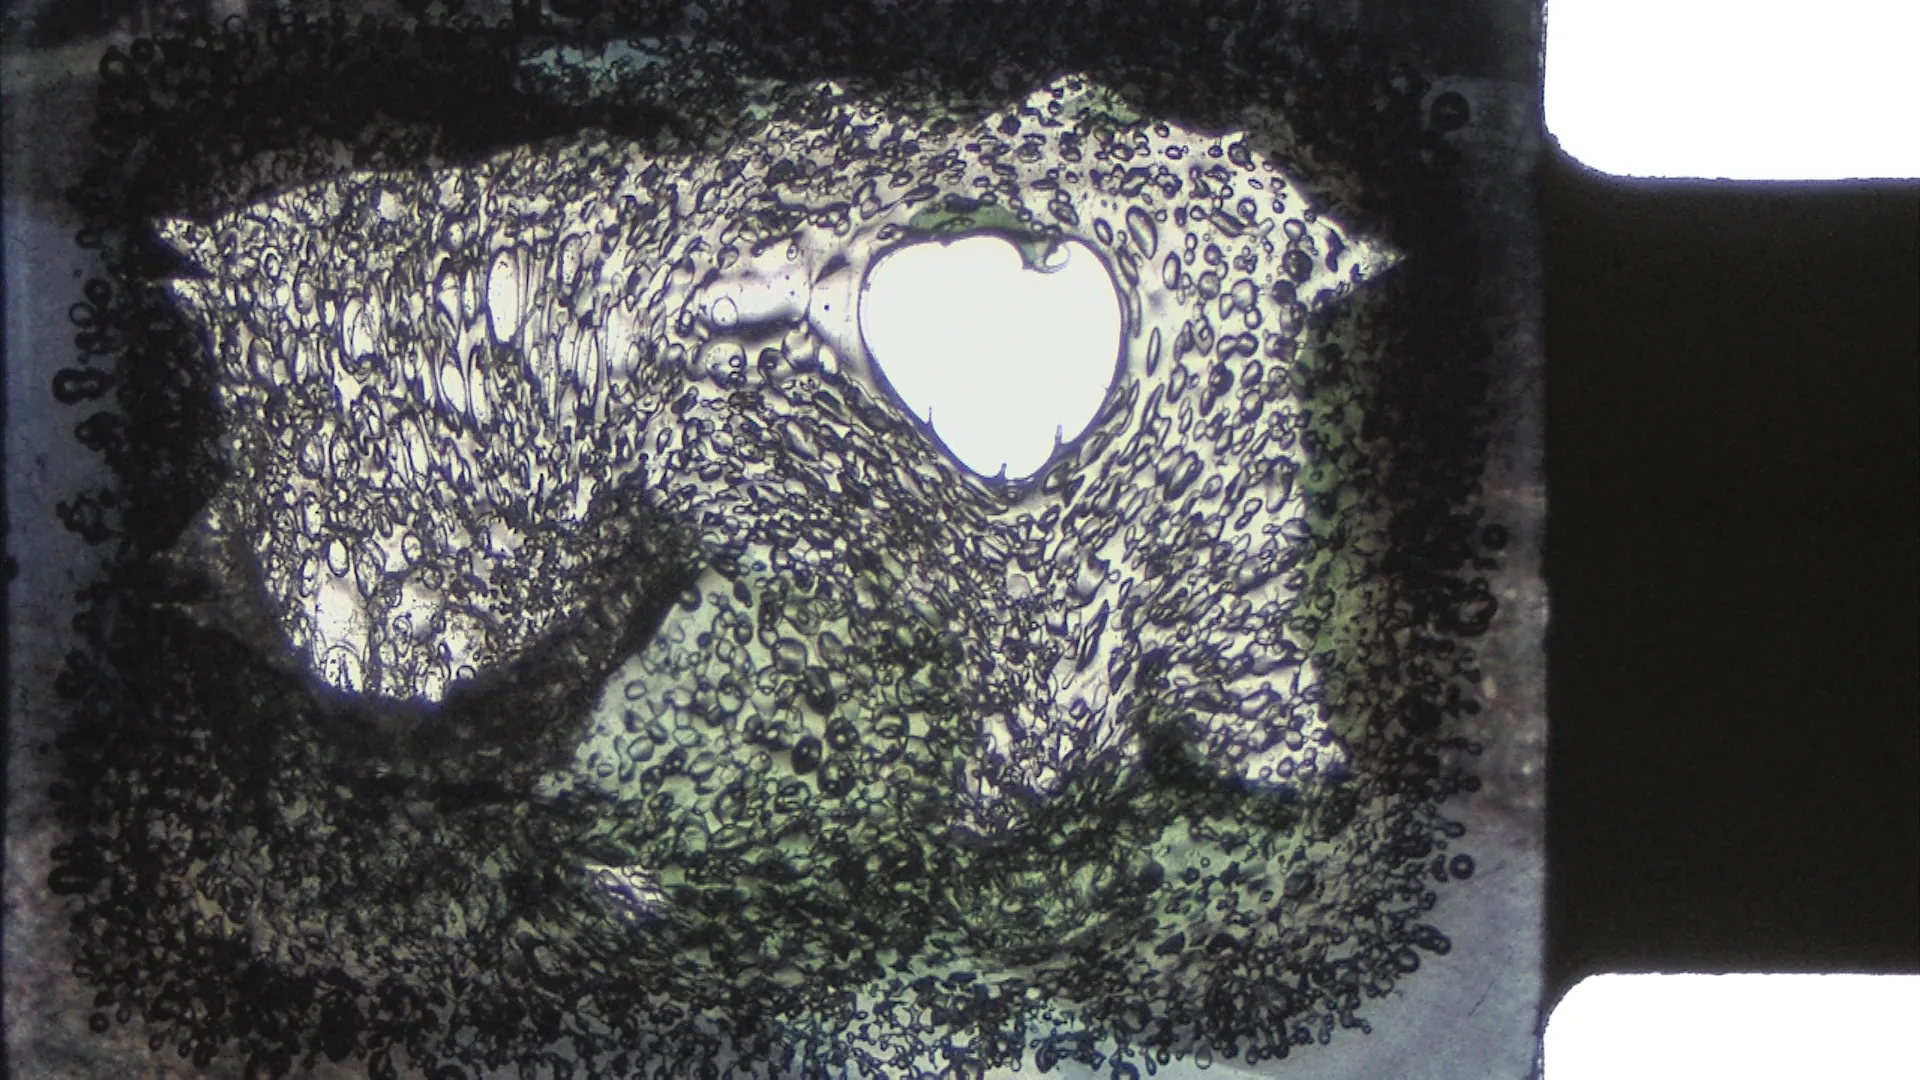
8 mm film burn hole
Burn hole in Super 8 film
of 1 small, 3-inch reel Archival Grade Slide Transfer
We are happy to bring you our "true grain capture" at 61 megapixel resolution per slides. This is a good time to consider transferring your most treasured slides to beyond Archival Grade Quality quality. These are very large files. 3.5MB for the JEPG files, and about 314MB for the TIFF files. Notice the rounded corners? Here is why we like to include parts of the border along with the round corners: Learn More

Click to download very LARGE image file
Use the bottom image to get a feel for what you will be getting in terms of details. 
Click to enlarge Slides courtesy of Amy Thomas.

click on image to download LARGE file
click to enlarge
of 1 small, 3-inch reel 4K vs 9.5K Slide TransferOur curiosity had us going once we had our new 9.5K camera in hand. We wanted to know how a lower quality transfer would compare to our new 9.5K transfer, so we had a reference. These are the steps we took to achieve this... 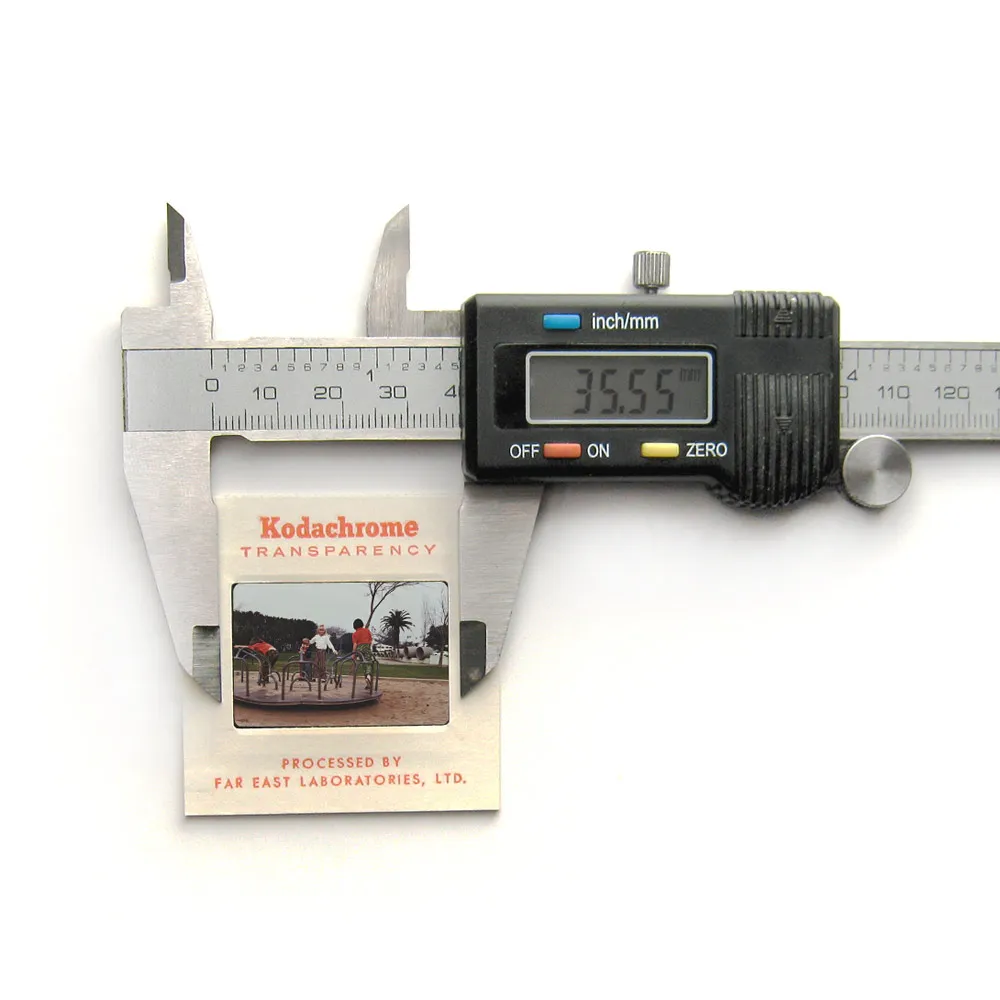
The approximate 9.5K image is about 35.55 mm, or 1.399 inches in width. Our 9.5K Slide TransferThis slide was transferred using our 9.5K slide transfer setup. The resulting file is: 9,504 by 6,336 pixels in size JPEG size 29.8 MB TIFF size 310 MB This is what we did to calculate our DPIDPI stands for Dots Per Inch. We divided the dots recorded (the image width 9,504) by the image width in inches 1.399 (35.55 mm, see above) = 6,793 DPI --- or approximately 6,800 DPI. All images below are JPEG files, because JPEG is what's used on the InternetPlease keep in mind that TIFF files look a great deal sharper than these below! Unfortunately, JPEG compression has a tendency to crush fine details. The advantage of JPEG files is that they are much smaller and easier to share. In comparison TIFF files are extremely large. TIFF files hold a huge amount of image information and thus serve as a valuable archival record of your slides. 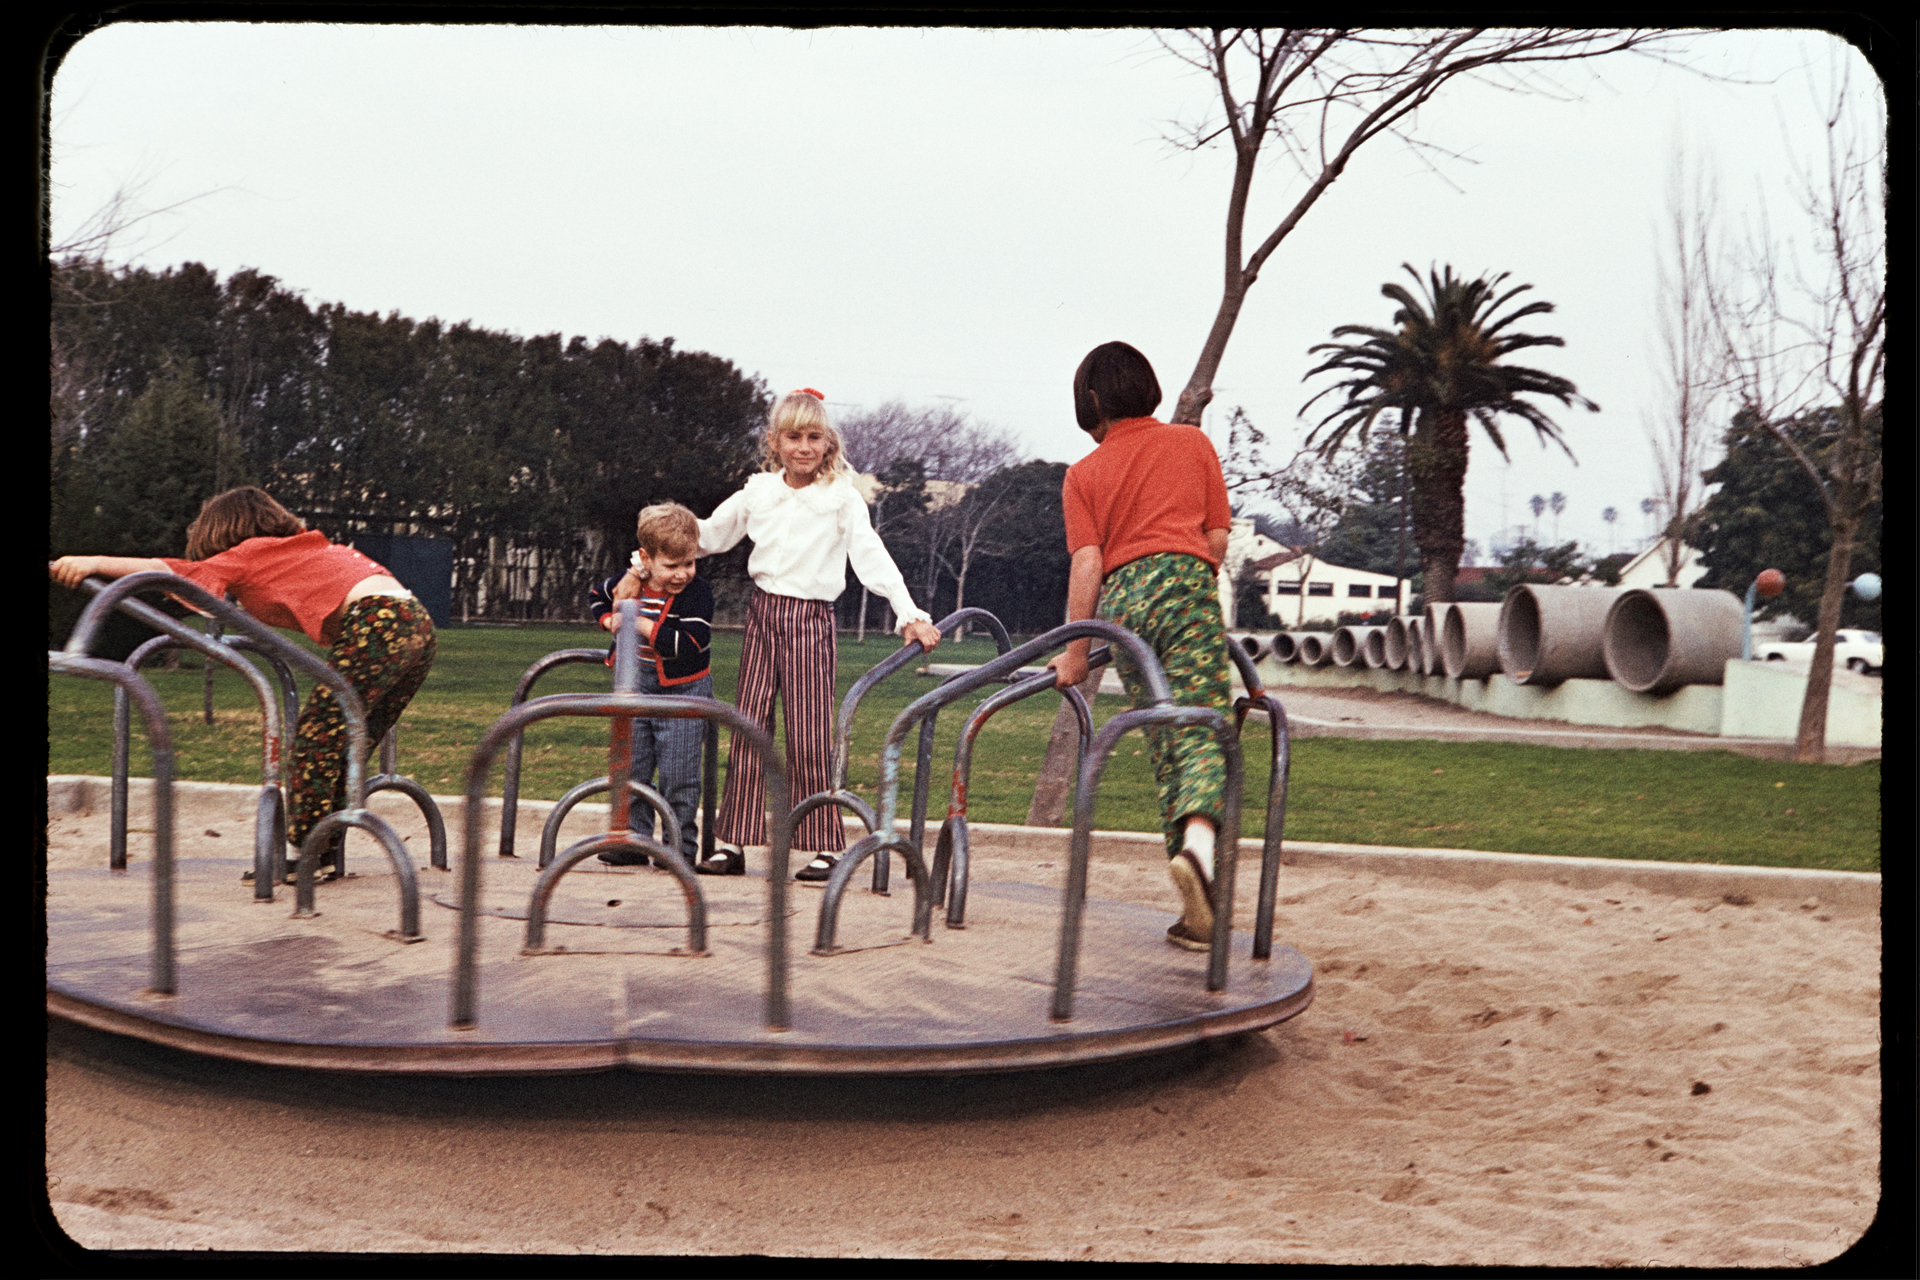
Clicking on the above image, you'll see a downsized JPEG (size 1920 by 1280 -- not the full size 9504 by 6336 pixel image). The full size image would take too long to download, here. - Slide courtesy of Amy from Ojai, CA Let's focus on the film grainWe selected the above image because of the fine line detail in the fabric of their pants. Focusing on the lines in the fabric helps us when comparing the different resolutions. 
Click on this close-up to view this section of the slide enlarged -- then, zoom in on it to see all that detail we capture. (size: 1000/660px) No image sharpening was applied. The above close-up is 1000 pixels wide. So, you would need a monitor of at least the same or larger width to see this whole close-up section . A desktop will do, but an iPad may not. If you are on a small screen device, like a phone, make sure to zoom in.
Our 9.5K transferZooming in even further, we will be using this 400 by 400 pixel excerpt as a reference point. This way we don't need to zoom in on each sample to get the 100% representation of the excerpt. This excerpt is the basis from which we will produce some 'lower K' transfer samples (like those that other companies do) so you can compare how nice ours look.

9.5K with some light sharpening. At 9.5K we are clearly above what film can hold! Going higher would only bring more details in the grain, and not benefit image detail.
7.1K transfer (our competition)In order to obtain this representation, I took the un-sharpened 400 by 400 image from above; scaled it down to 294 by 294 (400/9.5*7.1); and scaled it back up to 400 by 400; and included some light sharpening. 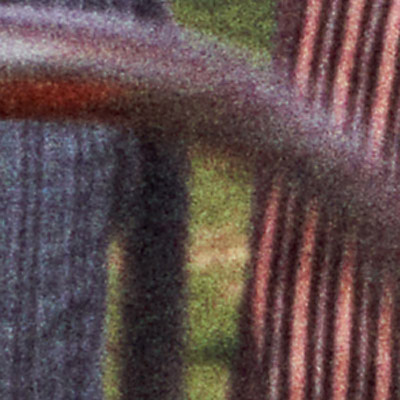
7.1K transfer The upshot: The grain looks less defined, larger and is blotchy. The finer lines in the blue pants on the left are starting to blend together.
5.6K -- is considered "Film Resolution"5.6K is considered what "FILM" can hold - approximately 4,000 DPI. In order to obtain this representation I took the un-sharpened 400 by 400 image from our 9.5K transfer; scaled it down to 235 by 235 (400/9.5*5.6); and scaled it back up to 400 by 400; and included some light sharpening. 
Some say, anything finer then that will just start recording what the grain looks like. The grain is still recognizable but overall it looks much like the above 7K transfer.
4K Apple iPhoneIn order to obtain this representation I took the un-sharpened 400 by 400 image from our 9.5K transfer; scaled it down to 168 by 168 (400/9.5*4); and scaled it back up to 400 by 400; and included some light sharping. 
UHD TV (2,863 DPI) The over all impression is that it looks muddy.
Now Stacked form 9.5K to 4K (top to bottom)... so that you do not have to scroll to compare. Can you tell them apart? 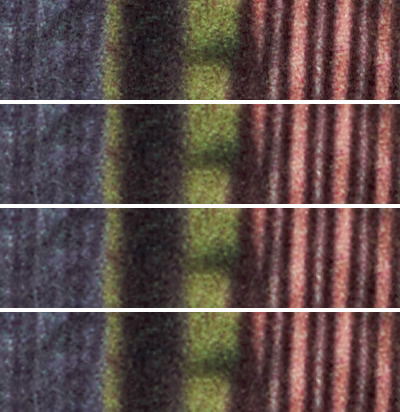
From top to bottom: 9.5K - 7.1K - 5.6K, and 4K ConclusionHorn tooting: We are confident that our new 9.5K slide digitization surpasses most of what is "out there." This bold statement comes from what customers recently told us. It starts with the level at which we capture the grain and with the fine camera we use. It continues with the types of files that are included in our service and ends with the clean and tidy results we deliver to you. KEY NOTES: We changed the way we clean slides before digitizing them. Each and every slide gets special attention and is carefully hand-cleaned. We don't yet know of another company that does it like we do! We're one of the few companies that offer TIFF files at no extra charge and the RAW file, if you request it. of 1 small, 3-inch reel What Makes Our Slide Transfers Exceptional?We start with the professionally trained and educated operator who graduated from the world-renowned Brooks Institute of Photography, in Santa Barbara, CA (graduated February, 1996.) Your slides are professionally digitized at the very highest resolution (of 61.0 megapixels = 9,504 × 6,336 pixel files,) employing specialist equipment and tender care. Please have a look at the equipment and tools we use. We do not use automation. We take no shortcuts, which is obvious from the results we achieve. To view our slide samples, click here. (- coming soon.) Important: Read the last paragraph ... if you read nothing else! Our CameraThis Sony α7R IV 35mm full-frame camera, with 61.0 megapixels, exceeds the resolution of 35 mm film by 170%. That is outstanding performance that creates highly-detailed images. 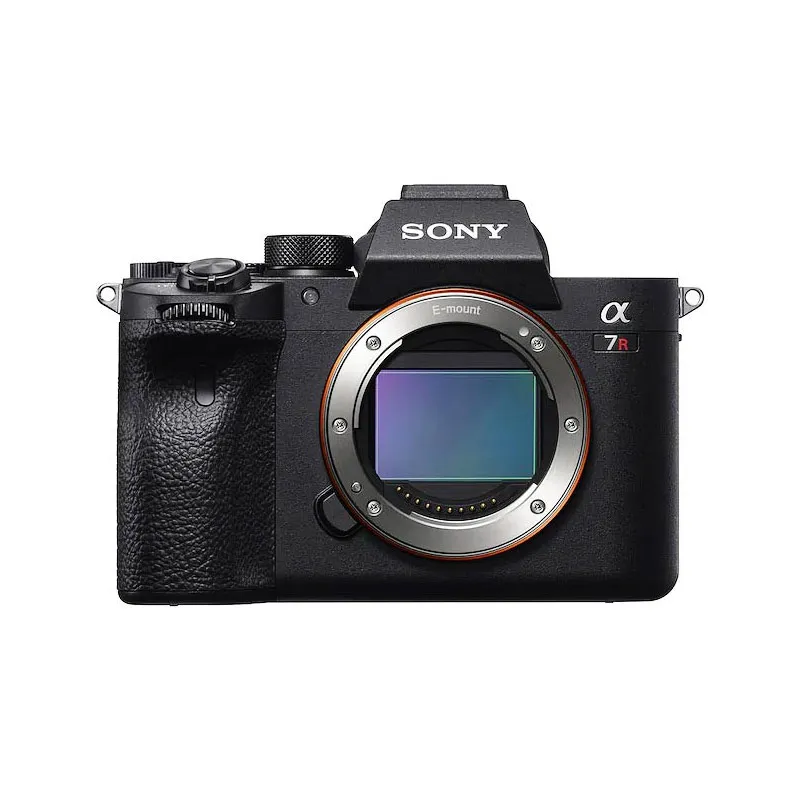
Sony α7R IV, 61.0 megapixels - 14bit RAW - with Dynamic Range Optimizer. Image size: 9,504 × 6,336 pixels We capture a true 1:1 image, offering a superior dynamic range of over 14 stops. Film generally has 10 stops of dynamic range, but we can work with a broader range bringing about optimal luminence. We manually set the exposure on each slide. For each image, expect approximate file size to be: • JPEG file - 7.5 MB - we provide • TIFF file - 340 MB - optional (click the check-box on online order form if you would like the TIFF file -- no extra charge) • RAW file (ARW) - 60.1 to 60.9 MB - provided upon request (no extra charge) Our LensThe Voigtländer Macro APO-LANTHAR 110mm F1:2.5 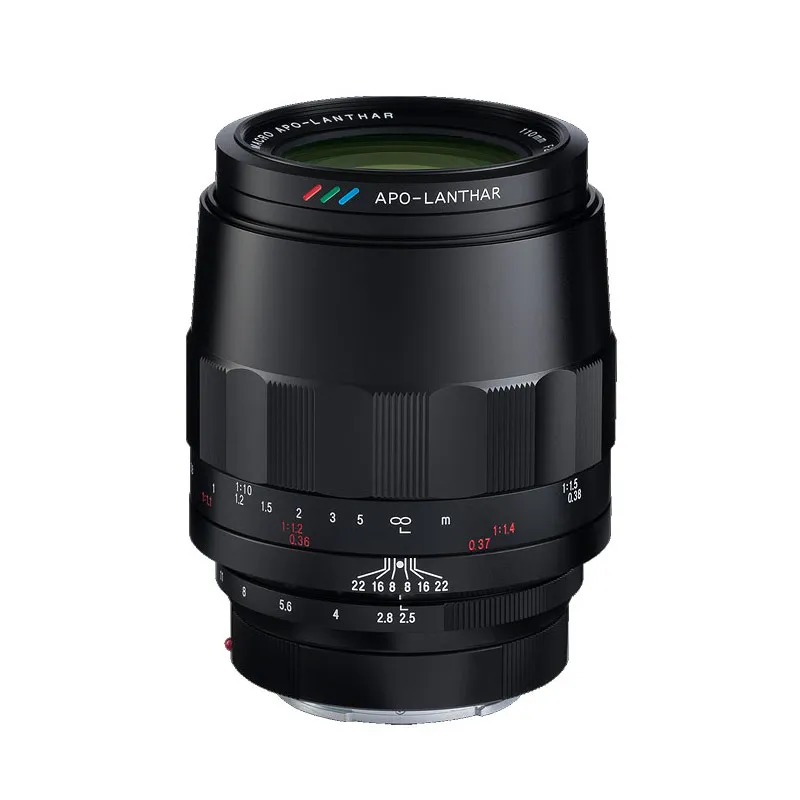
The best "German" lens designed for true 1:1 macro work The "APO" (the apochromat) aspect of the lens is important and will produce very impressive details without necessitating post-production chromatic aberration correction. However, if a customer's lens has chromatic aberration issues, we now have an exceptional image at our disposal and can do further "post-capture" work. This lens is remarkably sophisticated and precise, even though it is a manual focus lens! Our Light SourceWhat furnishes the light is a Canon Speedlite 430EX strobe light set to 1/8 of its full power output. 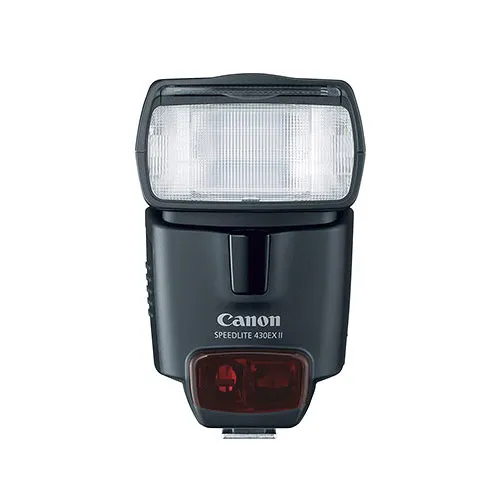
A very reliable strobe light is an essential component. We then shape the light quality by adding a glass diffuser between the strobe and the slide. The diffuser in the lineup is what emits a uniform soft light and is what ultimately backlights the slide. Our Slide-HolderA projector is used to "hold" the slide in place. We are not using the projector to project the slide image rather to simply hold the slide in place. 
We started with this and ended up with a trade-secret piece of equipment. It took a little modification -- cutting a sizable portion off the front section and removing the lens. We also had to add a strobe light and a diffusing "milk" glass. Our Focus AdjustmentWe use this to manually find the perfect focus. 
Micrometer focal finder This tool is a micrometer. It adjusts in millimeters. It is more precise than the camera's original focusing ring. Our SoftwareAs Capture One states: "Start your editing with the sharpest possible details and most natural colors." 
Capture One image processing software It handles our very large, RAW files well. It is an essential part of the process. This professional software, fine-tunes your slide digitization for optimal results all the way through to the final image. Professional Photographers: If asked, we are happy to provide your with the original RAW capture and the adjustments we set in Capture One to produce your final file export (no extra charge.) Learn more about Capture One software. Last but not least!We start the entire process by hand-cleaning each slide -- both sides. This takes time. 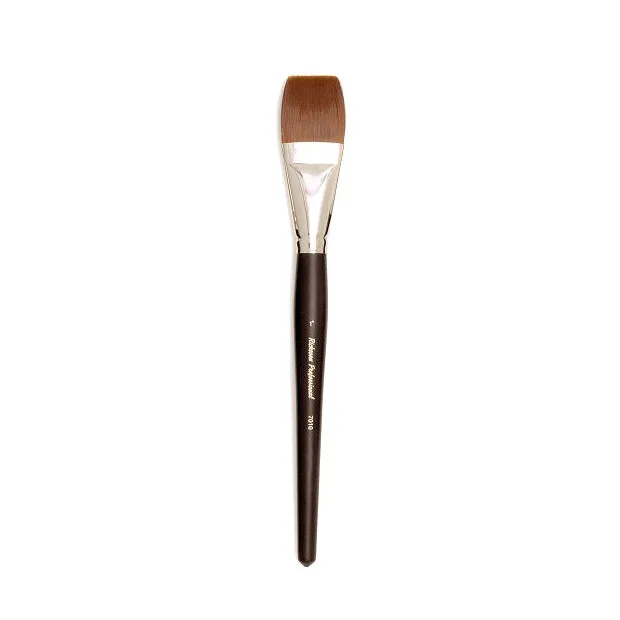
One of the most important aspects of the entire process - a gentle and thorough dusting with a high quality brush We use a fine art brush to gently wipe away dust and debris that is lightly stuck to the emulsion. Each slide receives the care it deserves. This results in a much cleaner slide than the one we were sent. We like to say ... "Do it once and do it right." of 1 small, 3-inch reel Video UP-SCALING to HDUp-scaling your video to HD is a wise option to consider when digitizing your old video tapes. Professionally up-scaled footage results in a nicer image when viewed on a large TV or computer monitor! We think you'll be surprised. The improvement upscaling brings to Mini-DV and Hi8 tapes are the formats which are most favorably affected by the upscaling process. Our FilmFix up-scaling differs in that we perform steps 3, 4, and 5 (detailed below), and other companies don't. For "computer geeks": If you're comfortable using command lines in a terminal, here is how to go about doing the up-scaling yourself. 
After up-scaling SD capture from video tape. Click on image to view big (best viewed on a large computer monitor.)

Original SD capture from video tape (before up-scaling)
FilmFix's up-scaling - benefits and extras:The upscaled file is an MP4 file and can be viewed on any modern device. While a "Smart TV" has its limitations, it knows what to do with an MP4 file. To note: .avi and .mov files will not play on each and every device. Your up-scaled image quality will be superior to your original capture in SD, when viewed on an HD monitor. Up-scaling strongly reduces the typical jagged edges on diagonal sharp lines -- which you'll notice in SD sort of look like jagged "stair-case" edges. 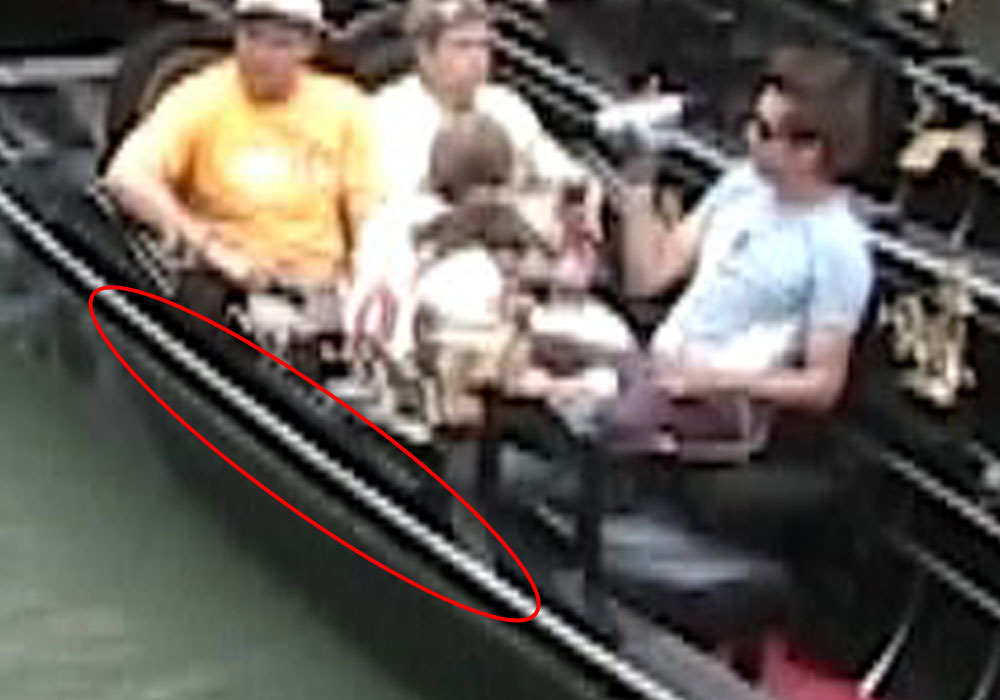
Standard Definition (SD) video – no upscaling
After upscaling SD to HD is when the deinterlacing takes effect Our up-scaling is a two step process. First, we correct (as much as possible) for overexposed whites and underexposed blacks. And then ... 
Without upscaling video misses out on overexposure correction
Upscaling to HD includes overexpose correction providing more detail in highlights In the second step of up-scaling, the standard all-black side bars on either side of the frame, get replaced by blurred side-bars, which is common place in today videos on the Internet or on TV. You've probably seen it -- they are colored, side-extension "bars" and are a blurrier and diluted version of whatever frame we're on.
SD video - no upscaling
Final result - with HD upscaling of SD video And finally, during the up-scale process, we crop off just the messy looking first and last couple of lines (on the top and bottom of image) as well as a minimal amount on the left and right of the image to present a cleaner looking view. NOTE: Some of the more advanced TVs offer an 'internal up-scaling' option, but the quality does not compare to ours. Ours is far superior and it's not only because we add steps 3, 4 and 5! The algorithm our computer uses is far more sophisticated and processor intensive than the quick on-the-spot TV upscale feature. (Sample images to follow, as soon as a particular customer gives us their approval.)
We can fit up to 23 hours of up-scaled video onto a 256 GB flash drive. of 1 small, 3-inch reel "Magic Cords" - Do They Work?These video transfer cords hit the market, and people started digitizing their tapes at home. However, it seems people are not getting satisfying results with these things. It appears that it is probably not capturing true "S-Video quality" analog signal to digital. Perhaps, it is instead using a little trick of utilizing the signal from pin 2 and 3 of the 4 pin mini-Dim plug (wiki info on S-Video) to "capture" a less colorful and softer looking video image. These days specs are hard to read and sometimes difficult to trust. There is a reason why we do NOT use any of this here at FilmFix -- we stick with what we know for a fact works exceedingly well! If you already have a so-called Magic cord with converter like this, and are intent on using it, it would be good to jump down to our "Set-up Check List." 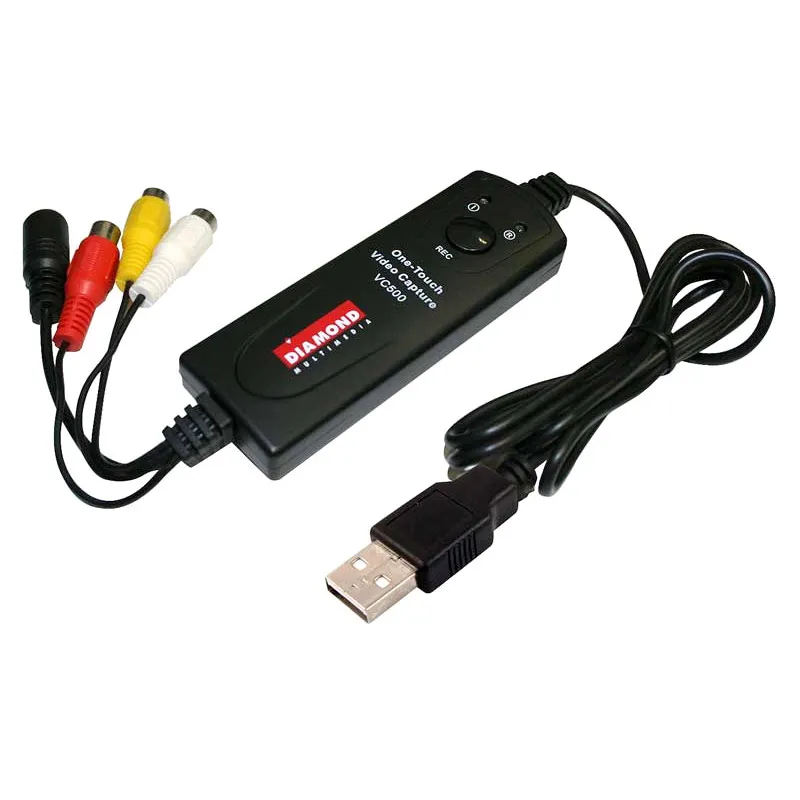
Diamond VC500 available here at B&H for less than $36.00, but before you buy, it's good to know its limitations. The Diamond VC500 specs say ...."Video Capture Formats: MPEG 4, MPEG" and "(600 MB to 3GB required for 1 hour of recording)". The upshot is: You will be capturing a highly compressed video, because a standard quality video file uses about 13GB for 1 hour of recording -- not merely their advertised 600MG - 3GB. Sure, using their cord you'll end up having the convenient MP4 file, but later if you want to upscale your video to 1080, it won't work. It will just look muddy and unsatisfying. This is why we don't use this type of "magic cord." It's advised to do your research and read other's reviews -- available online. Sure, it's easy to set up -- but user beware!
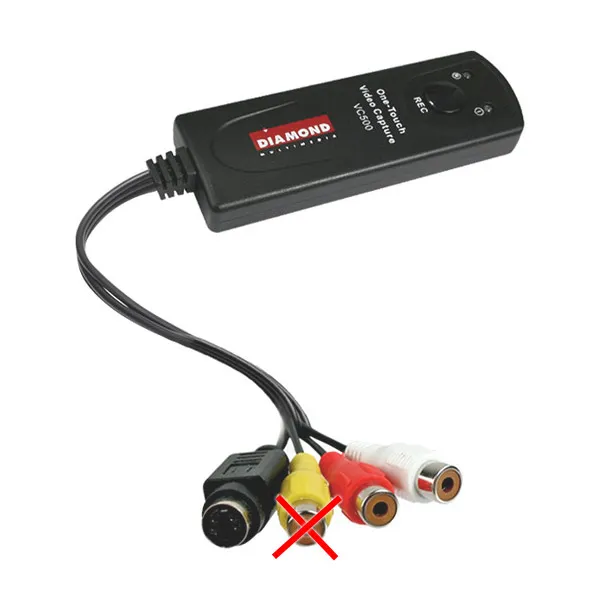
Don't use the yellow RCA plug! Video decks and cameras normally provide a video-out connection. Only a few higher-end units provide you with an additional S-Video connection. Please make sure to NOT use the yellow connection for the video signal, but instead use the S-Video mini-Dim plug. You will be able to get an image using the yellow plug, but it is a substandard, much lower quality image. 
Yellow RCA plug will only carry a substandard composite video signal
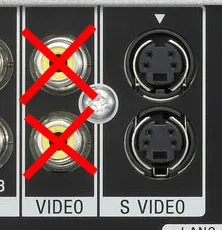
On the right are S-Video In and Out ports - on back of deck
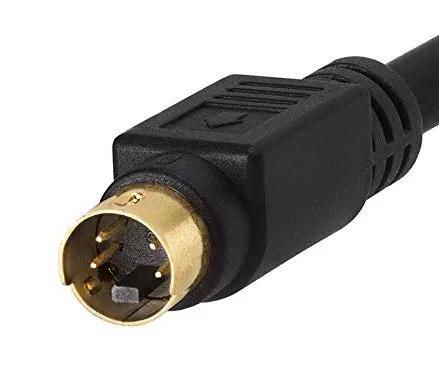
Do it right by using the better video signal with an S-Video chord, as seen above A clean S-Video signal "is king." If your unit only has a yellow RCA plug, consider using a different unit that has an S-Video plug. It really makes a difference! You may want to try your luck on eBay for a unit that is in good shape and which provides you with an S-Video port. Don't be fooled by this adapter cord
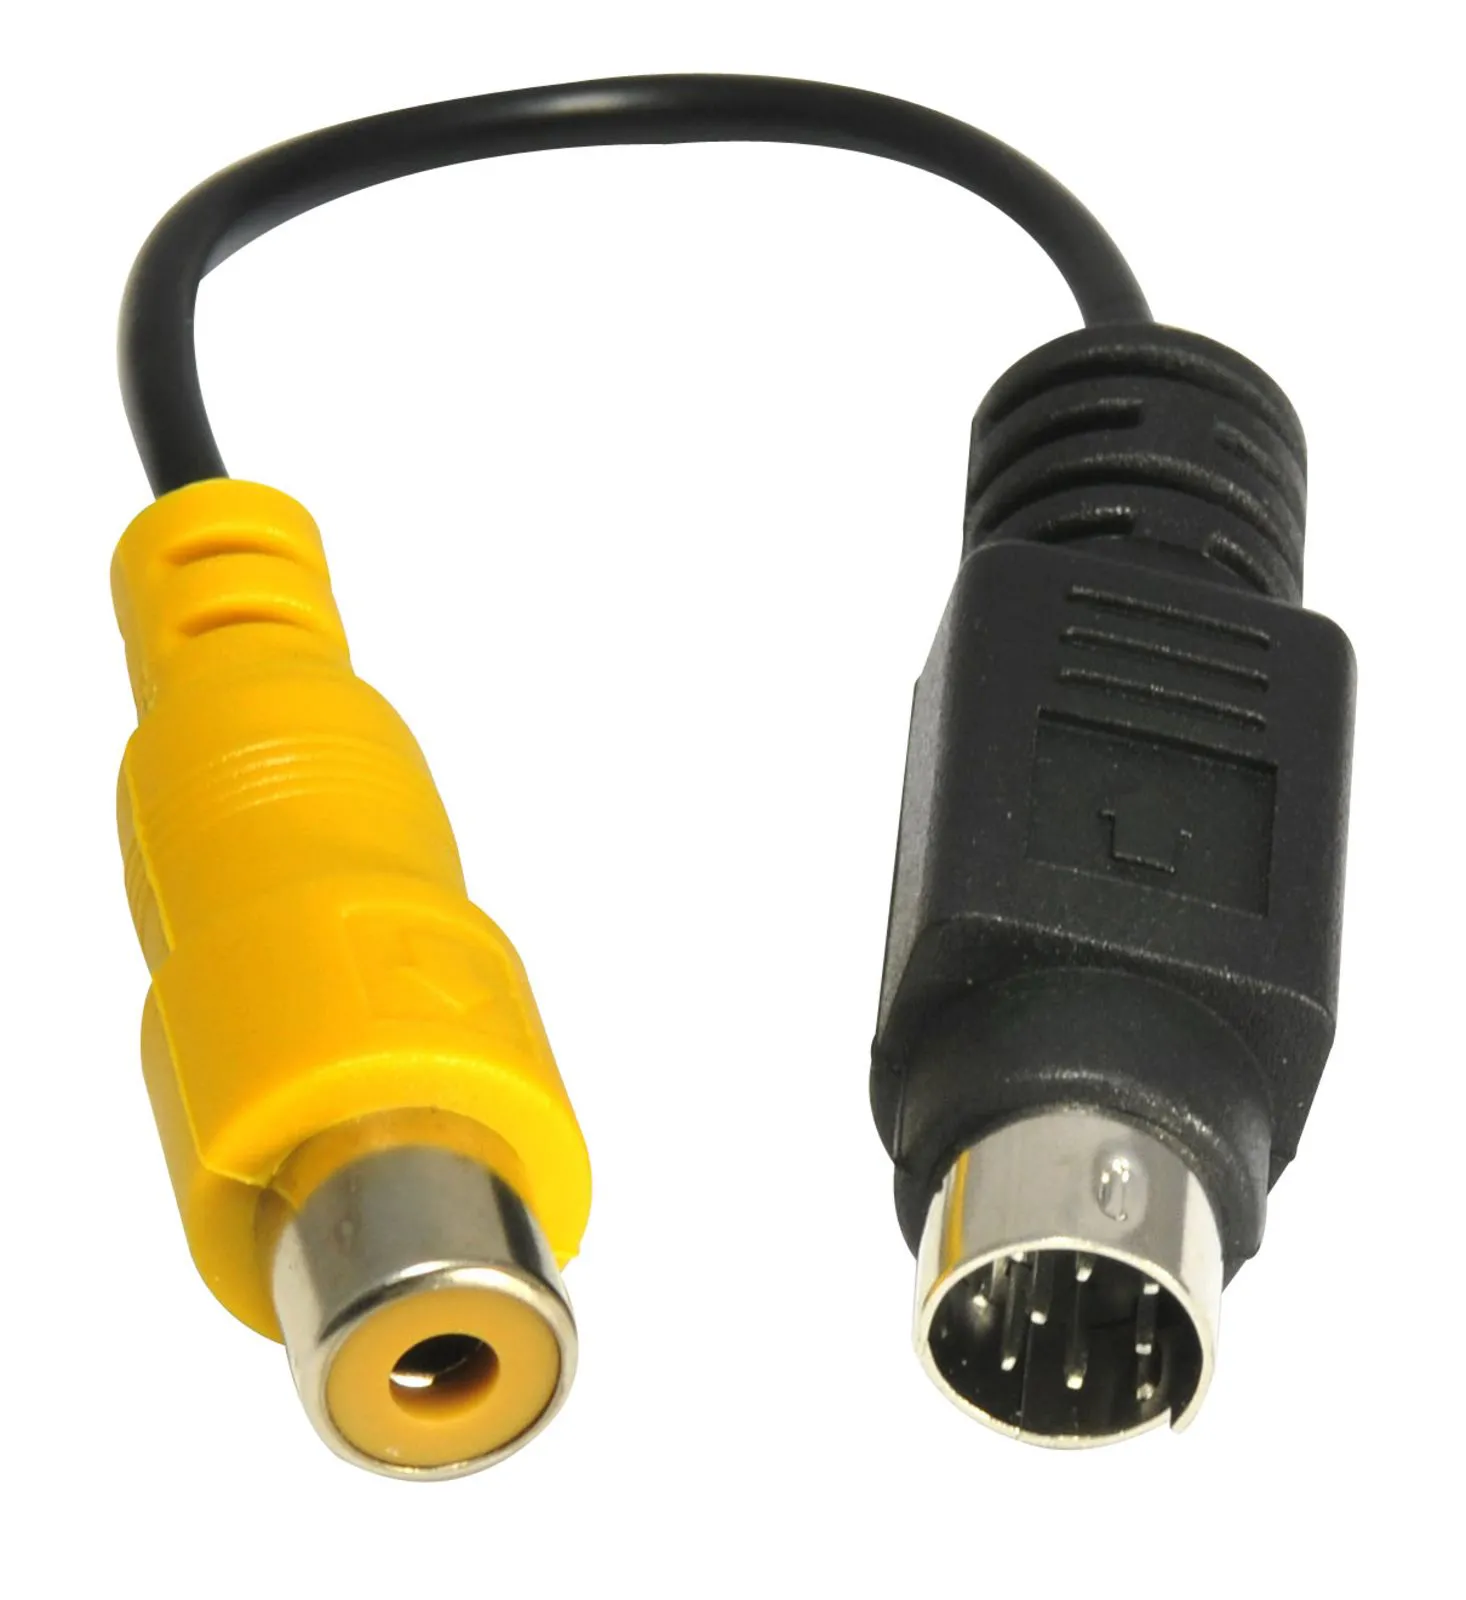
RCA / S-Video adapter - only to be used as a last resort Our advice: Do not use one of these converter plugs. They will not bump up the image quality, they will only bump it down. What we use at FilmFix:
We use professional decks that offer S-Video signal in and FireWire out (a.k.a. IEEE 1394.) And, we go from FireWire out straight into our computer to produce the best quality recordings possible. 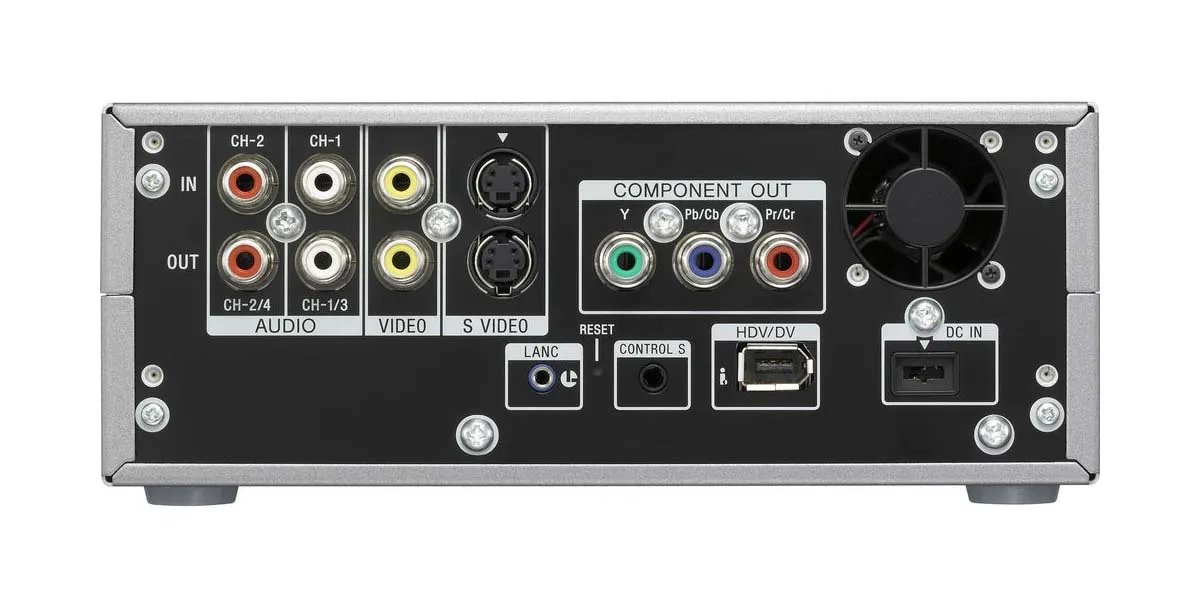
The magic really starts to happen when we start up-scaling the captured material to 1080 HD. Here is a link to our do-it-yourself blog post on how to go about that. Set-up Check List
Stay digital if it is already digitalMini-DV and Digital-8 tapes hold digital data. If you have Mini-DV tapes or Digital-8 tapes, please do not use the above discussed "analog" magic cord. Instead, stay "digital" by using a fire-wire connection to your computer. of 1 small, 3-inch reel 35mm Film ResolutionNowadays, when we refer to a photograph’s “resolution” or “image quality”, we generally mean its pixel density or, when printed, its Dots per Inch (DPI). Back in the days of film photography, we used a comparable measure of image quality, based on the film’s grain. Since FilmFix deals with 35 mm film transfers (as opposed to larger-format films that some photographers used), we will confine this discussion to 35 mm film resolution. 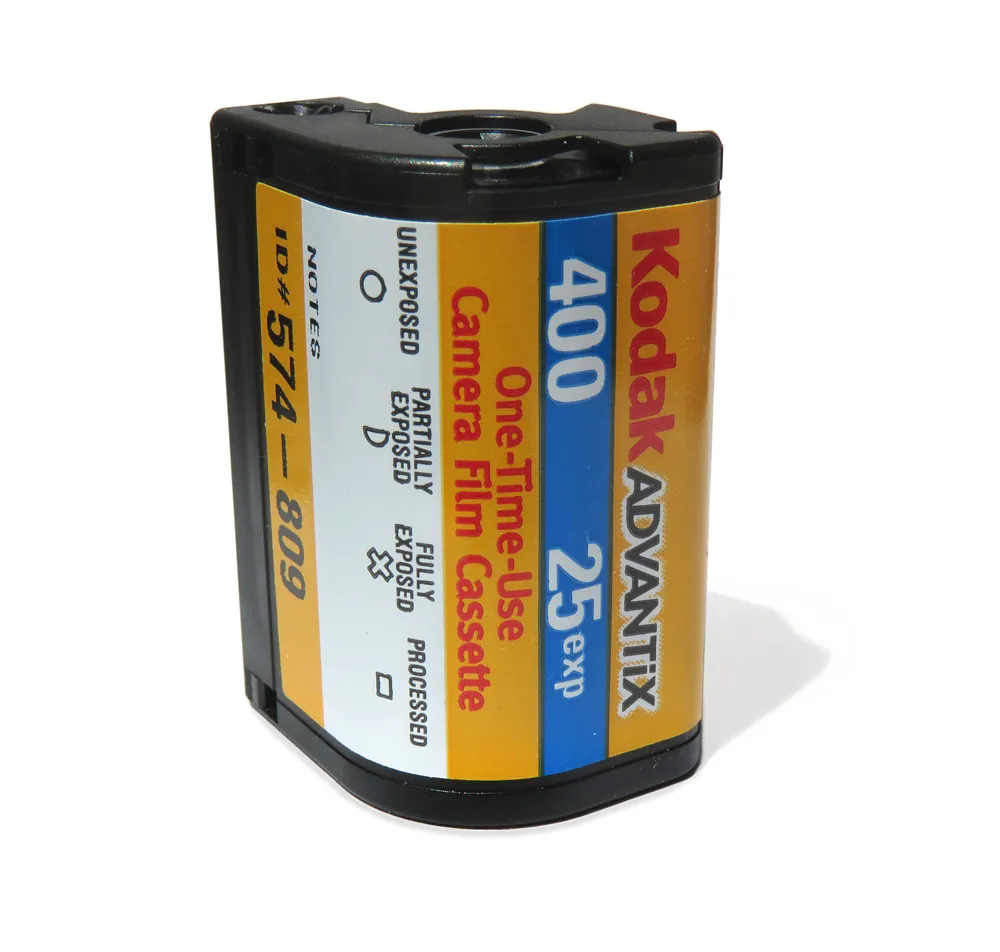
Kodak ADVANTiX 35mm film cartridge Thirty-five-millimeter film has a digital resolution equivalent to approximately 5.6K -- a digital image size of about 5,600 × 3,620 pixels. The finite resolution of film will fluctuate, based on multiple variables (see list below). A film’s image quality depends on its “grain”. Grain begins as tiny silver particles in the film's emulsion. These silver particles have the job of storing the image information. Before the film is exposed, they are light-sensitive. Upon exposure to light, the aggregate of silver particles records a latent image. Then, after the exposed film is developed, the now light-activated silver particles resolve into dots of color (in the case of color film) or shades of gray (in the case of black-and-white film). These dots are known as grain. All of these variables influence the film's resolution:
Scan Samples from 9.5K to 4KThe four image strips illustrate a 35 mm slide excerpt, of a slide we digitized. From top to bottom, it was captured at 9.5K, 7.1K, 5.6K and 4K resolution.
From top to bottom: 9.5K - 7.1K - 5.6K, and 4K. Visit this page to read more about this image. One can see how the bottom-most, the 4K scan, looks blurry and is not holding the details of the grain. In comparison, when you look at the first two images, the difference between 9.5K to 7.1K is barely detectable. We transfer 9.5K, as seen in the top-most strip. Now, with the dominance of digital imagery, film grain can be compared to pixel count or Dots per Inch. The table below illustrates how this comparison applies across various devices.
An Overview of MP (Megapixel), DPI (Dot per Inch), and Print Size Equivalencies
Enlargement LimitsThe renowned photographer Ansel Adams had a simple rule of thumb for enlarging images: avoid printing film to paper at more than 4 × its original size. To illustrate just how small this rule of thumb yields for 35mm film (frame size 24mm × 36mm), Adams would print his 35mm negatives at a maximum of 96mm × 144mm, or 3.8 × 5.6 inches. Adams would not enlarge more than 4 × his film’s original size, because any further magnification would too clearly reveal the film grain. However, when archiving slides, one wants all the grain to be preserved. Transfers at FilmFix are designed for archiving slides.Our transfers exceed your film’s resolution capacity. At 9.5K we out-perform all commercial slide scanners. We deliver an impressive 9,504 × 6,336 pixel file to you. We have the highest optical film transfer system that we know of. If you print at 300DPI (the printing standard), you can expect a quality print from our high-resolution scan. This will be true for images printed up to a size of 21.1" x 31.7" (for 35mm film.) Enlarging from 35mm to a print this size would appear to obviate Adams' rule of thumb mentioned above. In fact, you will see the film’s grain crisply detailed in the printed image. Keep in mind that the quality of the printed image depends on:
Footnotes and Sources1 35mm film 20MP https://pic.templetons.com/ 2 35mm film 21MP https://www.quora.com/ 3 20MP filmscanner Info 4 Braun 6000 (16-bit) if scanning at ME MultiExposure "The tool is called ME in the software and serves as a means to increase dynamic range" up to Dynamic Range 3.8 Dmax (but takes longer to scan) 5 Pacific Image PowerSlide X Automated 35mm Slide Scanner (48-Bit) 6 "Is advertised as 10,000dpi but is 5,000dpi" (source) 7 Some people believe that printing anything larger than what the film will store will yield a better image. In fact, doing so will only increase the grain size and produce bigger more defined grain. 8 At FilmFix we visually inspect and manually adjust each slide for its optimal exposure. The camera we use is a Sony A7R IV, capturing RAW at 14-bit, with a Dynamic Range of nearly 15 stops (14.77 EV). This degree of resolution shows the film grain in great detail, and stores all the image information of which a slide is capable. of 1 small, 3-inch reel MP4 Files at 18fps!A silent almost unnoticed breakthrough has happened in the play-back arena. It used to be that only computers were able to manage the play-back of files with frame rates that did not conform to the TV standard frame rates. These days, your Smart TV Roku Media Player can do it too! This is HUGE for us here at FilmFix, because it means that we can finally provide you with a more compatible file that plays each frame back just like the film was intended to be seen. 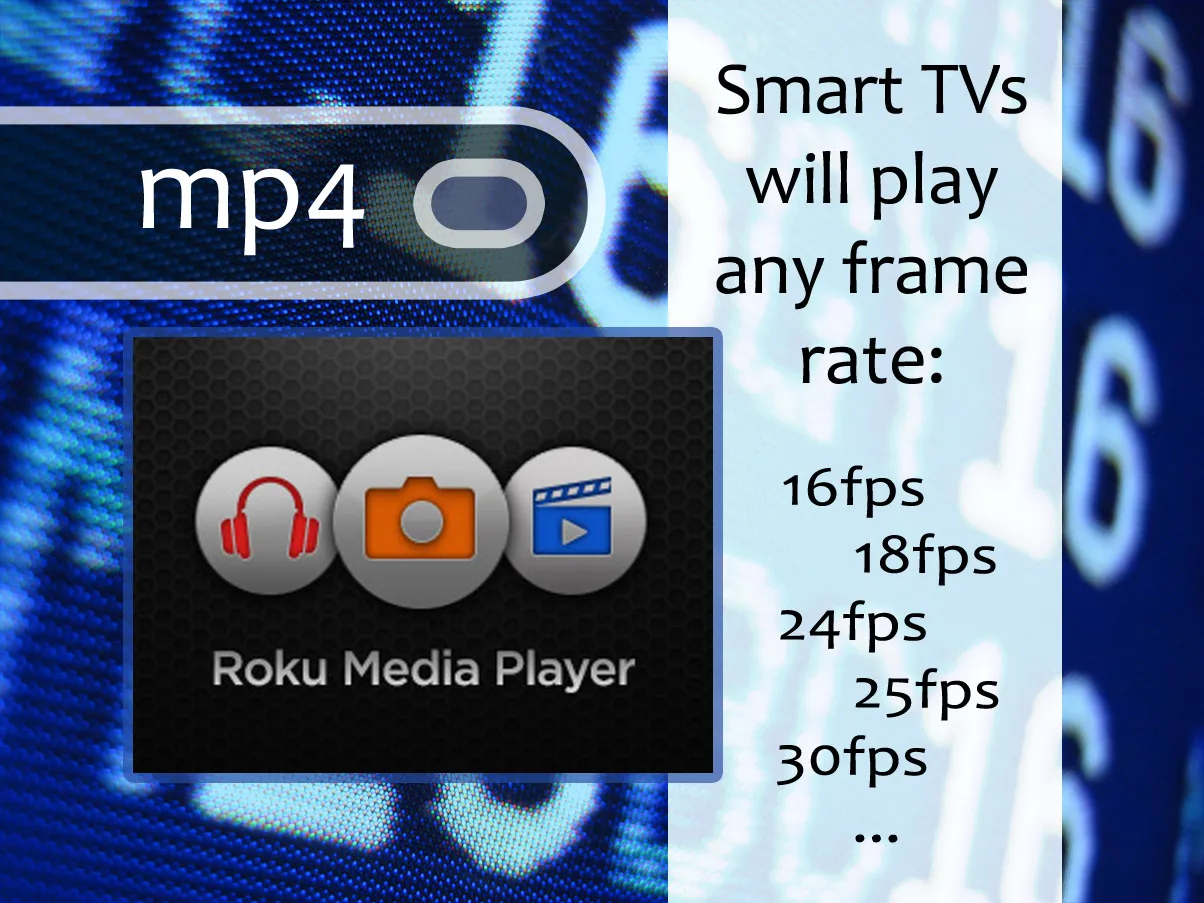
Smart TV's are slowly revolutionizing the way we view our old film. Now they play back 16fps and 18fps MP4 files, just like any computer. This is big, and shows you how small things -- as Frames Per Second -- matter hugely.
This topic is quite geeky, but for the curious reader here is a truncated synopsis on the subject.TVs sync to 30 frames per second (25fps in Europe, etc.) That frame rate is linked to the electric AC current's frequency of 60Hz (50Hz in Europe, etc.) Films are shot at all sorts of different frame rates: 12, 16, 18, 24, 25, 29.97... up to 70fps and beyond. In the past, the only way to get these films to play back correctly, while preserving their true playback speed, was to double-up (or drop) frames to a standard TV frame rate of 30fps.
The old 3:2 pull-down technique for real-time "Film to Video" transferThis technique is standard practice during a film transfer (telecine), and is referred to as the 3:2 pull-down technique for converting 24fps to30fps films. (Note this illustration is simplified -- in reality the 3:2 pull-down is applied to the fields of the frames and not to the frames themselves.) 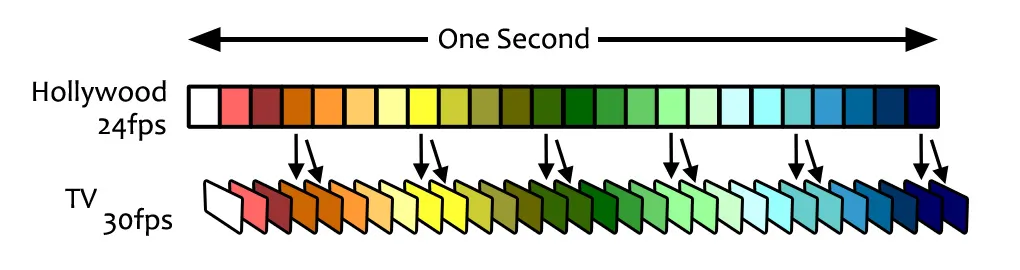
3-to-2 classic pull down from 24 to 30 frames per second The image here illustrates the doubling up of frames when converting film exposed at 24fps to a 30fps TV standard. You may notice that the pattern is repeating every 4 film frames. The first 3 frames get copied cleanly, then the next frame gets doubled up; thus its name 3:2 pull-down. Tid bit: In the olden days, to save the video onto a TV-standard tape was to record the video signal in real-time -- field by field. Today, it all gets captured frame-by-frame, manipulated and kept frame-by-frame until it is time to produce the final output. It's a much different approach.
The outdated approach of outputting 18fps film to 30fps files for your TVNow this is where it gets ugly, because converting 18fps to 30fps (or 29.97dps) is just messy. It is doable, but as you can see, in the image below, the pattern is less regular. That messiness is particularity noticeable when the camera-person shot long left-to-right (or right-to-left) panned scenes. It ended up looking jerky and far from smooth, upon play back. 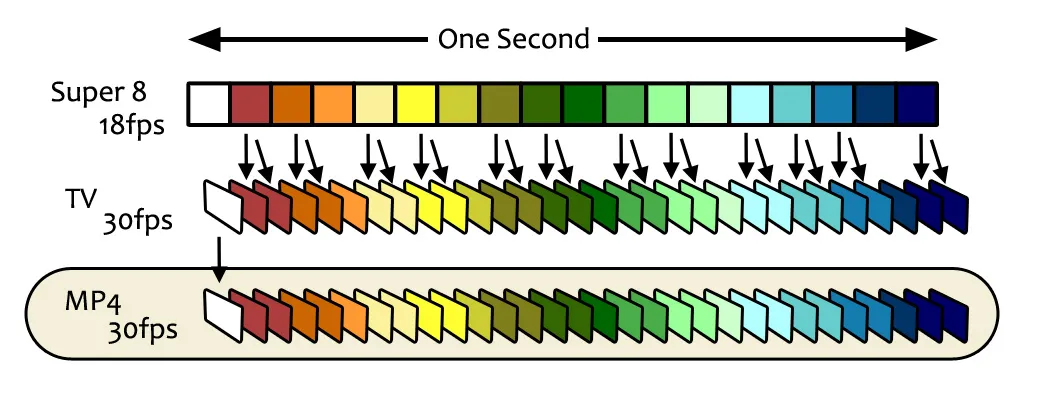
18-to-30 pull down from 18 to 30 frames per second This shows the traditional (but dated) approach of providing you with a playable MP4 file or any of the other master file (ProRes or AVI.) Note that we, FilmFix, used to provide you not with 30fps but rather 24fps files, because a 24fps file is a Blu-ray frame rate standard that is Internationally understood and compatible. Now imagine if you have an even lower frame rate, say, 16fps for Double-8 film? This lower frame already looked bad and then ... it got worse.
A new improved way to depict 18fps film on your Smart TVYour old TV operates at 30 frames per seconds, whereas Smart TV's have a higher frame rate of 60fps (the same as your average computer monitor.) As you see in the illustration below, the higher frame rate has the advantage of evening out the color-differences better during playback. With the above illustration at 30fps it was more obvious when the frame doubling did not line up properly. For instance, orange has just one frame in the MP4 file (and on the TV) whereas in the Smart TV 60fps that one orange frame is better represented and blends in better. Most importantly -- play-back of MP4 files at a 18fps frame rate is now supported! Actually, any specified frame rate will work. The Roku Media Player from your Smart TV knows how to interpret the speed of your MP4 file to back it back correctly. And now this makes it possible for us to produce MP4 files (and other master files) that offer a 1-to-1 representation of each Film Frame; be it 18fps or 16fps, or any other frame rate, without having to double up any frame in your MP4 file. 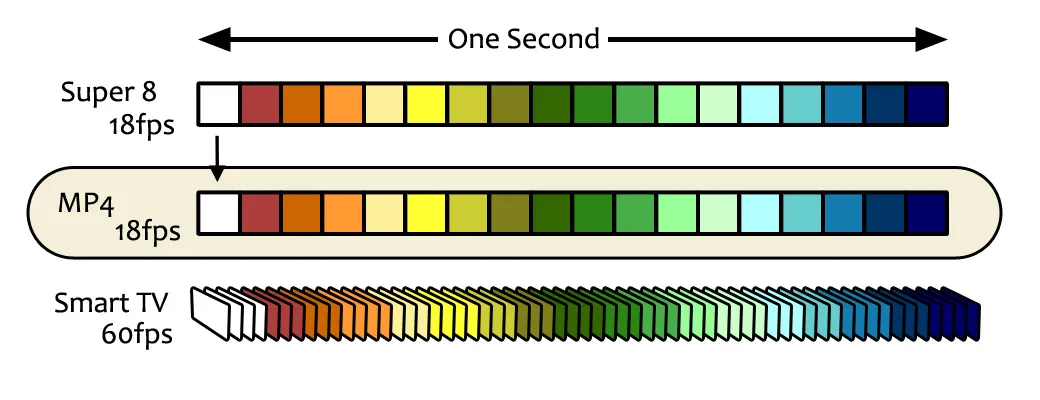
no pull down (true frame rate) playback at 60 frames per second Your Roku Media Player will know how to stream an MP4 file that has an unconventional frame rate (such as 18 fps.) Exciting! The upshot is: Your Smart TV is able to play back MP4 files that have varying frame rates, just like your computer can. So, this finally opens up the possibility of truly changing the experience of how films that were originally shot at 16 or 18fps, or any other frame rate, are played back. So much for the truncated synopsis. (For the even more curious person, there is more to it -- here. For instance there is an explanation about Drop and Non-Drop Frames.) Enjoy!
The True Frame-Rate Advantages
The True Frame-Rate Disadvantage
How to check your MP4 file's frame rateGo to the file's "Properties", right-click, and under the "Details" tab (or similar), you'll see this info: 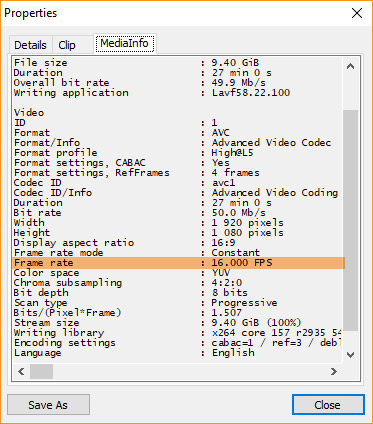
In MPC-HC
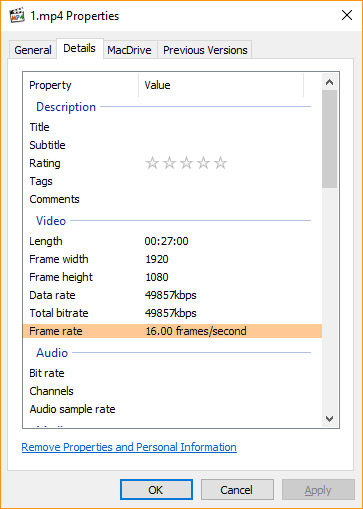
In Windows Properties FFMpeg examples
FFMpeg Changing Frame Rate, without re-encoding
To output the final 16fps ProRes files, without re-encoding use the code below. (Note: I added the third line of code
FFMpeg Changing Frame Rate going from ProRes to MP4
To re-encode from single frame (any fps) ProRes to a 16fps MP4 (without audio and some light sharpening.) It will process at approximately the speed of 1x. (The same will also work for AVI to MP4; just change the second line of code to read:
of 1 small, 3-inch reel DIY Upscale SD to HD (free)Let me share with you a hidden treasure that took me a while to find! For a long time, even though I was using an expensive editing program, I was not getting satisfying results when upscaling SD video (i.e. VHS tapes) to HD. I sure am now! Note: If you are a competitor of ours, please, stop reading here. ;) It was thanks to Andrew Swan, a respected professional blogger writing in great detail about this subject, that I now proudly offer affordable, high quality HD up-scaling. If you're curious about the cost of our upscale service, please follow the link to our online estimator tool: cost for transferring and upscalling 10 tapes of 1 hour each. You may adjust the current numbers according to what you actually have in your video collection. Or, if you want to try your hand at "bumping it up" yourself, you can follow Andrew's instructions, below. A few things to keep in mind, before you start. It takes quite the investment in time and electricity! Expect a 1 hour tape to take 3 hours worth of processing time -- and that's on a speedy computer. My office gets warmer, even with my water-cooled computer, as it processes away on these files. Ah, but the results are so well worth it. 
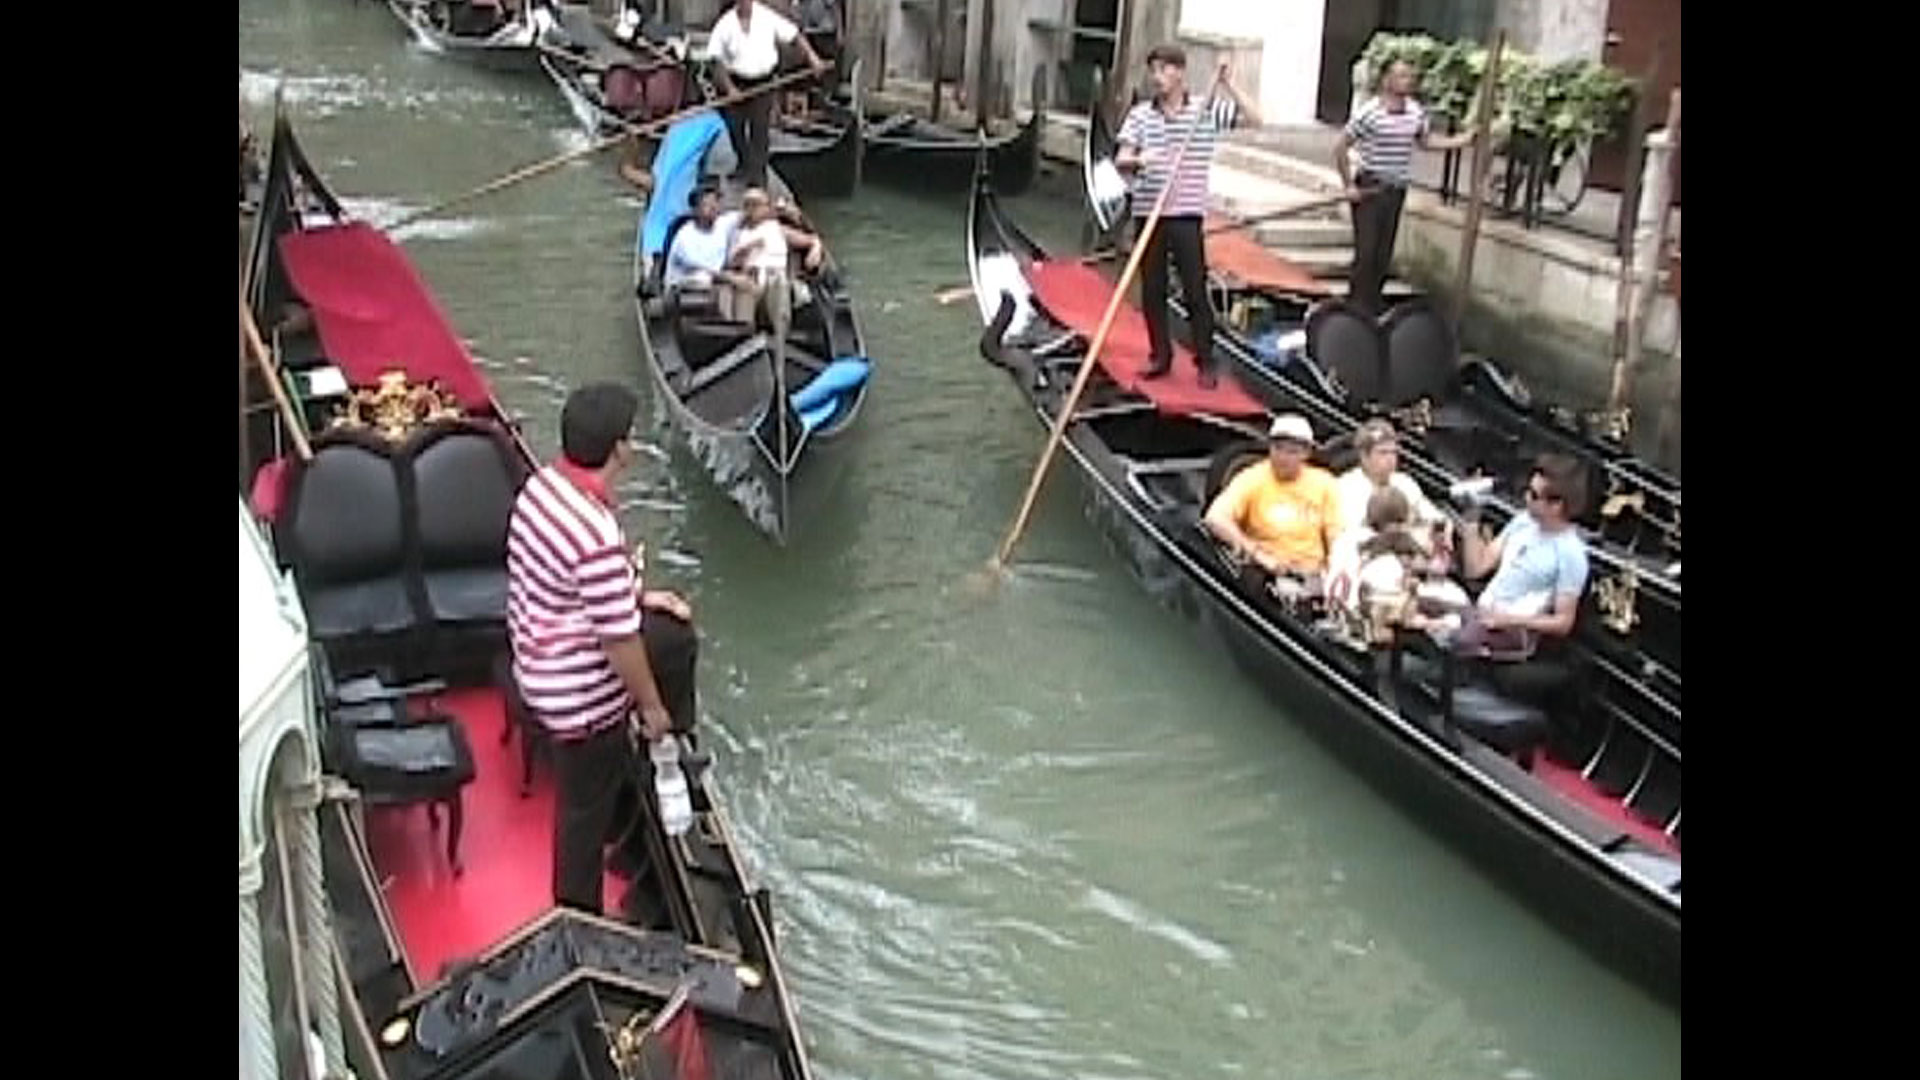
programs needed to upscale video Tutorial by Andrew Swan - step by step videoAndrew Swan has been blogging since 2008 about video processing. In his 45 minute YouTube video here, he explains how to instal 32-bit and 64-bit AVISynth+, QTGMC, and FFMPEG side-by-side; use AviSynth+ and all the required filters to properly de-interlace and upscale your SD video files to HD 720, or 1080. He'll walk you through all the steps of downloading, installing, and processing an SD video file. Some To-Dos along the wayBefore starting, it's a good idea to prep your files. Clean up the start and end times of your initial capture (file) by editing out the "snowy" parts. Bring the glaring whites and deep blacks into a more pleasing viewing range. Pay attention to the color intensity in your highlights and bring those down a bit in order to bring about a more natural looking result. Now that he files are cleaned up a bit, it's time to upscale. Up-Scale AutomationIf you have many files to upscale you may be interested in using a Python script to help you automate the process. I programmed a Python script that helps you batch-process one file after the other, without having to call the script again for each file. You can find (the script) that I shared on Andrew's Blog, or you can directly downloaded the script from our FilmFix website by clicking here. Just edit the lines of code to reflect your particular file locations, and name the files numerically. (Sorry - that's all the support I can give on this subject, here. For consulting, naturally, I need to charge my hourly rate.) Other Up-Scaling methodsThere is an upscale method called "super-resolution". Super-resolution up-scalling utilizes a different approach and yields a different result. You would end up with a non-TV standard size video that will have to be downsized to fit either HD 720 or 1080. And, this method takes even longer to process - not an appealing option. Video Upscale samples coming soon... of 1 small, 3-inch reel Our Super-8 Transfer as Compared to TheirsRecently, we were given a tremendous gift! A customer, Rob C. of Washington, asked us to please re-do a transfer he had done elsewhere, because he was disappointed with their work. He felt some trepidation sending his reels to a second company for fear our results might be similarly dismal. Well, he was so pleased with our transfer that he compiled a comparison for us to use on our website's blog. What a gift! Below are his words: "I had some free time, and I created a high quality frame capture of your conversion, the same frame from the other company conversion, and a merged version where I show how their scan only covers 40% of the actual image you captured (i.e. they lost 60% of the frame). I selected 2 different frames where it’s impossible to recognize the people, and you are welcome to use these in your website if you like (please do not use the others). I think it highlights the quality you offer pretty well." 
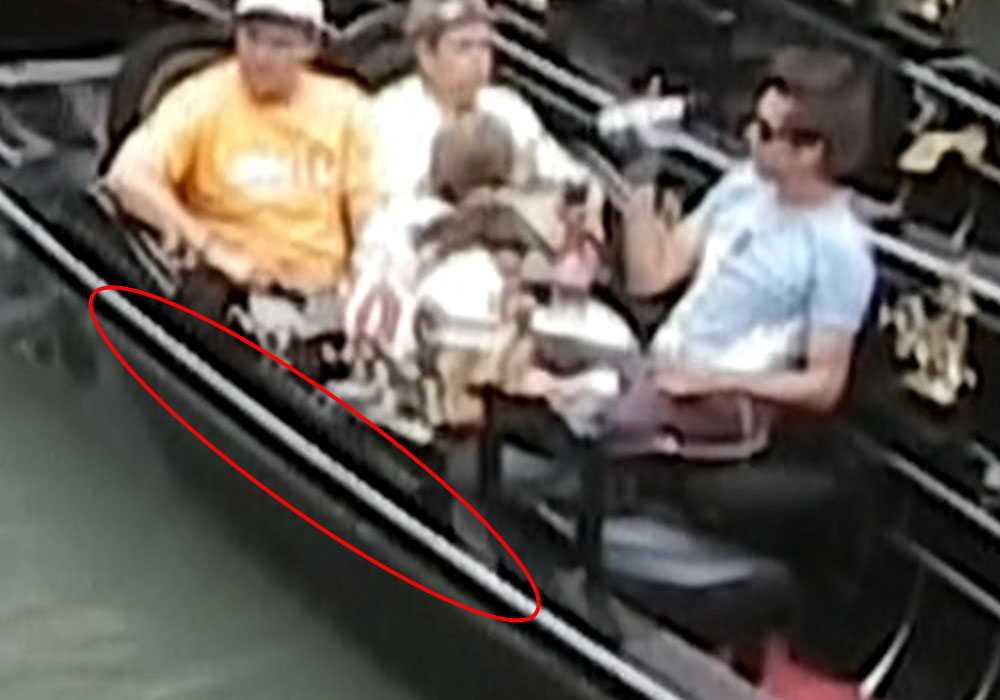
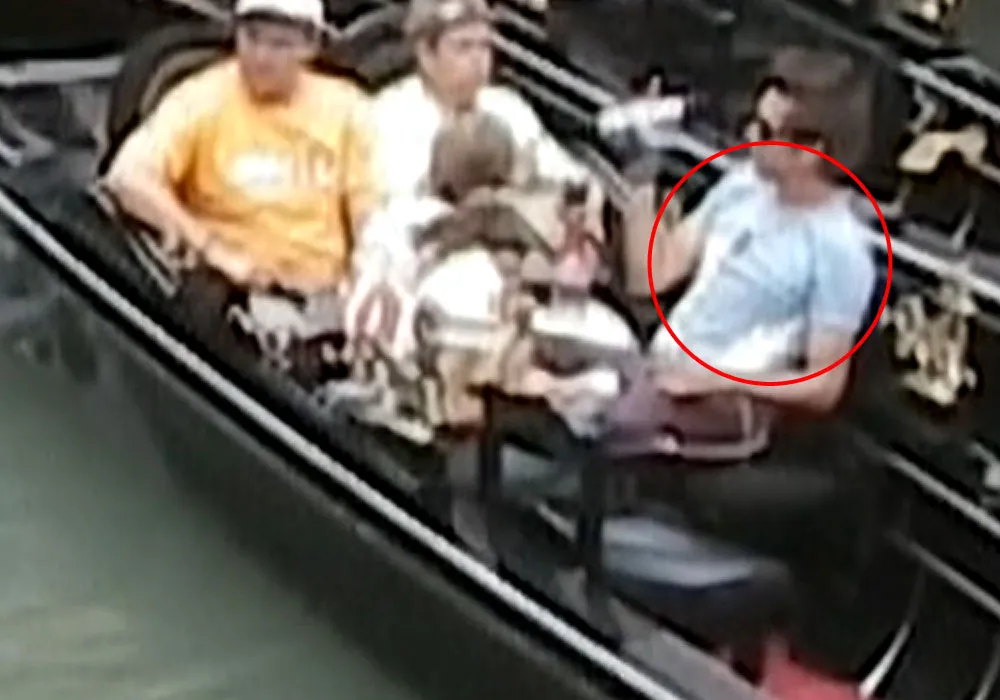
Here the two transfers are overlapped. Theirs is inside and ours is the outer edge. See the beautiful colors we were able to restore?
1st transfer performed by the other company.
Our FilmFix transfer At FilmFix we capture the entire frame from edge to edge. Because of our superior 10-bit capture, when a film's colors are challenged, we are able to improve them to a large degree with the "secondary color correction" image enhancement option. And, when a film was over-exposed or under-exposed, we can improve that to a large degree as well with our added option of "secondary color correction." 
1st transfer performed by the other company
Our FilmFix transfer -- We capture the whole frame, from edge to edge.
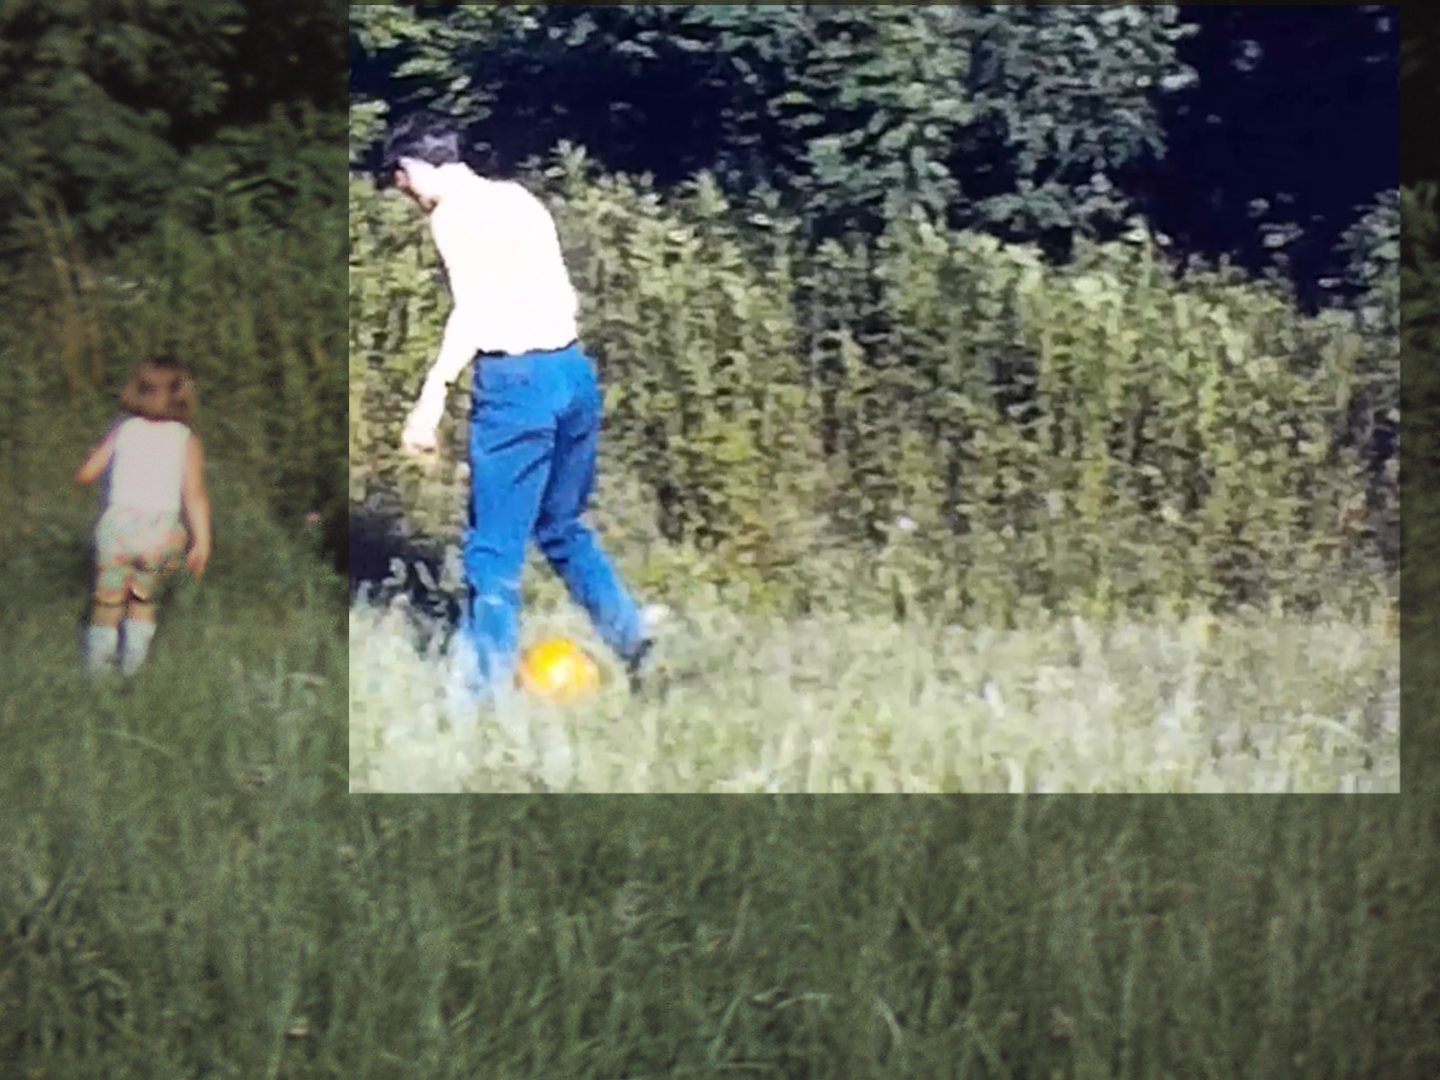
By overlapping our transfer and theirs, you can better see what is missing in their work. Their image is muddied, the colors are completely off, and their image lacks crispness. You'll note that the grass on the outer edge of the above example is not very crisp. This is because "grain reduction" was applied to the transfer. "Grain reduction" has advantages and disadvantages. It gets rid of many scratches and imperfections, but it does tend to slightly soften the image. That's why when a customer chooses "grain reduction", we like to provide their transfer in two files -- before and after -- grain reduction was applied. (So, check that box on the order form if you want both versions.) The two files will require a bit more data storage, but it's very rewarding to have both versions of the final footage. Customers love it! We are sorry to see some of the shoddy work that is being done in this industry. It does nothing for the industry's reputation. While we always enjoy restoring our customer's films, it is such a pity to learn they've wasted their time and money elsewhere before finding us! of 1 small, 3-inch reel 8mm Wolverine MovieMaker-PRO RentalIf you don't know what's on your family's treasured films, you can rent a Wolverine from us for a couple of weeks and have a look-see! Note: Operating the Wolverine MovieMaker-PRO does require technical know-how. FilmFix Wolverine Rental - (U.S.A. only)UPDATE: We are sorry. The Wolverine is not available (read more) It's $80 to rent for 2 weeks. You pay shipping, both ways, and fee varies depending upon where you reside, in the U.S.. We are located in Ojai, CA and ship out via USPS "Priority Mail" with a "Signature Confirmation." Also, a $300 refundable deposit is required and is returned to you once we receive the machine along with its accouterments, in fine working order. Shipping fees range between $16 and $65 (depending upon where you live in the U.S.) 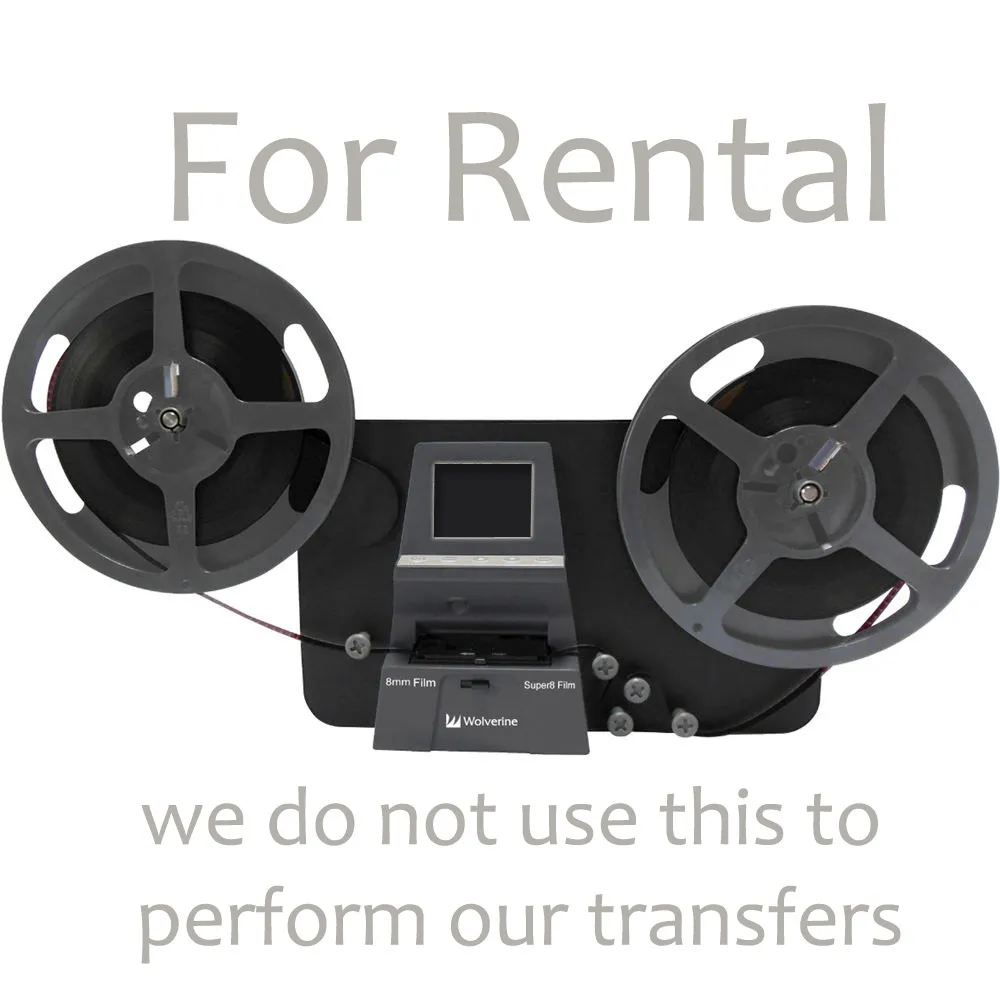
Wolverine Data MovieMaker-PRO 8mm and Super 8 Converter - new $400 / we do not sell. If interested in a rental, please fill out our FilmFix Wolverine Rental Agreement and send it to us as an attachment via email, or 'snail mail' works too. The reason we bought a Wolverine MovieMaker-PRO

Wolverine PDF User Manual Since we were receiving multiple inquiries asking, "Do you use a Wolverine?" to perform your transfers, we thought we had best know what type of transfer the inexpensive machine delivers. So we bought one -- their better model. Our results are markedly different. The effort a customer needs to put forth to use the machine is also markedly different than a customer utilizing our 8mm transfer service. Details about our professional 8mm transfer equipment Clearly, we offer our customers beautiful film transfers by attaining all that is possible from any given film. We offer the additional image enhancements of "image stabilization", "secondary color correction" and "grain reduction", if a transfer calls for it. Plus, our customers have repeatedly noted our great customer care, and it shows in our stellar customer testimonials (dating all the way back to 2005.) We hope you don't hesitate any longer ... those memories are fading off the films stored in a box in the drawer or closet.
UPDATE: We are sorry. The Wolverine is not available for rental. It's broken and we do not plan to repair it, at this time.IMPORTANT NOTE: The Wolverine does not capture SOUND. If your film has sound, you won't hear it. However, we do capture sound, in sync, and at no extra charge! 
FilmFix does not use a Wolverine for its transfers. Click on image to read more about our professional transfer system. Also, if your film has perforation damage, it's likely you won't be able to transfer it yourself, but we can! 
Shredded leader - needs replacing. We'll replace it at no charge.
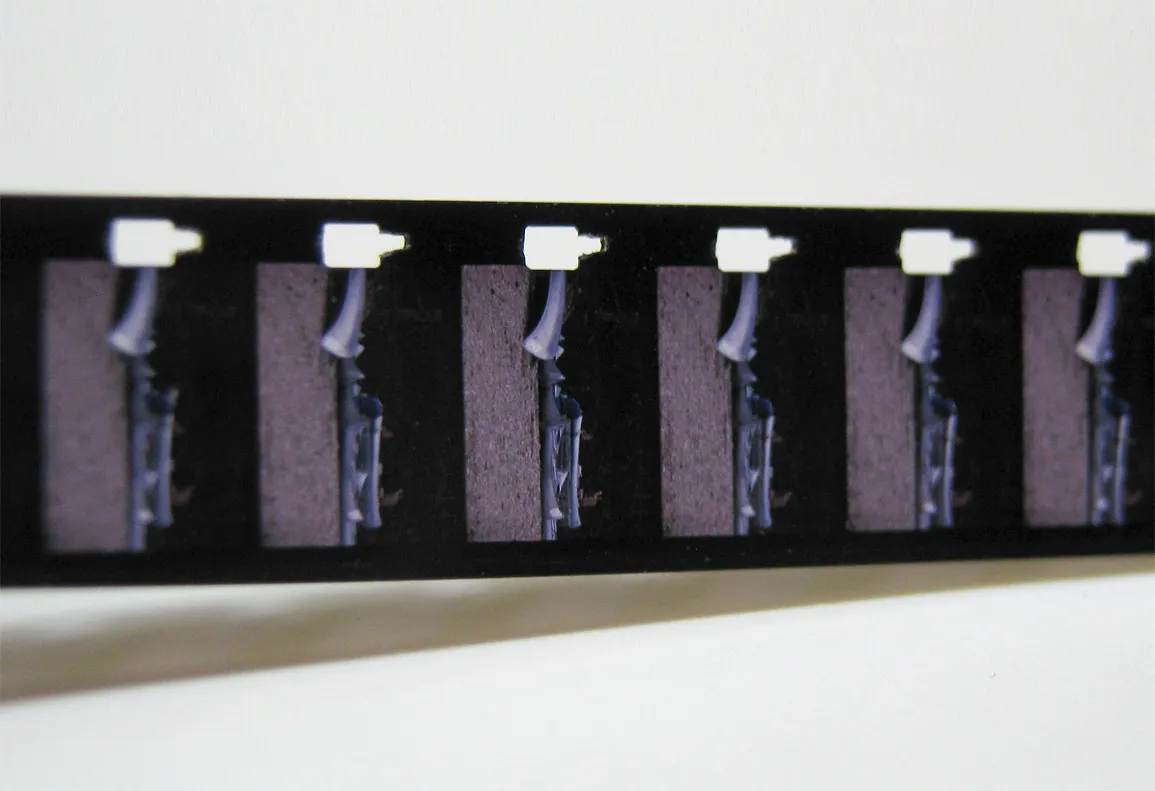
Damaged perforation holes - our system handles this nicely! Knowing what you have, before sending it off, is a nice way to organize your collection. Then, we can professionally transfer your precious memories in 2K resolution to obtain the best possible full-HD (High Definition) outcome. We'll put your transfer either onto a Blu-ray, USB stick or hard drive or a combination of your choosing. We can also put it on a DVD, but that only holds a lesser quality "Standard Definition" transfer. of 1 small, 3-inch reel Super-8 Close-Up ShotsSee Mother Nature, shining brightly, in this fine footage! The camera work of these two clips was exceptional. Thank you, Mr. Commons, for letting us use this as a sample transfer on our website. Clip courtesy of Mr. Spencer Commons, with expressed written consent -- All Rights Reserved. of 1 small, 3-inch reel Cracked and Discolored Super-8 Test-TransferMaria was thrilled with what we achieved on her small 3-inch Test-Transfer reel. Therefore, she granted us use of fun parts of it on our website. The Super-8 film was littered with tiny emulsion cracks. Originally, the multitude of cracks provided for a very hectic viewing experience. So, we used our additional image enhancement option of grain reduction to remove these cracks as best we could. We also restored some of the discoloration by means of our secondary color correction work. The film had turned a strong magenta, in color, and had lost its yellow color layer. The result: The film looks more natural. Clip courtesy of Maria Ikenberry, with expressed written consent -- All Rights Reserved. of 1 small, 3-inch reel Watch Our Top-Notch Super-8 Film TransferI, Nathaniel, very much enjoyed transferring this particular collection of mini-documentaries which the Rene Family filmed during their International vacations. These treasured films were very well stored, and the camera work was outstanding. Clip courtesy of Robert M Rene MD, with his expressed written consent -- All Rights Reserved. of 1 small, 3-inch reel Children to the Rescue (Film from 1938)Classic all metal fire engine, in high pursuit - even amidst snowflakes! Here is 8-decade old 8mm black and white film with all its charm ... and then some. We use this clip with expressed written consent from Phil Hugly -- filmed by Lina Studer nee Dubois. All Rights Reserved. of 1 small, 3-inch reel Old-Time RacersFreeport Stadium May 1958 winning driver of car 269 George Peters.
Clip courtesy of Richard Girards, with expressed written consent -- All Rights Reserved. of 1 small, 3-inch reel Unique 8mm SplicingOne day, we came upon the most unique 8mm film splicing technique ever used -- a staple. It sure made us laugh! 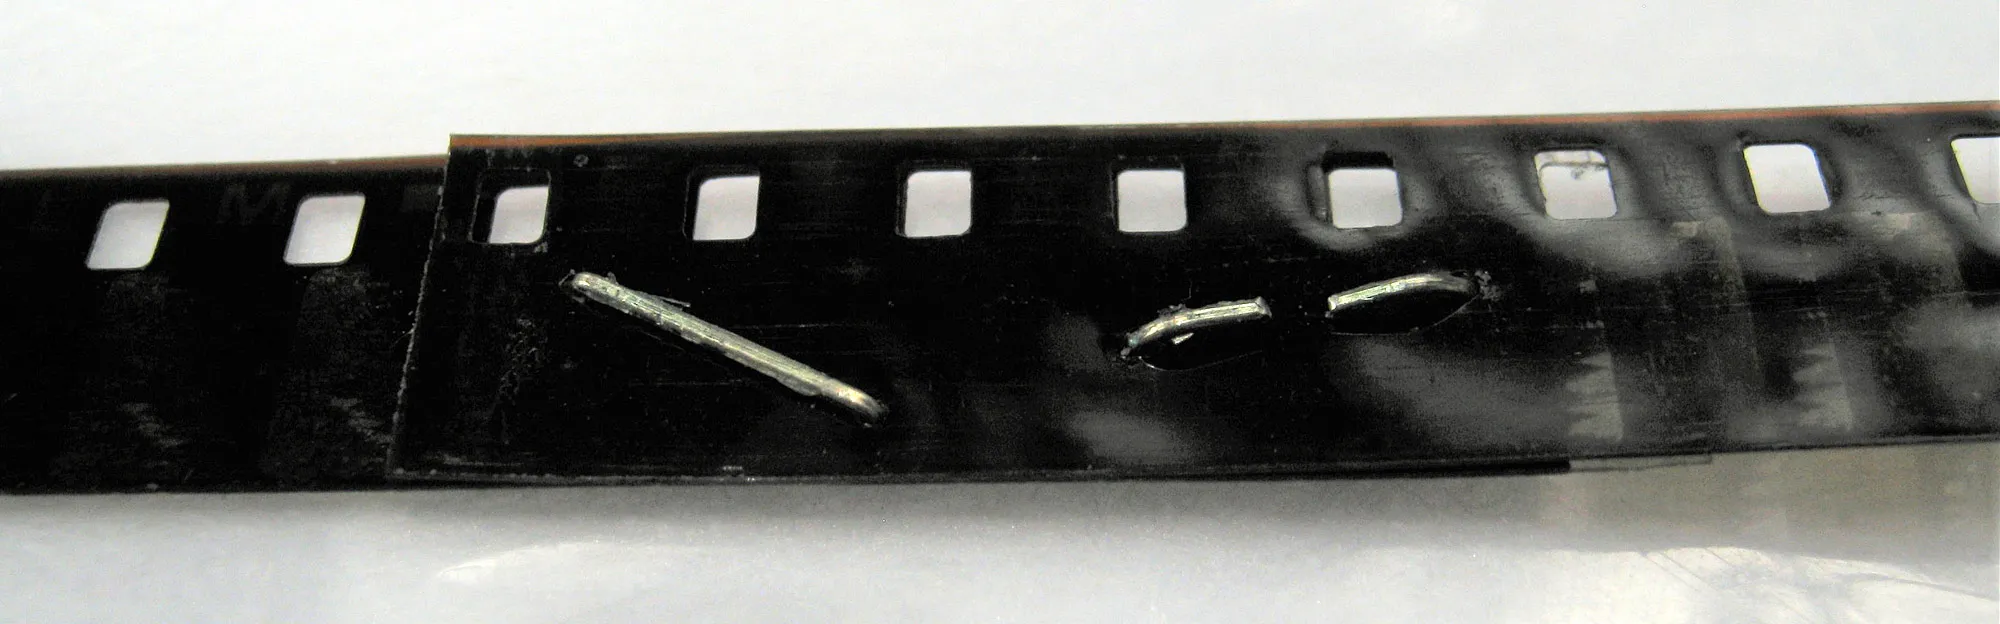
Winner of most unique splice award In all the years of seeing the various film splice work that our customer's have done, the use of thin metal was something that really surprised us. Hey - it worked for them in the moment but would not do in our equipment. With each reel, we carefully check all splice for integrity. If we find them broken, weakened or exceedingly poorly done, we replace three per reel -- FREE of charge. If more splices are needed, in order to affect a nice transfer, we charge a nominal fee for additional needed repairs. Most reels don't require more than three, if that. 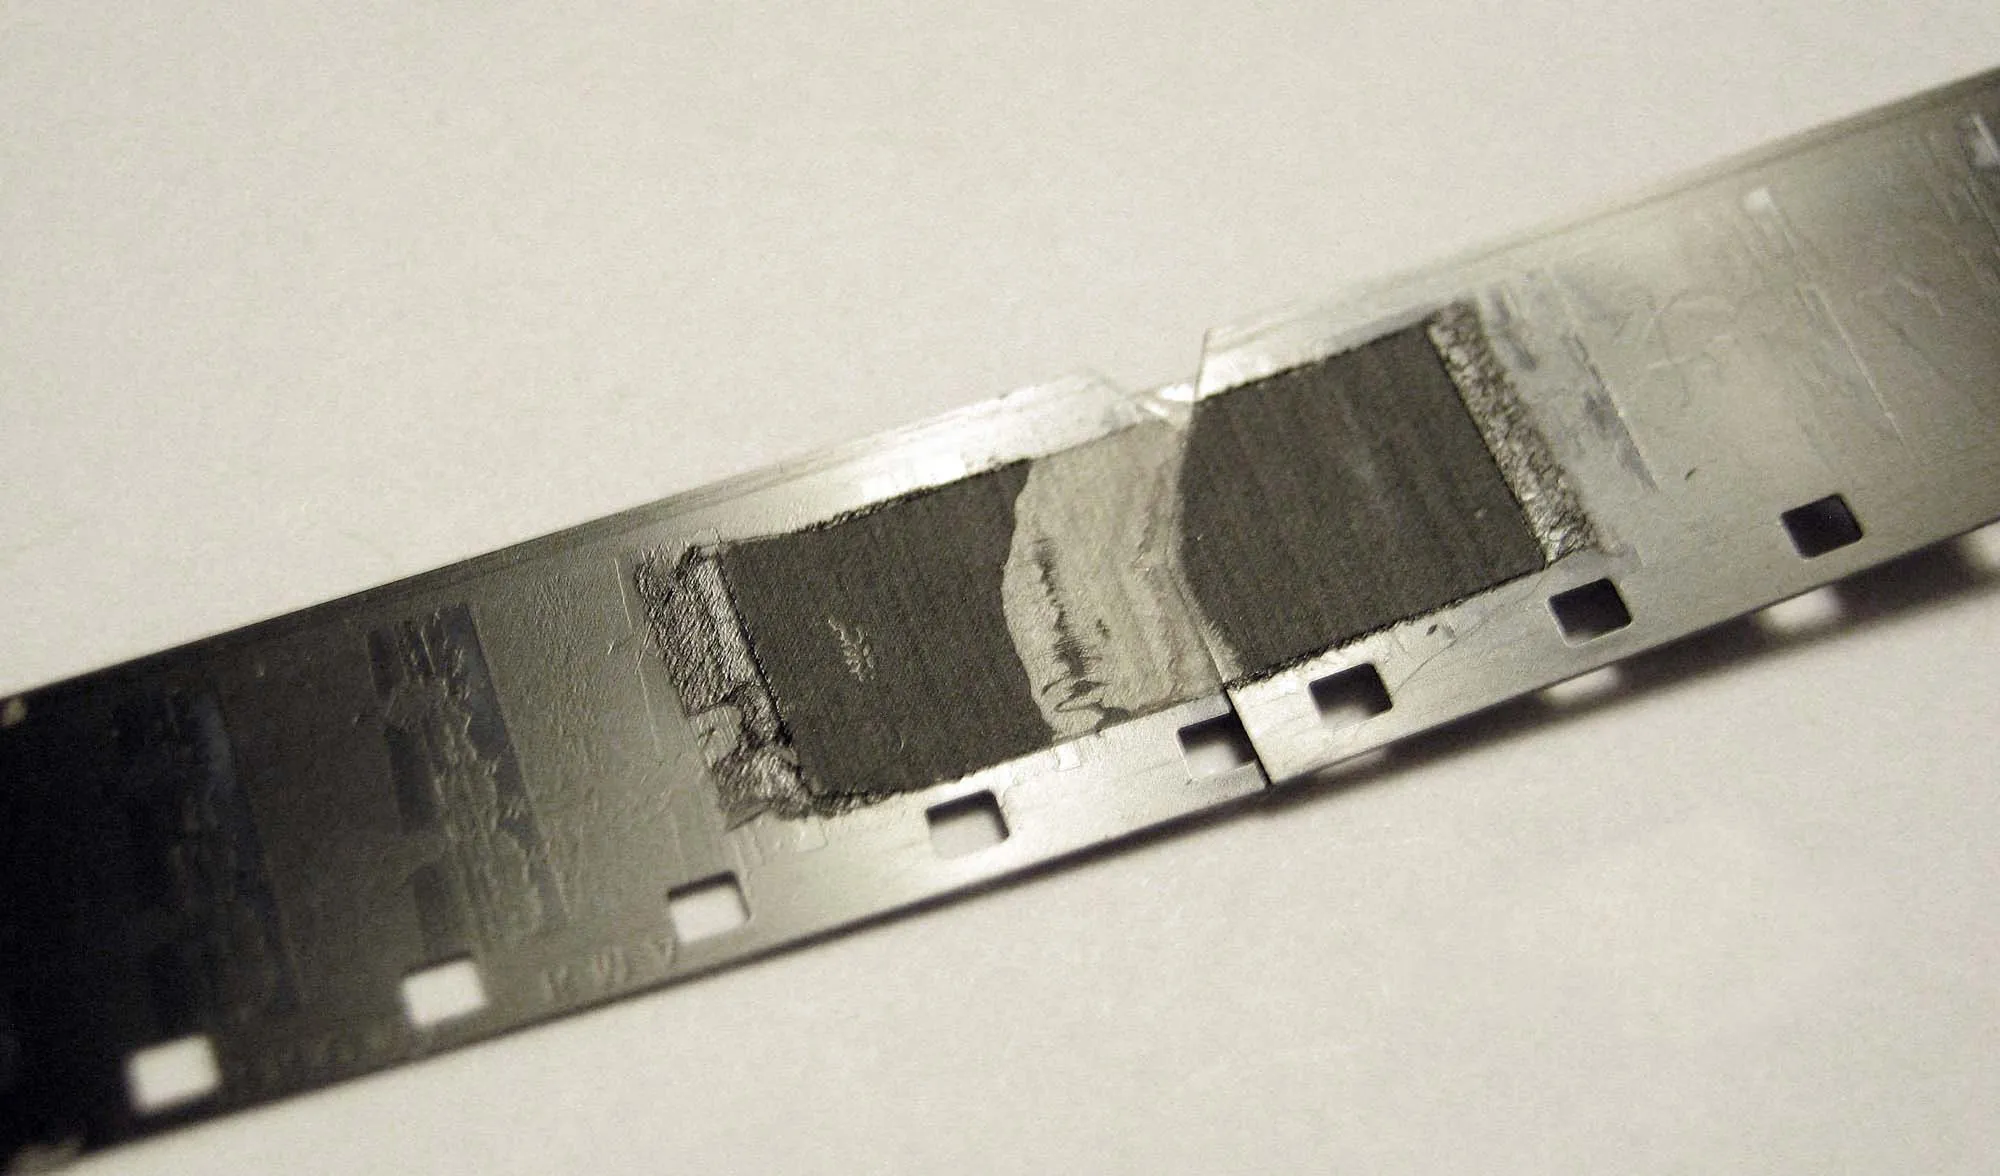
And the "runner up" award goes to ...... user of white "first-aid" cloth tape (long since turned brown.)
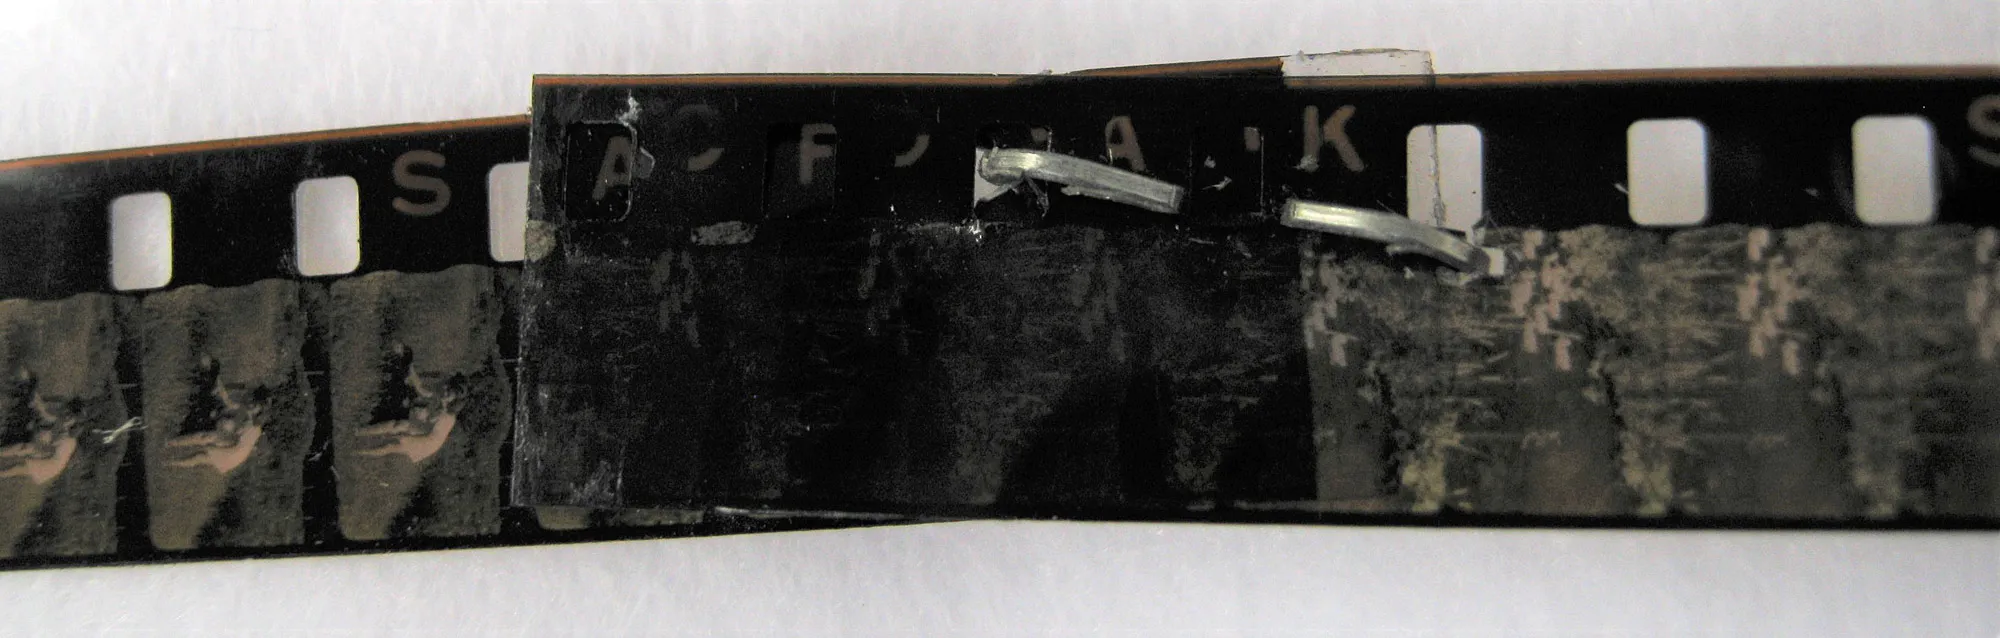
A variation on the winner. of 1 small, 3-inch reel Charlie Chaplin Promoting "THE KID"While all cherished footage that we have ever transferred is an honor to us, here at FilmFix, this is the most treasured footage we have ever digitized. It's short but very sweet, and it proves that each second of every reel is being monitored, while we preserve our customers' precious memories. These brief moments were shot on 8mm film and shows Charlie Chaplin self-promoting the movie "The Kid" -- the one which brought him into the limelight and International fame. The parade took place in Switzerland, circa 1932. We assume it was that year based on the date hand-written on the film canister, even though he released the film in 1921. This must have been how he started to endear himself to the Swiss people, long before he made his final move there to the US. Apparently, Charlie Chaplin was know to self-promote his movie by "dressing up" in his iconic Tramp outfit then joining parades. Seemingly, the parade had other characters from other motion pictures but nothing that I could definitively recognize. In this clip, do you notice how Mr. Chaplin is using a whistle in order to draw attention to himself? We think it's a brilliant way to draw eyes toward him! To explore more about Charlie Chaplin and his Swiss connection, please visit this page. Use of clip with expressed written consent from Phil Hugly -- filmed by Lina Studer nee Dubois. All Rights Reserved. of 1 small, 3-inch reel What about Moldy-Looking VHS Tapes?
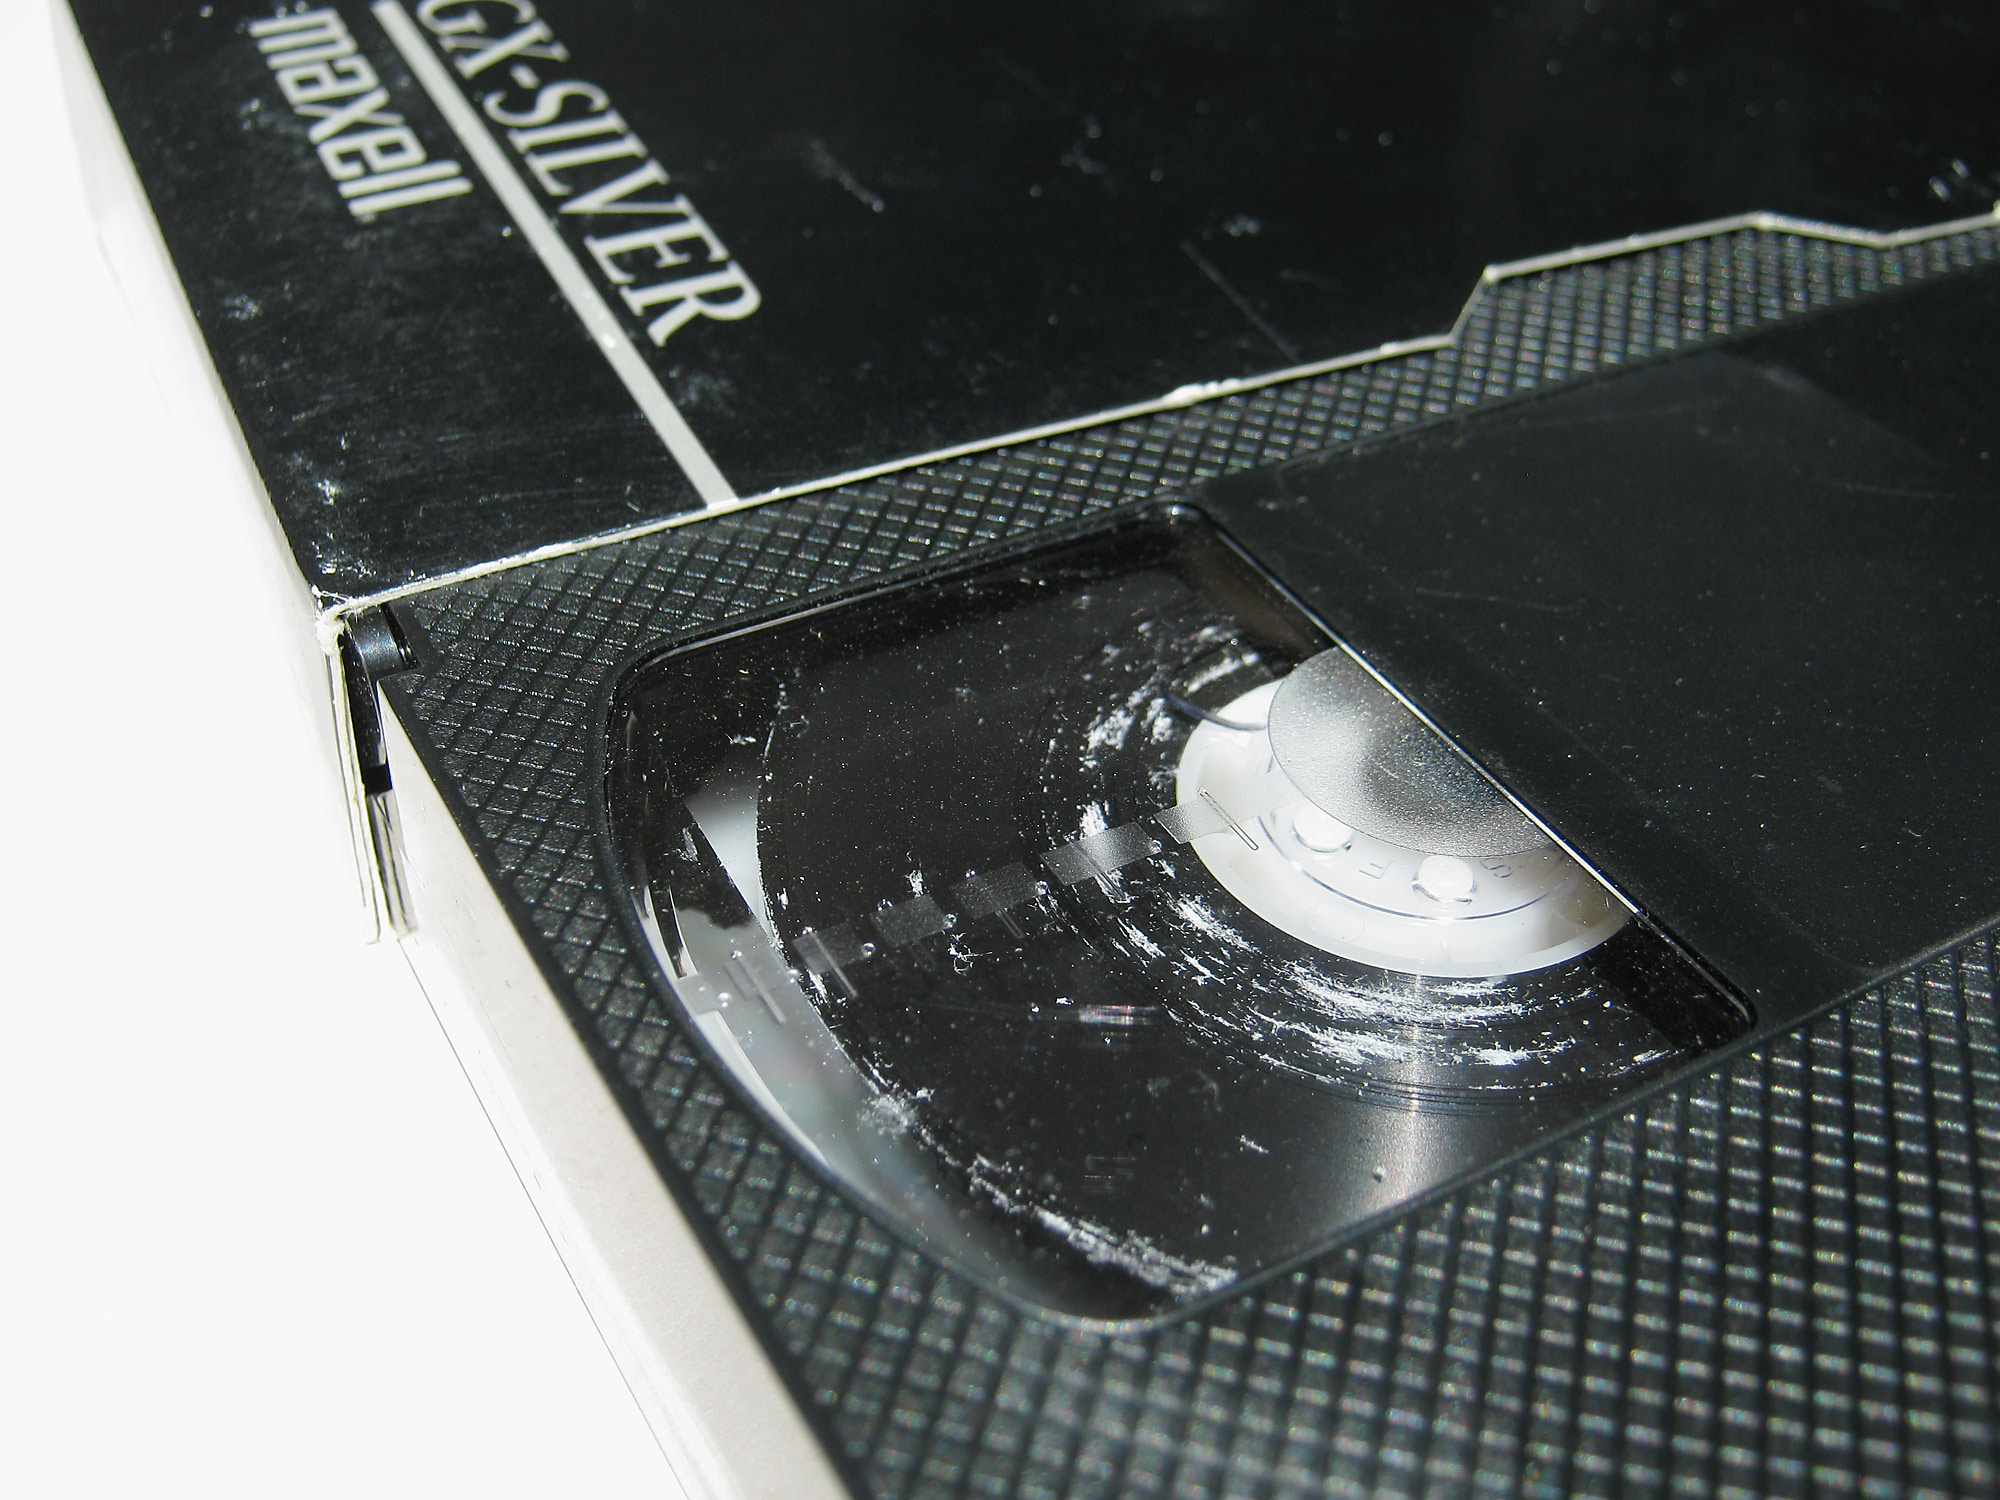
Mold on VHS tape - or what is it? Evident crystal-like white powder looks like mold at first glance. In realty it is a chemical reaction that happens as the VHS tape slowly breaks down. A tape that looks like this will not play back in your deck for very long. Soon enough, the fine, flaky powder will cover the inside of your VHS deck, and the VHS deck head which reads the tape will stop producing a clean image. You will start to see more and more dropouts, as that powder continues to build up on the head. However, we can probably fix this - cost: $35.00 per tape. (If you have more than six tapes, the rate is $30 per tape.) 
Inside look -- close up of powder build-up caused by older degrading tapes

VHS drum head cylinder which reads the tape Eventually, the deck will need to be sent out for cleaning, because those long cotton swabs dipped in rubbing alcohol will only work as a "quick fix" for so long. The tapes below required a special hand-cleaning treatment before being transferred. First, the tape case is disassembled then carefully cleaned. 
Opened VHS tape is ready for cleaning The activity happens in a protected environment. 
Cleaning machine is used in a protected environment. Paper tape rolls continually get renewed as tape is cleaned.
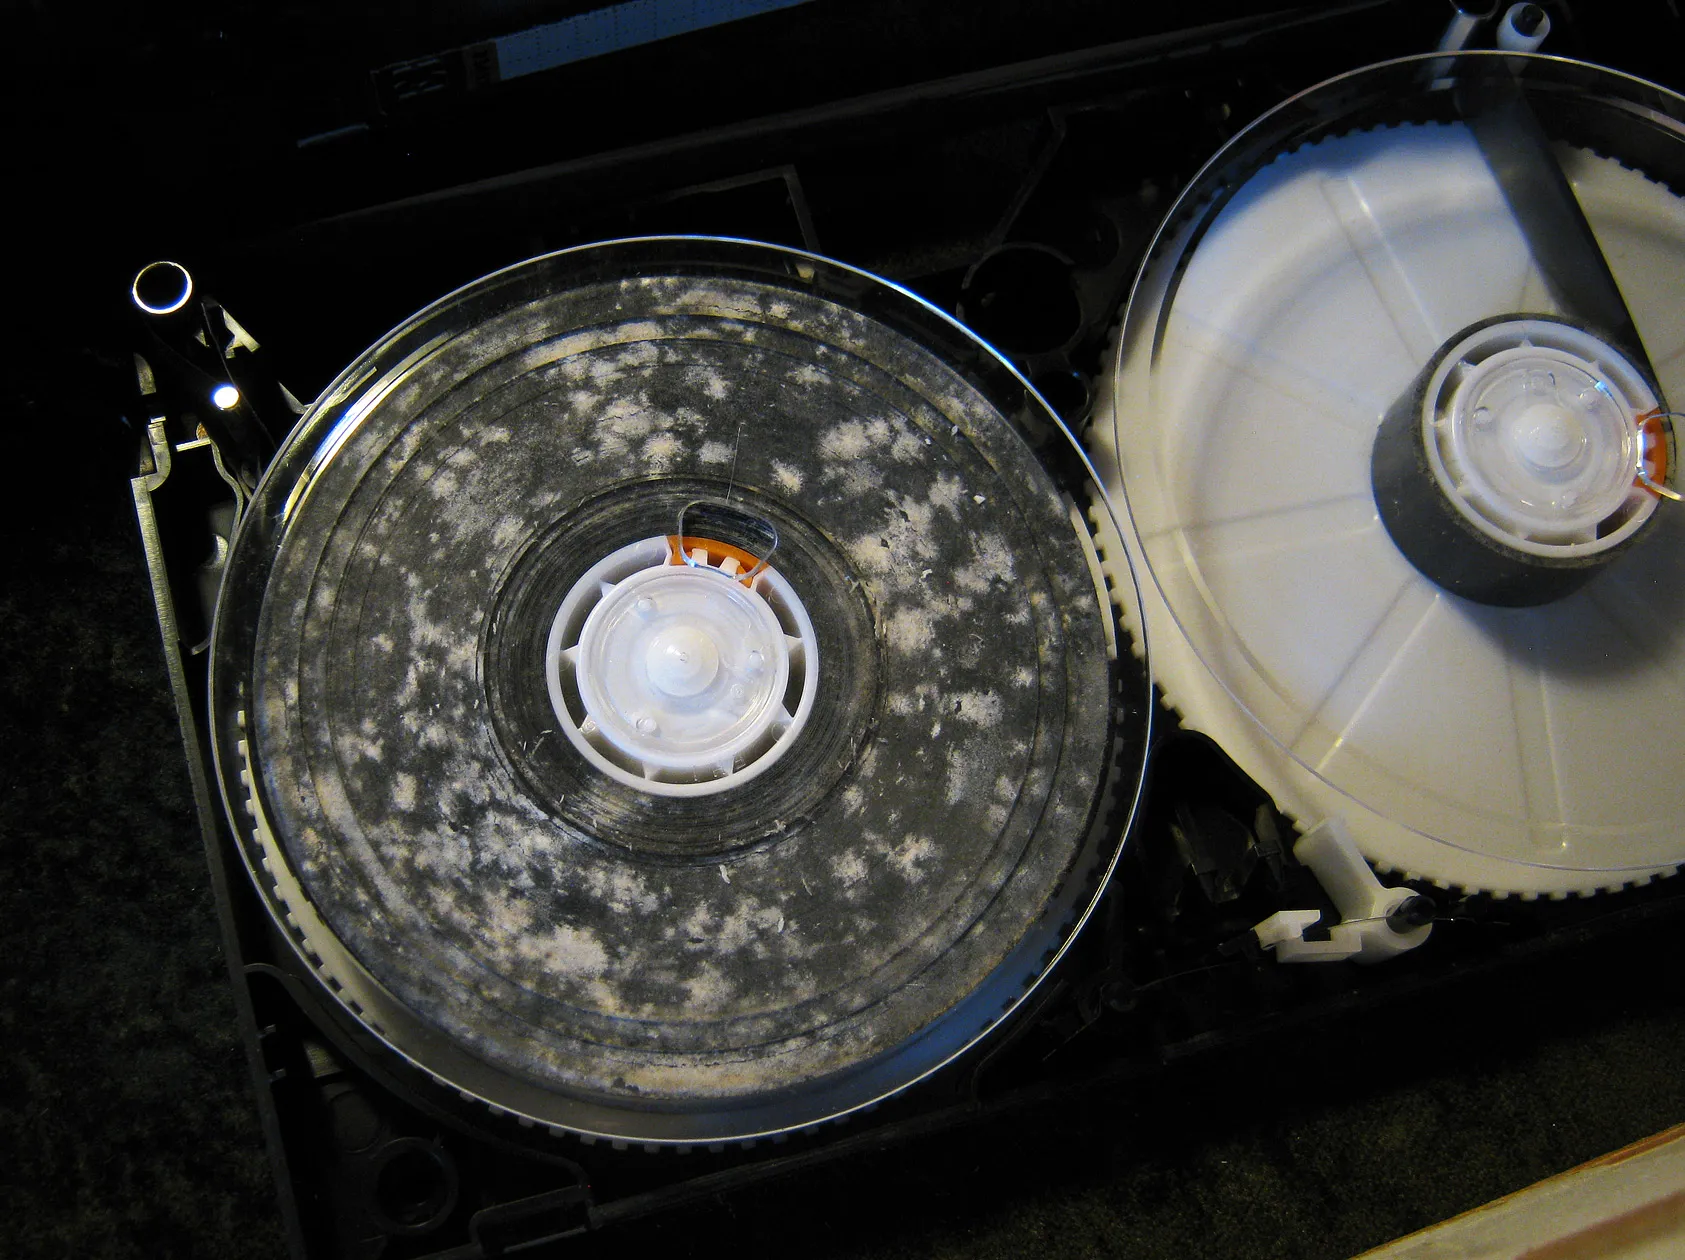
If your tapes are as moldy as this one, you mustn't expect miracles. We will run it through our special mold reduction/removal process and try to achieve a decent transfer from it. However, we will charge two times our regular price for this special mold reduction/removal cleaning process. It takes at least twice as long to clean a tape with this level of damage. of 1 small, 3-inch reel Grain-Reduction in MotionWe'll start by showing you the end-result, so let's work backwards. This short clip shows the effect of grain reduction when applied to your footage. Take special note of the detail in the skirt portion of her dress. Where there is motion, grain reduction tends to blur the image slightly. When motion ceases or movement is slower, the image is more crisp and in focus. Some people prefer the results of grain reduction, because it softens scratches, lessens obvious debris which may have remained on the film (even after a careful hand-cleaning), and it reduces the mold pattern on films which may be affected by such a misfortune. Below, is the same clip without grain reduction applied. Above you did not see what you will see on this clip. Take note of the rather long hair-like piece of debris which was embedded in the emulsion of the original film. It appears on the right side of the frame just as she steps down onto the second step. The grain reduction cancelled that debris right out. It can cancel out quite a few flaws. Over the years, we have noticed the preference of our customers. It's about 50-50 as to the grain-reduction choice. Some like the softened, cleaner image. Some prefer to see the image in greater focus - flaws and all! Now, showing you the entire frame as it's captured by our equipment you will note the sprocket holes, on the left. See all that movement? Our "image stabilization" option has cancelled out most of it, and we provide a result with a nice and steady image. It's a joy to watch! Our additional image enhancement option of "image stabilization" is inexpensive, and nearly every customer chooses it. NOTE: Do not let the sprocket holes jumping all about give you any pause ... they will not show on your final transfer (unless you prefer to see them, and you let us know that choice.) The magnitude of those sprocket holes jumping about gives you an idea of just how shaky the original footage was. Clip is courtesy of Phil Hugly, with expressed written consent -- all rights reserved. of 1 small, 3-inch reel It Is All about Privacy!We respect your privacy. 
You retain copyright
You retain copyright of your treasured family memories! Not all companies can say that. Please check their "fine-print" to make certain they will not sell or share your personal family footage to an unknown source. Over the years, we discovered too many other companies retain copyright of your personal memories. If they retain copyright, they can use or sell your footage, as they wish. What you likely thought was a private transaction is not. We find it disturbing that unbeknownst to you, those dearest memories could end up anywhere. It was astonishing for us to discover a company who was offering their transfers at a low price, and providing low quality work too, only because they were trying to hook customers -- then sell that personal family footage to make a large profit. We can just imagine their further motives! If privacy is as important to you as it is us, please do your homework -- then, choose us.
of 1 small, 3-inch reel Our Transfer EquipmentWe use a telecine xenon flash scanner. Here are some of the parts of our system. Our CameraBecause many of you asked, we show you the type of camera we use. It's a professional JVC video camera, model GY-HM750U. What makes it distinctive is its 3CCD image sensor. Having a 3CCD sensor, and not just a CCD or CMOS sensor, is critical in capturing a true image. The camera provides an HD-SDI output signal, which holds the 10bit Full-HD image information. That HD-SDI signal gets captured by a computer. The extra color depth of our 10bit, over most transfer houses' 8bit, provides a more refined range for precision color-grading. The camera is pricey but worth it! 
3CCD professional JVC camera model GY-HM750U 2K Resolution: It is important to note that with all 8 mm flash scanners 2K (2048 × 1080) is equivalent to Full-HD (1920 × 1080) — we could even call it a UWHD transfer (Ultra-Wide-HD 2560 × 1080) and the outcome would be the same. The reason is the "1080" horizontal line count is the same for 2K, Full-HD, and UWHD and because the 8 mm film aspect ratio is much narrower than the narrowest standard captures. In short – there is no point in capturing image where there is no image (meaning in the black areas, at the edges.) We run out of image information well before using the narrowest TV standard. (helpful link to resolution chart on wikipedia) 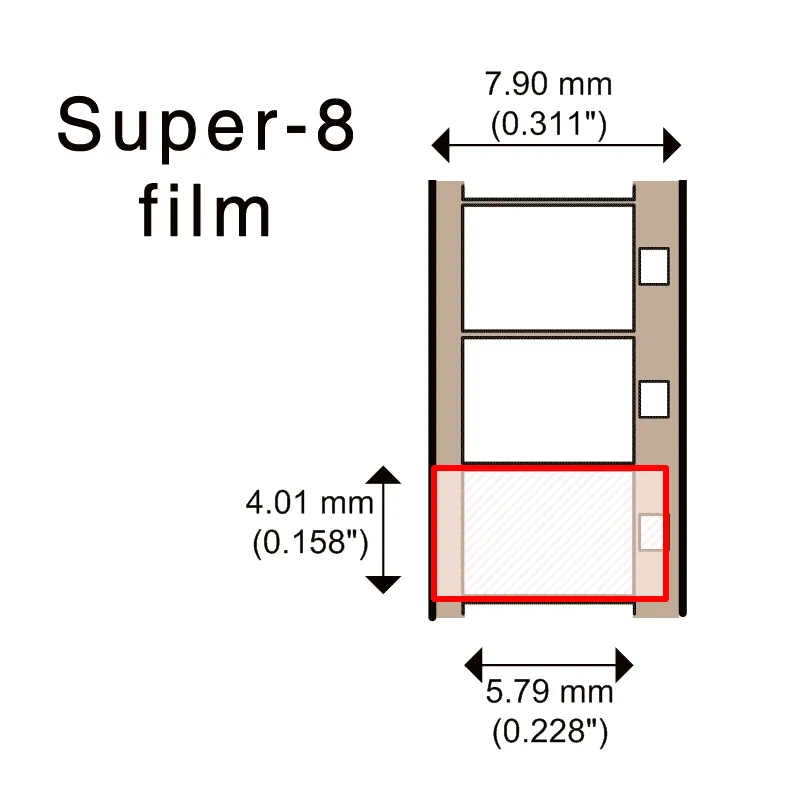
The red box indicates the area we capture with our 8mm flash scanner. One can see how the film's frame-height dictates where the zoom needs to be set so as not to crop off important image information. The left and right edges beyond the actual film image will be black, or sometimes they'll look like this -- when shot with certain types of Double-8 cameras. We capture your film frame by frame. Click here, on Frame-by-Frame and How It Is Achieved, to read the details. LensThe lens we is the sharpest 60mm macro lens Canon makes. It's from their EFS series. The lens is held by a special lens holder which allows us to finely tune the image framing getting your whole image perfectly framed during our initial capture. Flash Scanner Control BoxThis is the brain of our flash scanner. The box uses two 8-core microprocessors to control all the required elements of the flash scanner. The five elements are: the motor and video signal interlock, the strobe laser interlock, the color of the light, the light intensity automation control with added manual override for fine adjustments, and the mechanical adjustment required for any varying shrinkage of the film. 
8mm flash scanner control box Our 8mm Xenon Light Flash ScannerThe skeleton of our scanner is a studio class Bauer projector. The robust German machine (frame) provides the films transport and a stereo duo-play sound playback. Removed from this frame were the original motor, the mechanism of the pull-down claw, the lens, and the gear wheels. They were replaced with a new motor, new interchangeable gear wheels for 8mm and Super-8 film, a new light (a xenon light strobe with color filters and diffuser), a film density reader that pre-reads the film for any required automated exposure corrections, and a laser that reads the sprocket holes' edge for proper strobe timing. The optics for the light, includes a special encasing, color filters, IR and UV filters to protect your film from the light, light diffusers, encoders, servos, and a whole range of electronics. 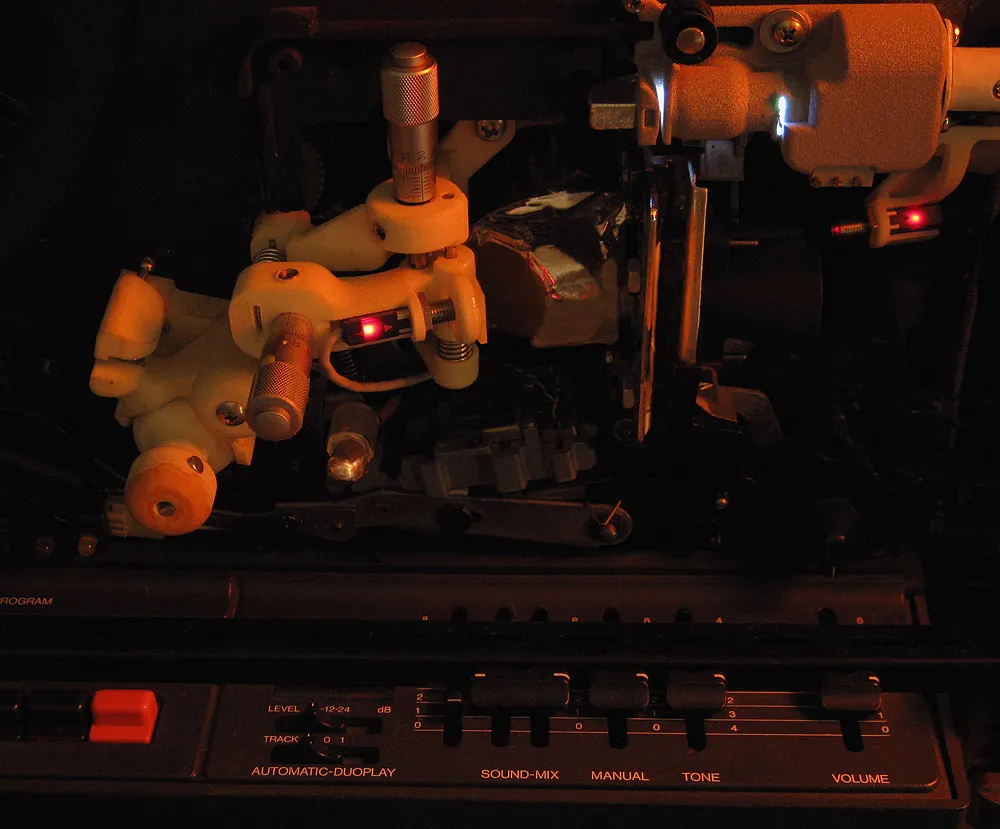
Shown here is the laser and the light of the film density reader.
SoundMany films did not have sound, but for those that did, we keep the sound interlocked to the image as your film gets scanned, frame by frame. In addition we record, in parallel, the analog sound at an extreme high sample rate of 192kHz. This recording replaces the camera's inferior sample rate sound. This extra step allows for a true 48kHz sound rate, even after we do our final slowing down for playback at proper speed. Transfer OperatorAnd yes ... that's me! A Brooks Institute graduate* at the controls during every frame of your transferred film. I watch very carefully and adjust the light making sure all is going well. *Santa Barbara, CA - 1996 - official diploma appears on our website 
Manual light adjustments during transfer allow for a more fine-tuned capture. Frame-by-Frame and How It Is Achieved:A customer asks: "Can you confirm if you are filming or capturing each frame separately?" Yes, we are "filming" in real time — but each and every frame is captured separately — as a single individual image/frame, recording at 25 frames per second. The speed is later corrected to 16, 18, or 24 fps keeping frames individualized. We are strongly of the belief that having duplicate or mixed frames is bad. Therefore, we provide you with files that are set to reflect the frame rate your film was original exposed at. Background, and how we make it work: The camera is setup for 25 fps (Full-HD 1920 by 1080) progressive recording (not interlaced -- interlaced is less sharp)! Note: We do not simply use a CCD camera, rather a 3CCD camera -- 3CCD's cameras produce a sharper more true image, especially when the subject matter has a lot of grain. The projector's motor is interlocked to the camera video signal; and transports the film at whatever frame rate the video cameras is set to. The motor speed control unit gets the video frame sync signal "frame start time" straight from the video camera v-sink signal. Independently, a laser is reading the sprocket hole edge and fires off a single strobe per frame. The strobe light duration is very short (1μF of a second, e.i. one millionth of a second); which equals 1/37th of a pixel height while the film is kept in motion at 25 fps (1 second/25/1080/37 = 1μF.) The strobe light freezes the image in time so that the 3CCD camera chip can capture it. This is what makes it a flash-scanner. Note: We protect your film by filtering out the unusable light; the light that is outside the visual spectrum range. In addition, the strobe "time" is fed back to a separate film path pulley that influences when the strobe goes off. The strobe-time needs to be kept within a mid-range of the "start-" and "end-time" of the camera capture window. This is necessary 1) to make sure we will not miss a frame (resulting in a black frame), and 2) to compensate for film shrinkage, which can vary significantly! Important to say .... We do NOT correct film shrinkage with changing the speed of the motor, as this would have a negative effect with any audio playback/recording. Furthermore: We can use either the lower edge or upper edge of the sprocket hole to trigger the strobe-light. The lower edge is technically the proper edge to use, because this was the edge used during the initial filming. It is the edge used by your camera's pull-down claw, which pulled the film in place for exposure. However, the upper edge is usually cleaner (less worn out) -- home projectors sometimes damaged the lower edge. This is why we generally like to use the upper edge. It gives us more accurate strobe timing. Some Images
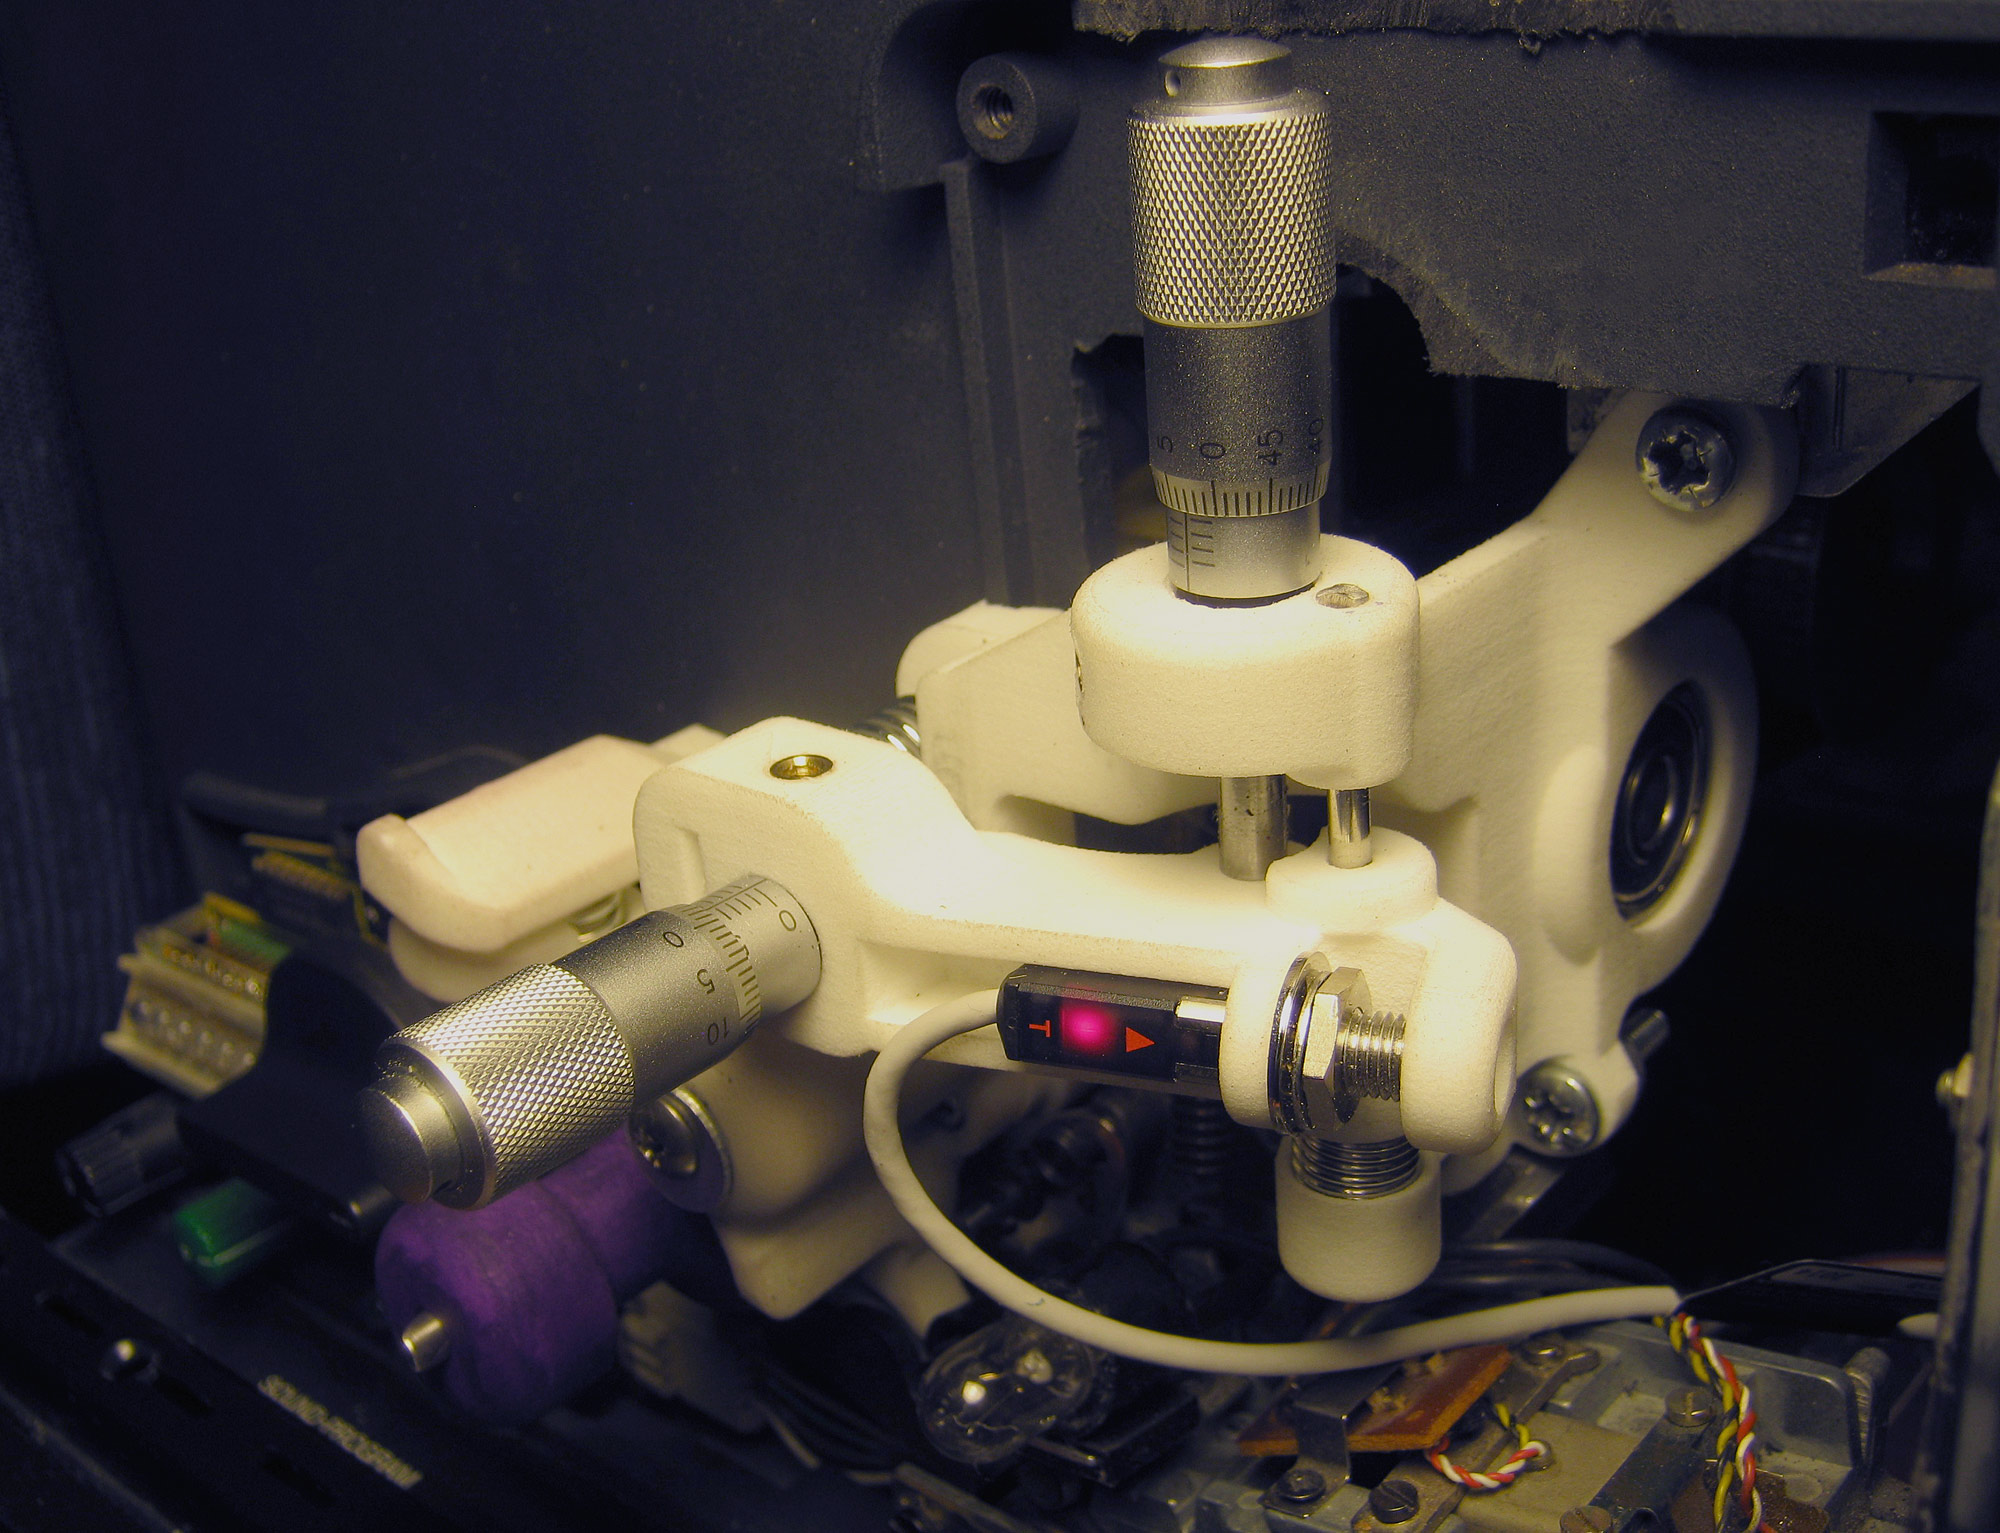
Laser with micrometer adjusters to fine tune laser positioning
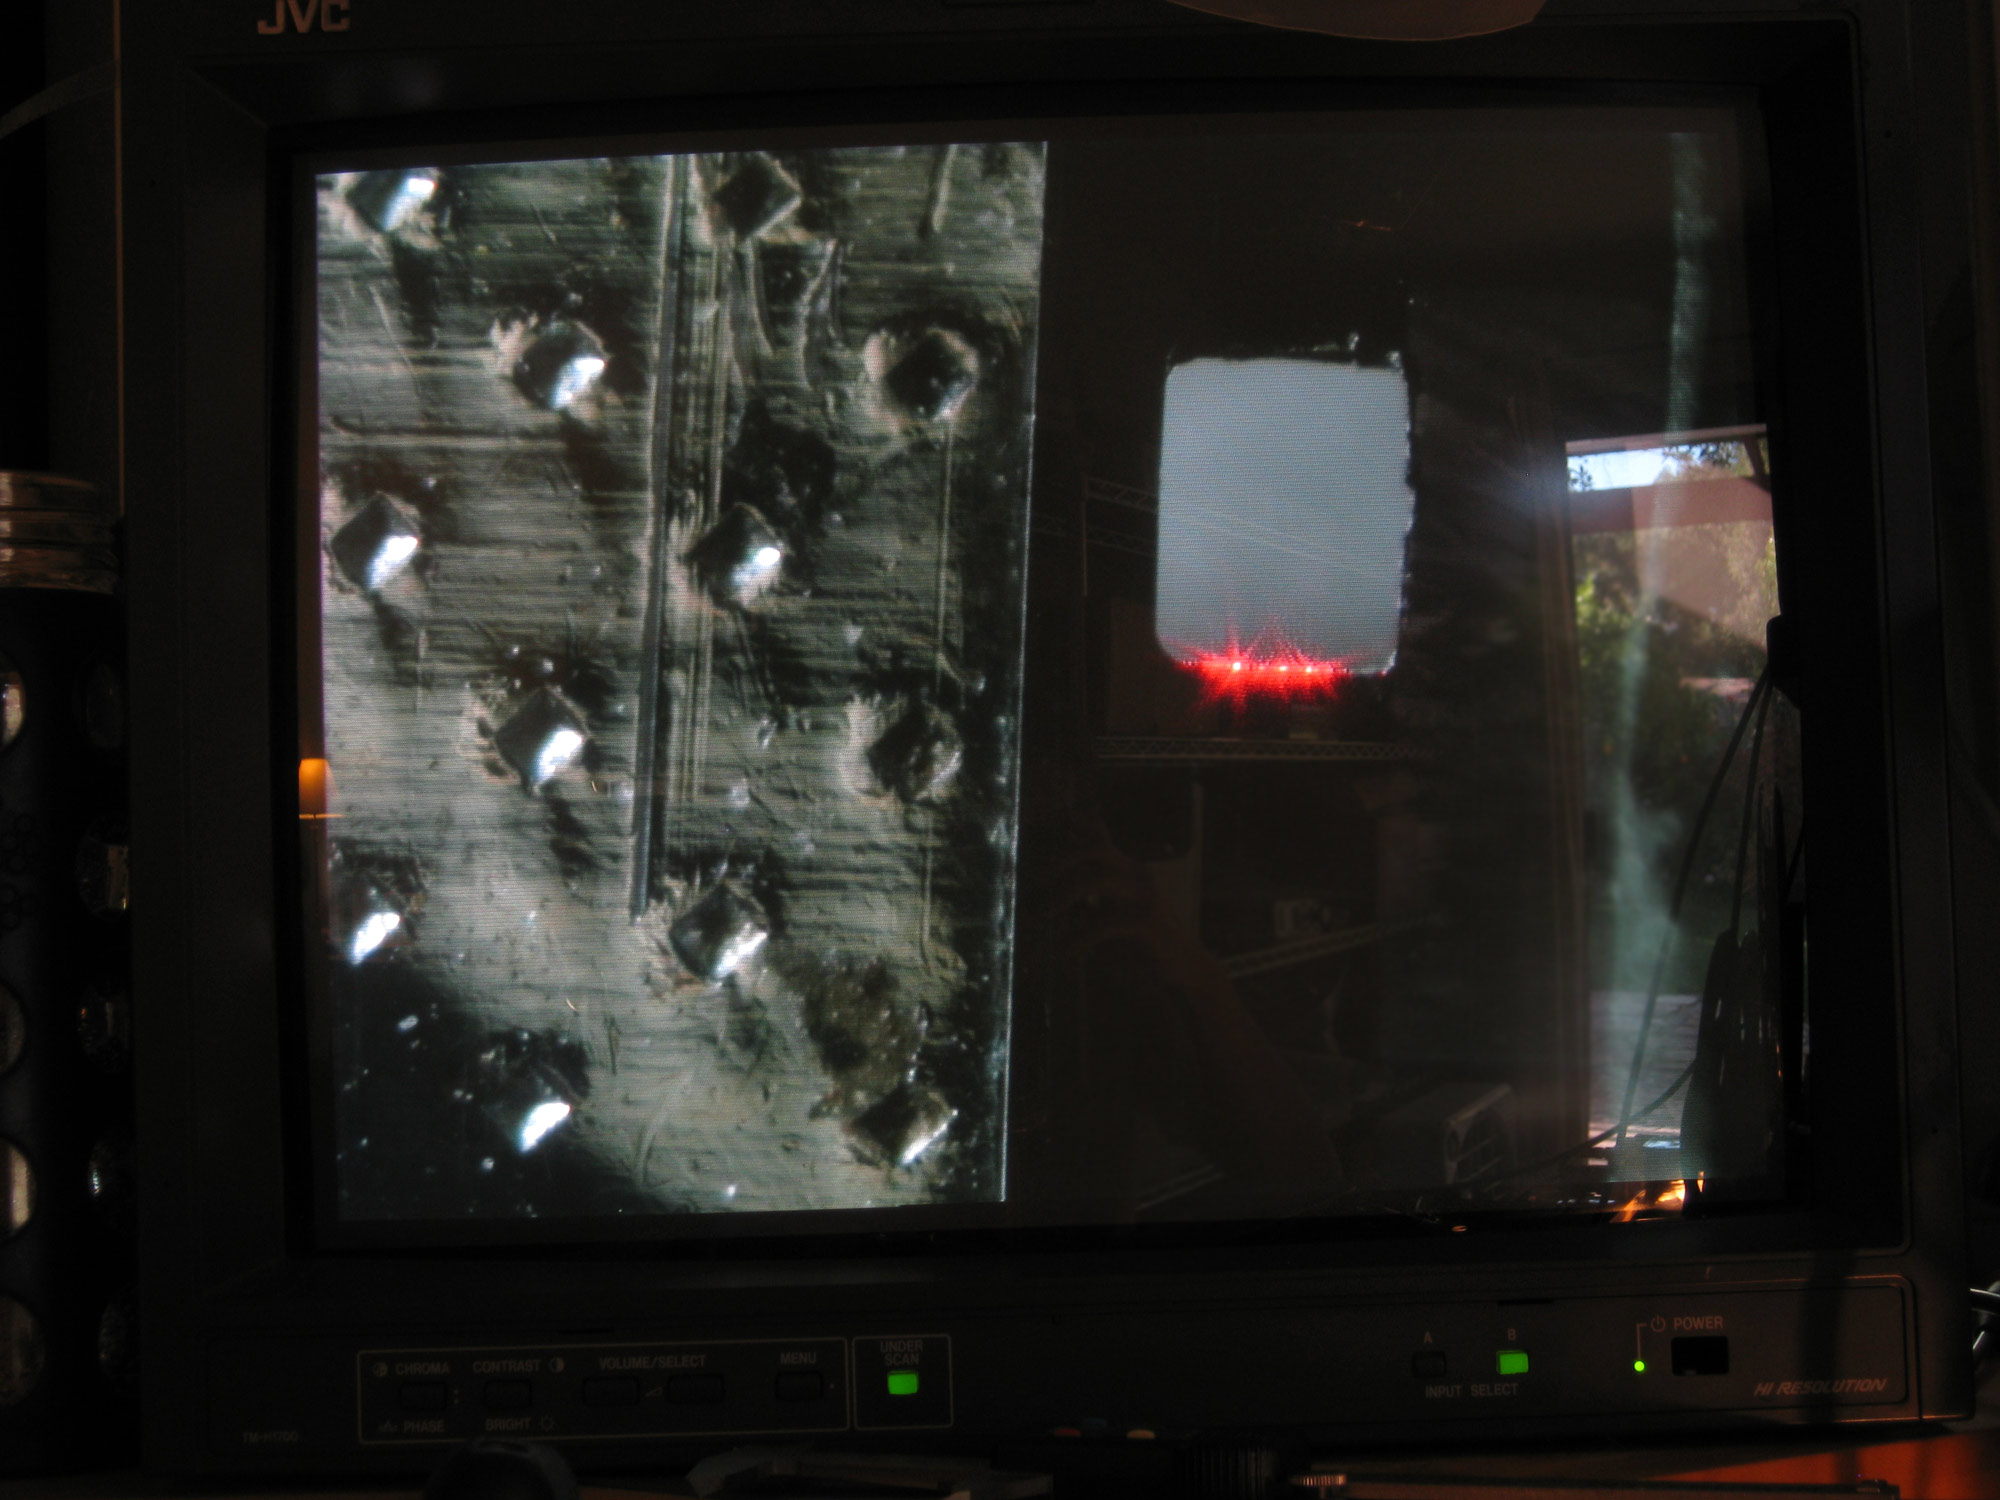
Laser reading edge of Super-8 film sprocket hole.
Locking down the light rod along the path the xenon light is traveling We don't use substandard, non-professional equipment.If you are intent on transferring the film yourself, you may have considered using one of the inexpensive models appearing on the market several years ago. It is wise not to expect decent results from these, and be prepared to invest a inordinate amount of time for each reel. May we boast for a moment? Our work is clearly superior to those DIY transfers for several reasons. (Send us a small free, 3" Test-Transfer reel -- we often run a special. Look for details on our website.) Also, those machines will not capture sound, if your film happens to have a sound strip. However, we will capture it -- at no extra cost! The sweet voices get perfectly interlocked and synced up with the film's image. of 1 small, 3-inch reel Will Rusty Metal Reels Harm My Film?Rusty reels have a detrimental effect on the film. 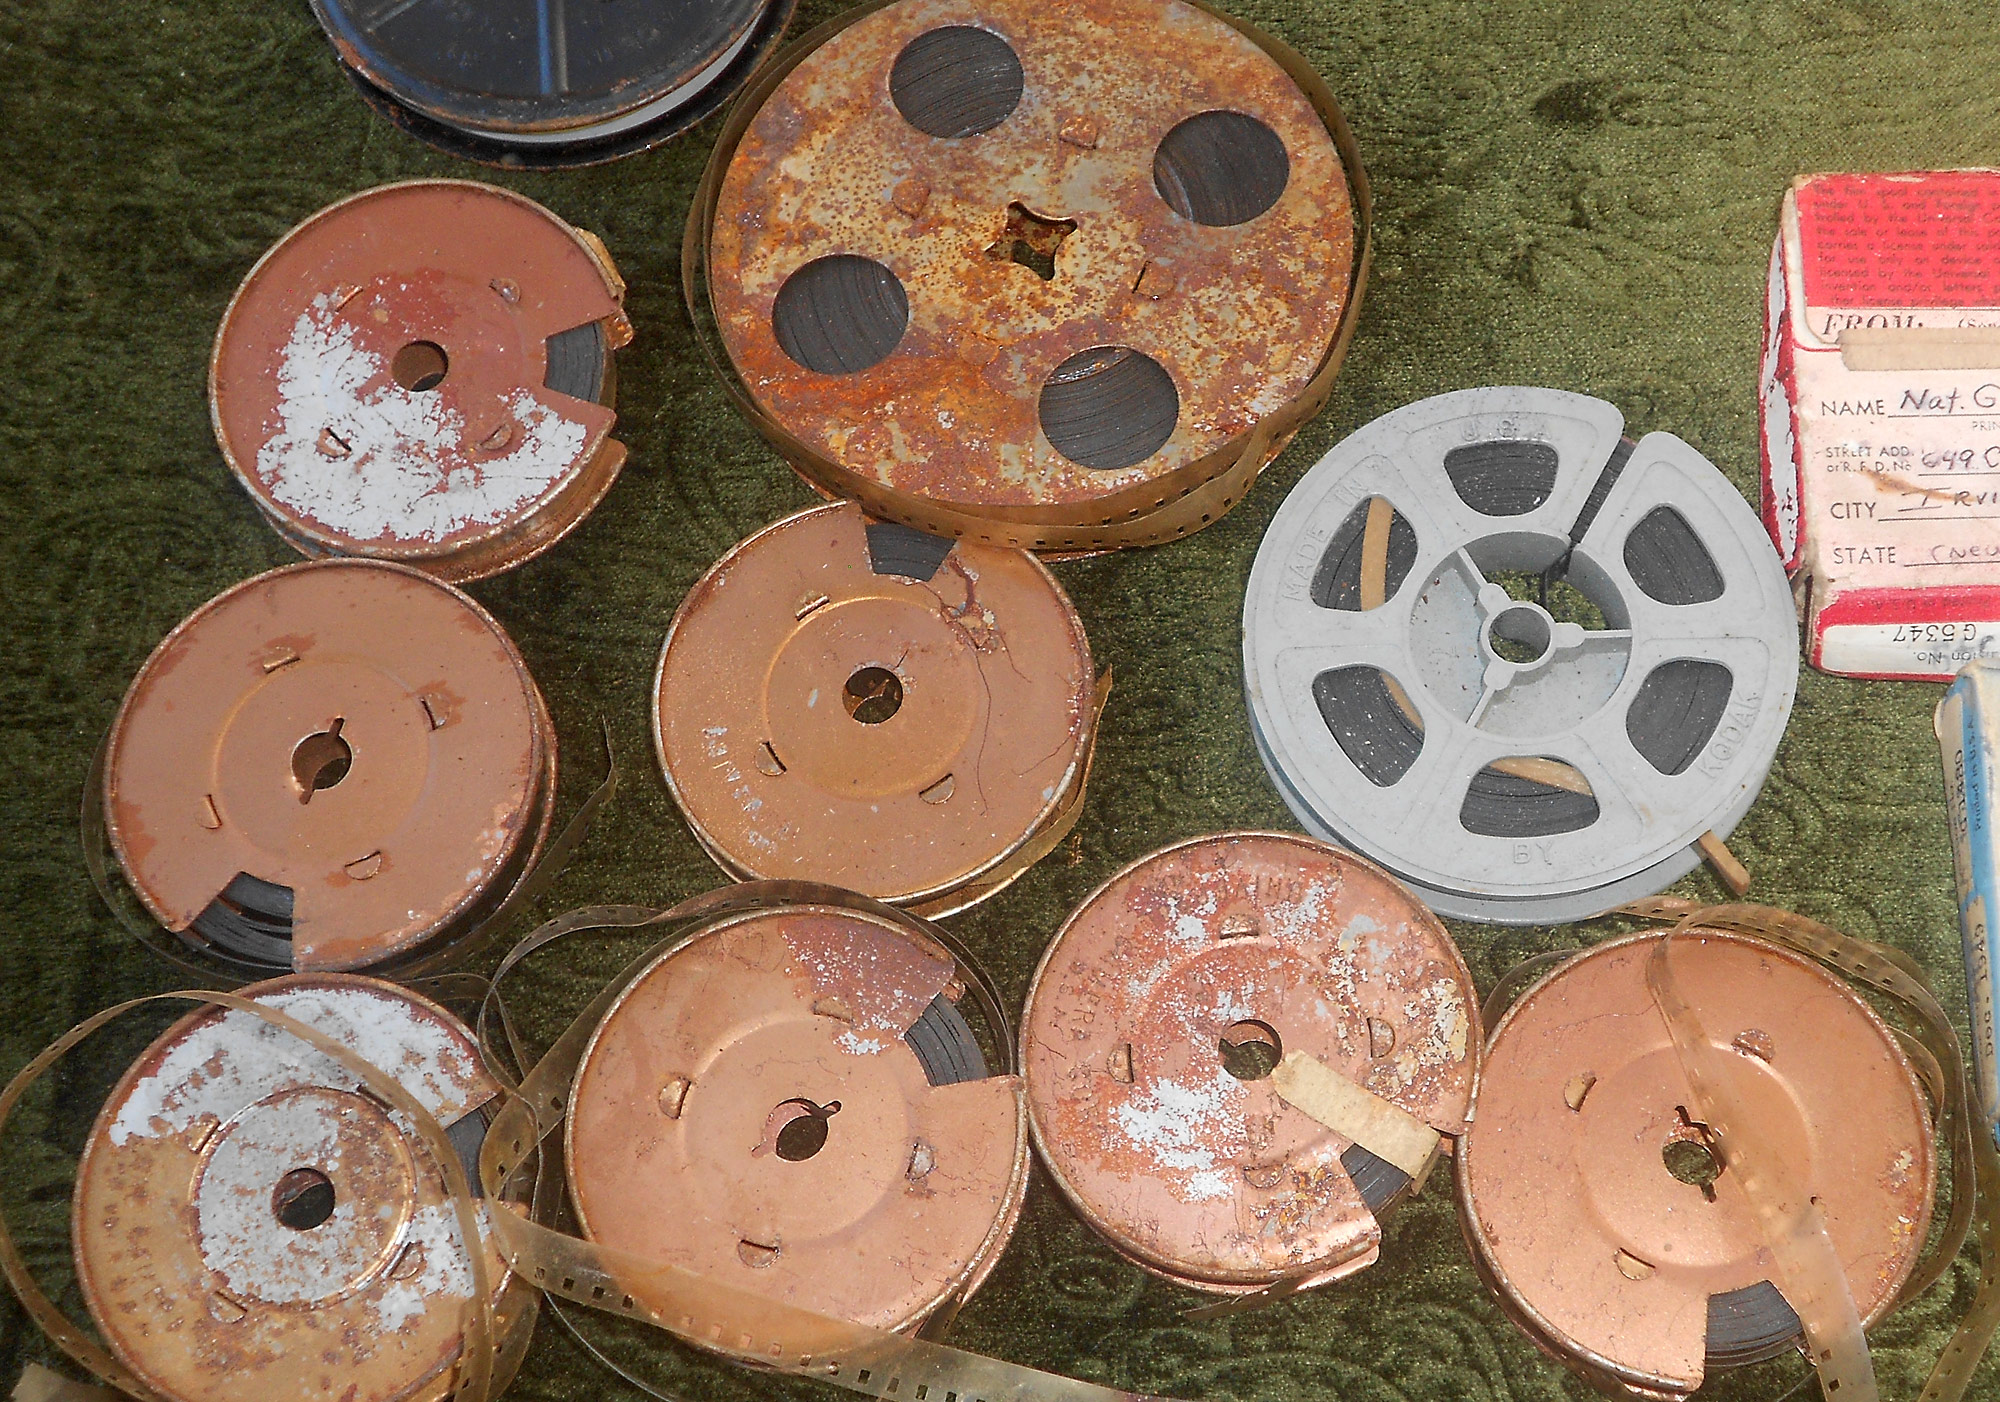
Time can be very hard on old metal film reels. It accelerates the decay of the films as it reacts with the film's silver. Film archival houses won't even let rusty reels be stored at their facilities. It is high-time to get these films first moved onto plastic reels, and then see what sort of needs they have. Conditioning the film will be a crucial second step, before a transfer is attempted. of 1 small, 3-inch reel We Carefully Hand-Clean Your Film.After inspecting your films, we begin by asking ourselves, "What will benefit this film the most?" 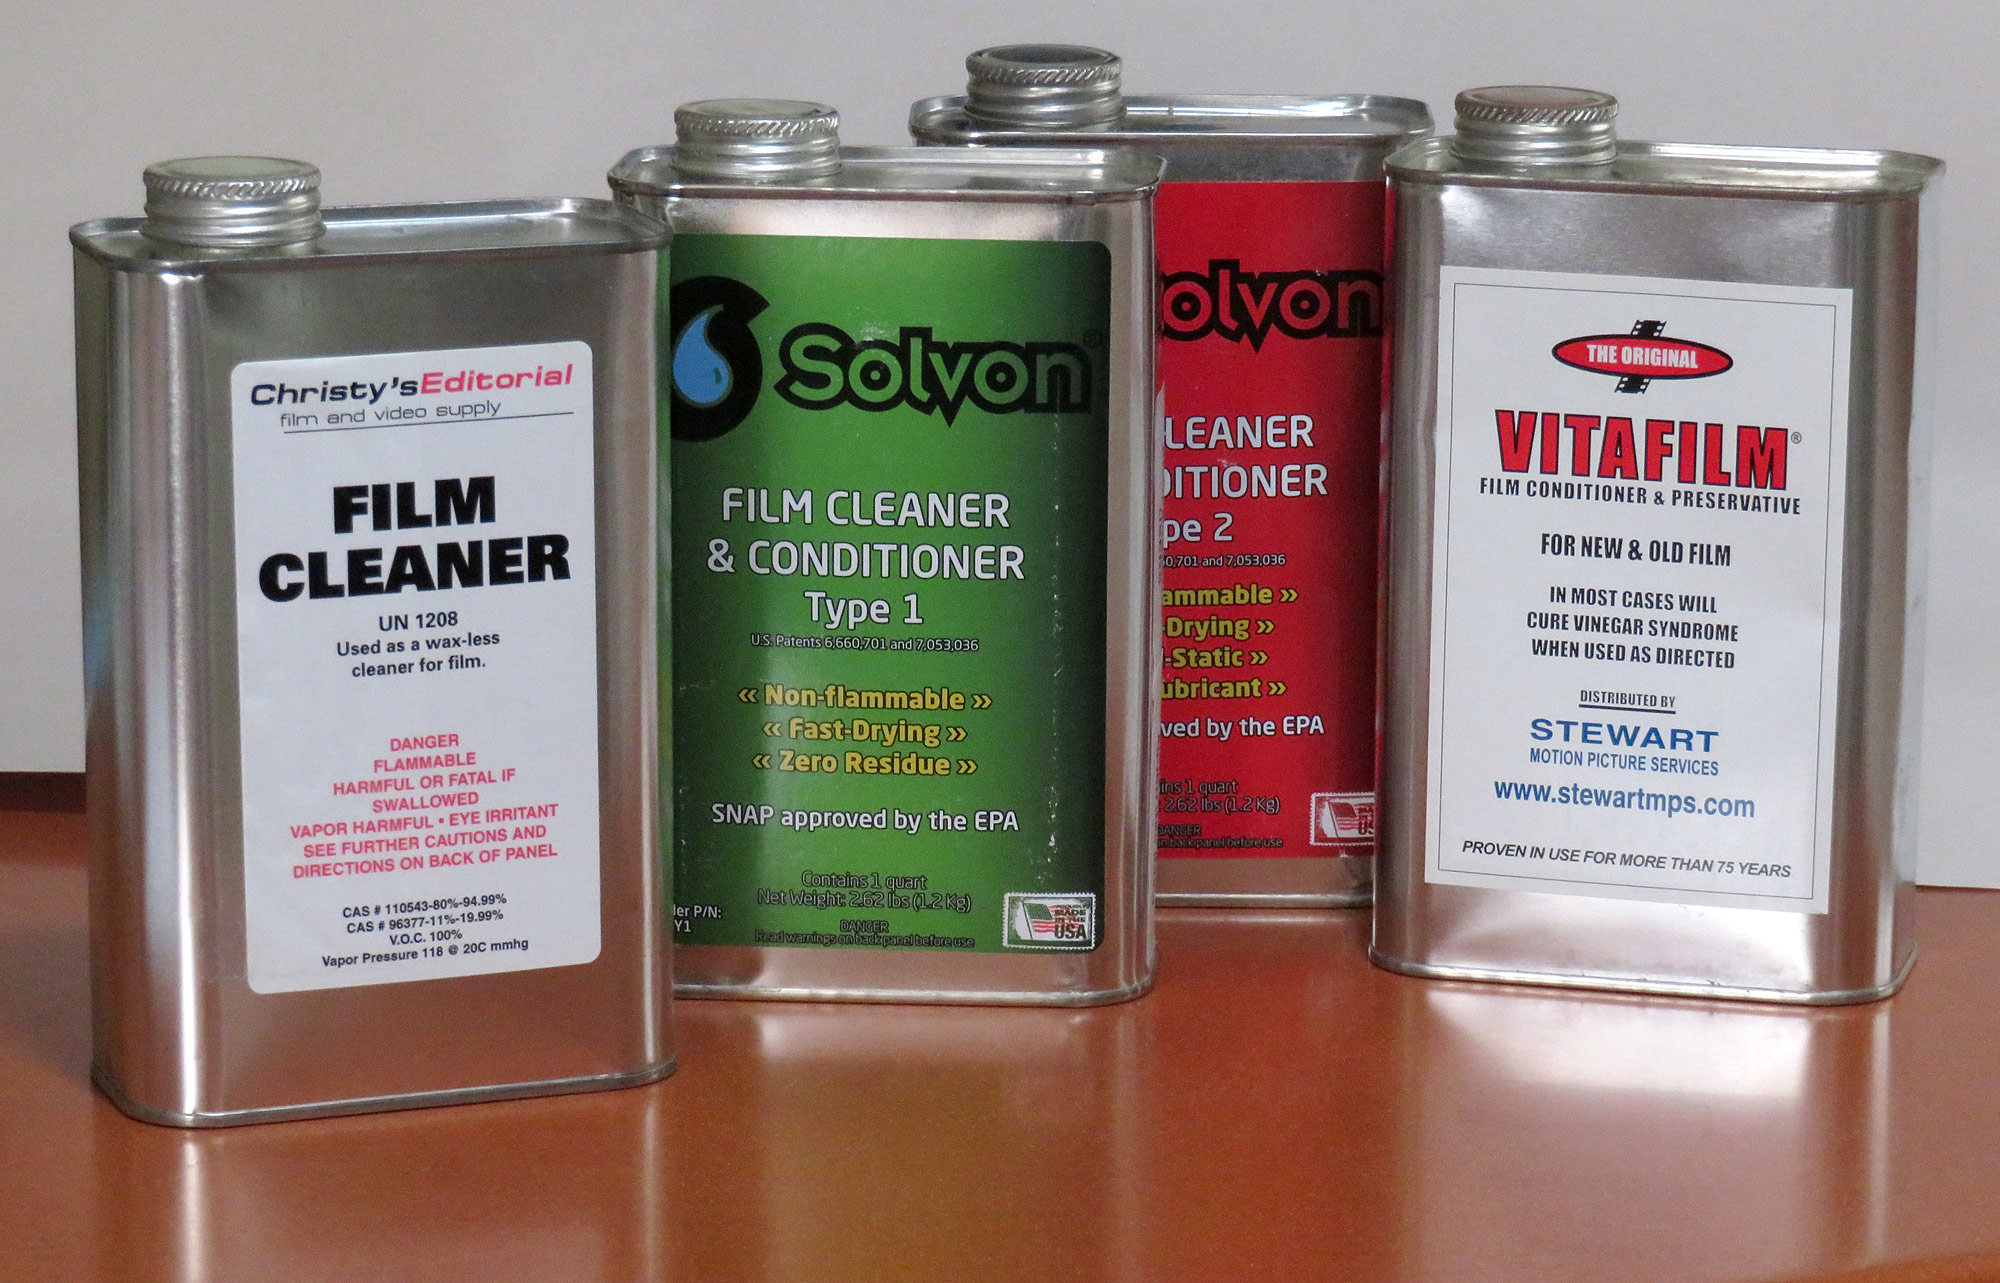
The professional brands we use to clean your film are: "VitaFilm", 2 types of "Solvon", Christy's film cleaner, and "FilmRenew." In our 13 years of experience, we have noted that all films benefit from cleaning -- even films coming straight from the lab! Many films do not require extra special care -- a careful hand-cleaning will do. Other films, though rare, require a pricey film solution called "FilmRenew" (not shown here.) To note: We never use "VitaFilm" to clean film that has been spliced using tape, because it dissolves the tape. 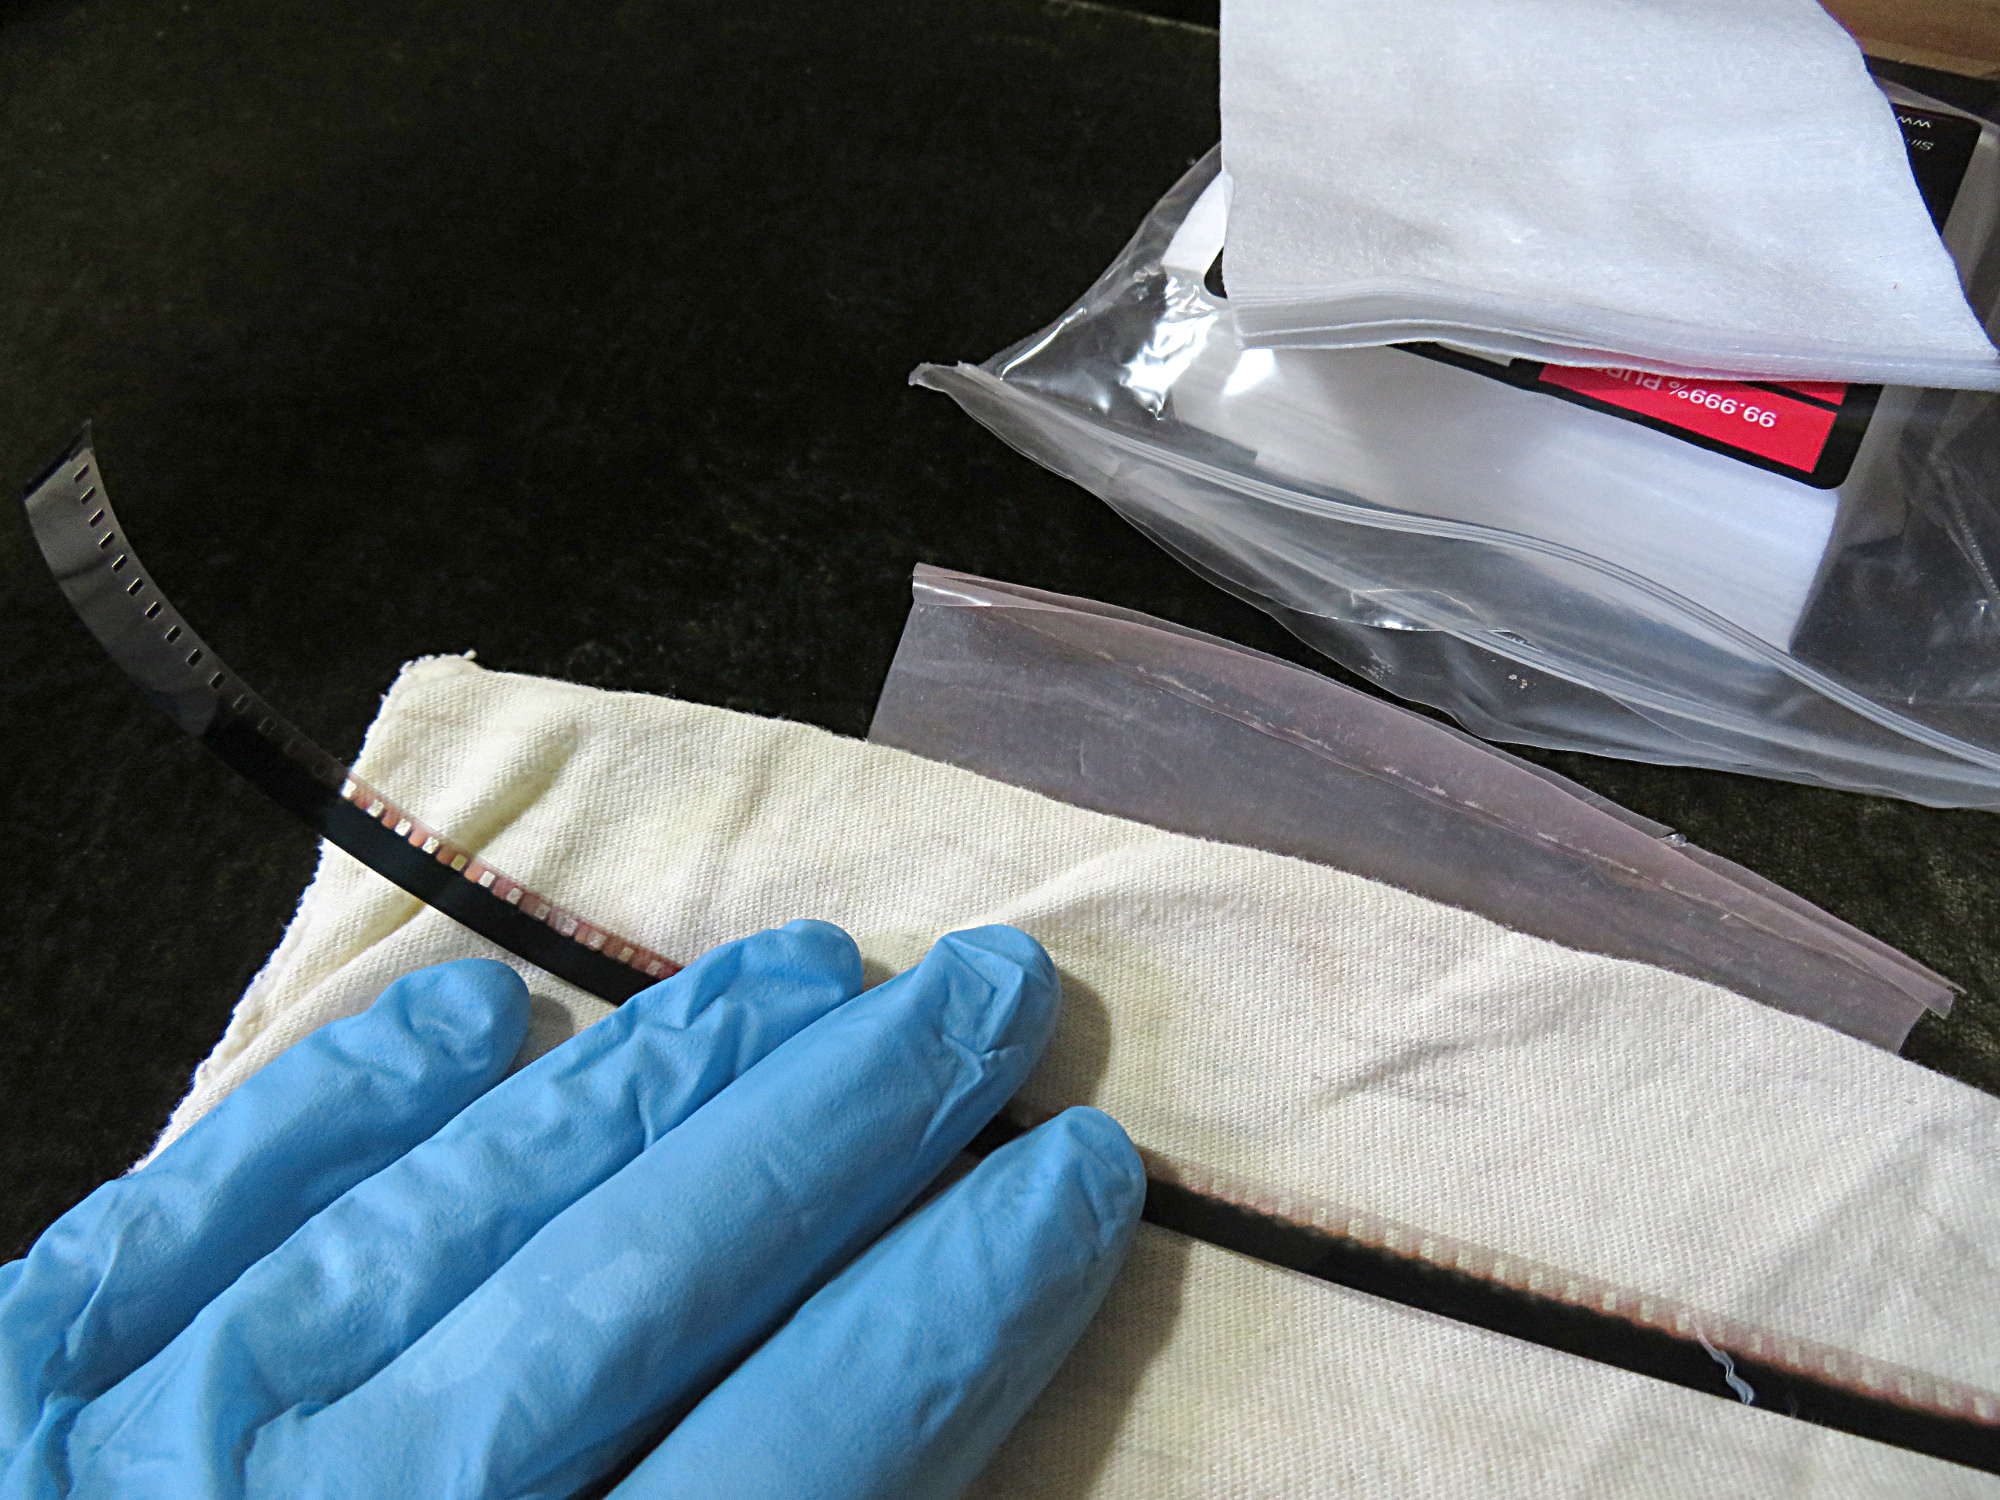
We have excellent cleaning practices: We start with clean hands (thus the gloves), clean surfaces, and cleaning cloths that are fresh. These things make an important difference. Below, the film was quite dirty, but with a careful hand cleaning, we achieved very nice results. Sometimes dirt will get securely embedded into the film's emulsion. In certain cases, some of that dirt will remain. Still, plenty will be cleaned off. 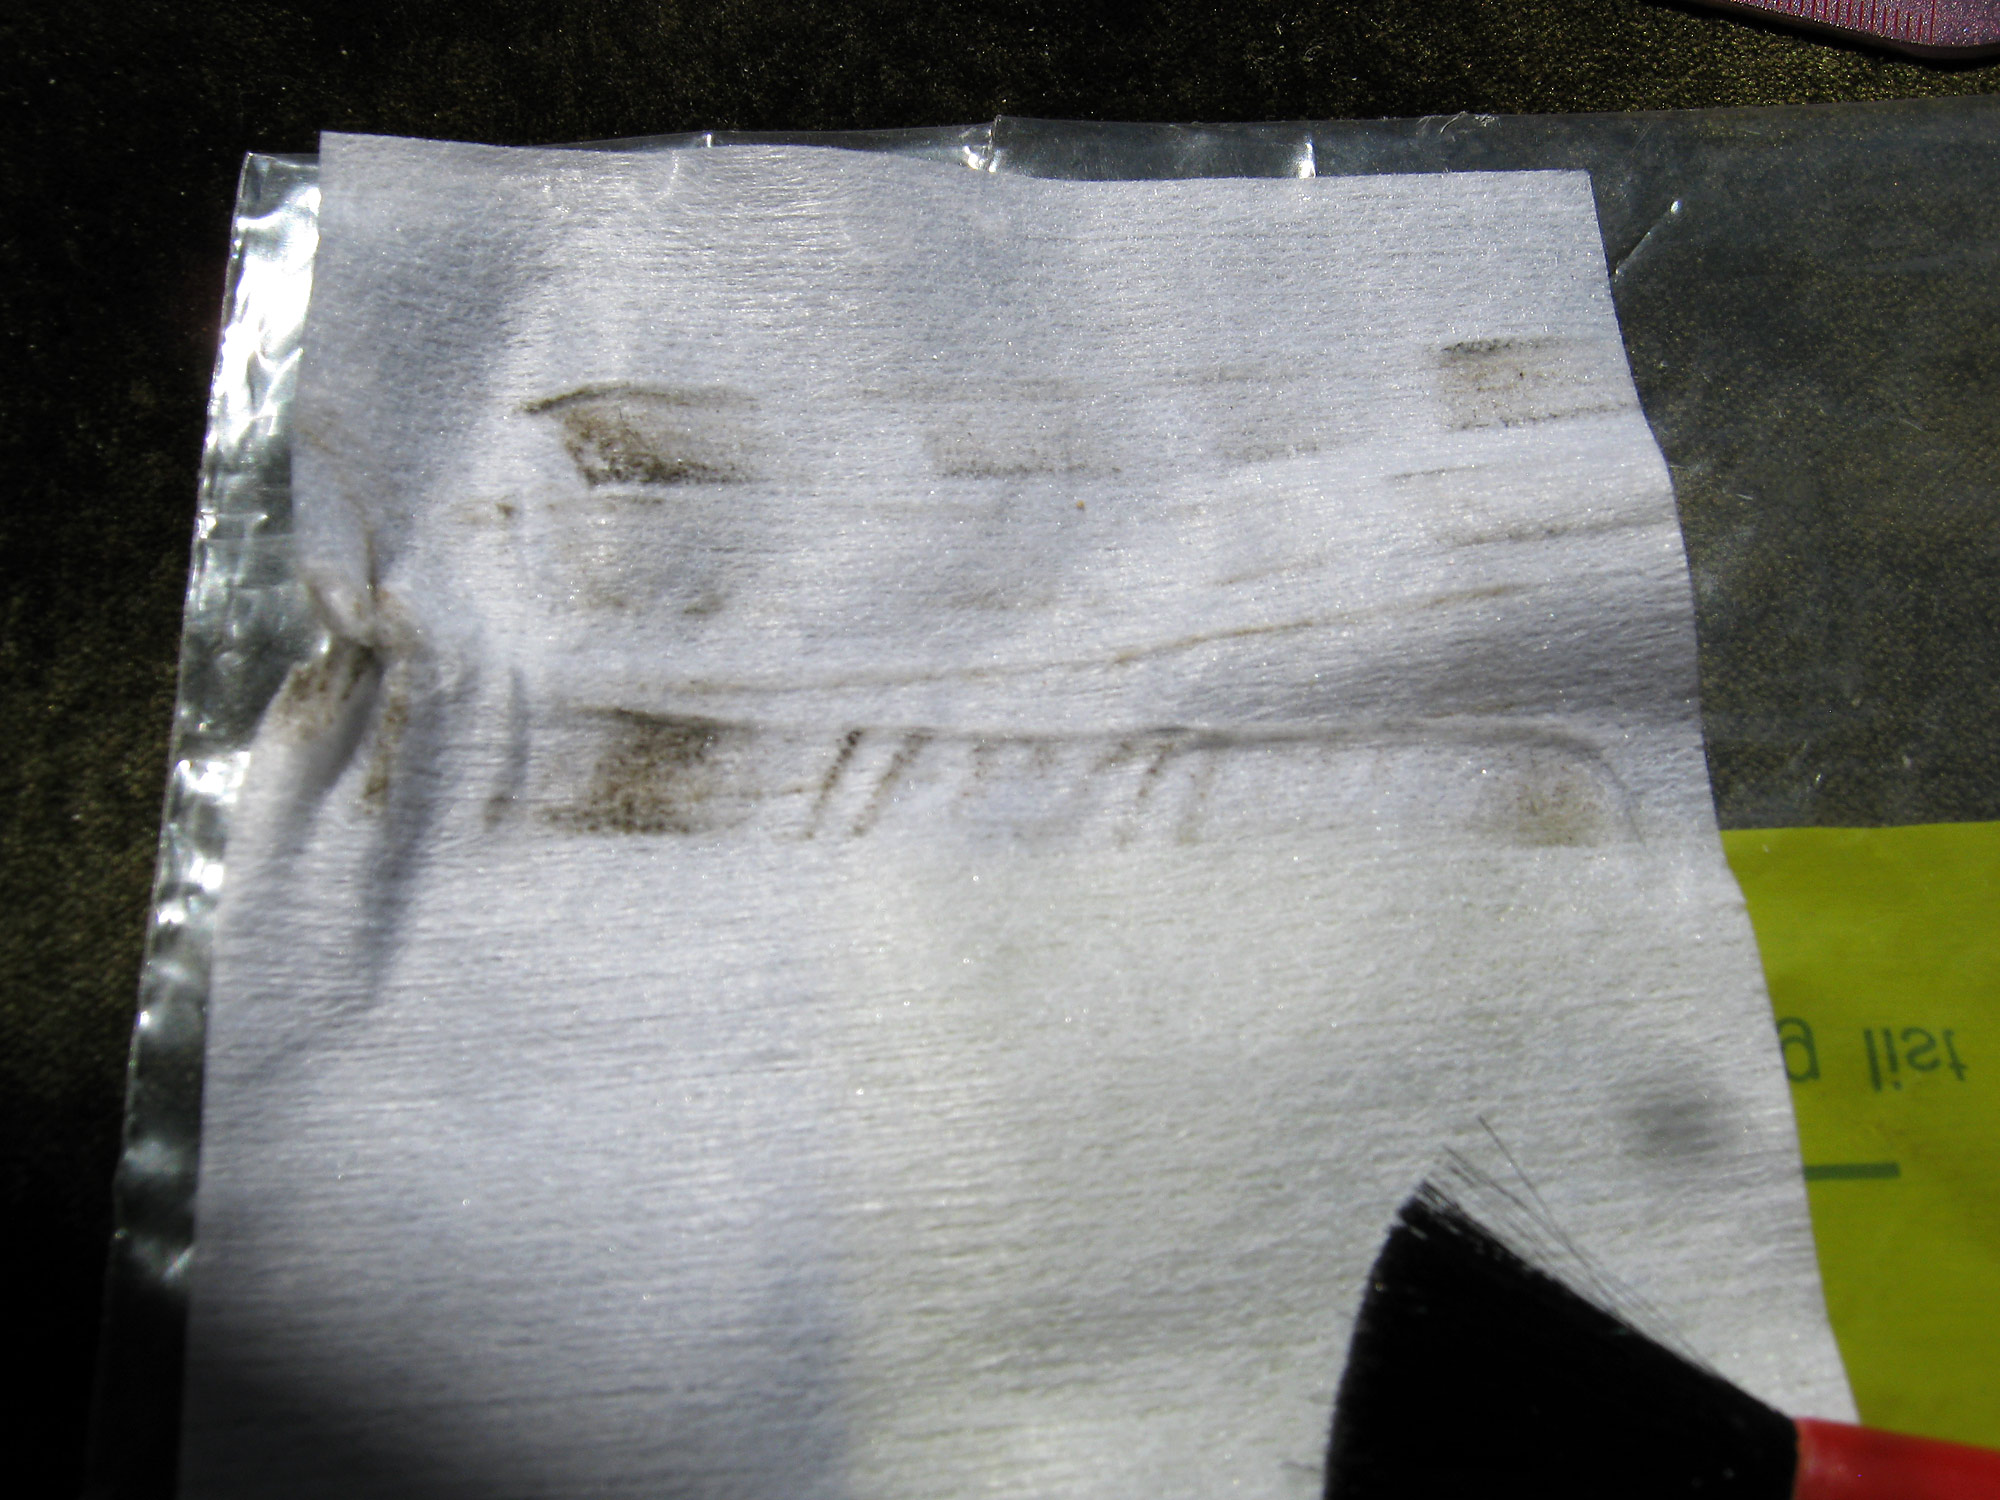
Careful hand-cleaning is part of a successful film transfer. Here, there was some mold with the addition of tar built up on the film. We speculate that the owner was a smoker and enjoyed their cigarettes, or perhaps cigars, while watching their treasured family memories. 
Dirt and smoke, in the air, can cause a considerable build up of residue on the film.
of 1 small, 3-inch reel Oops ⎯ Do Not Send Like This!Without padding, things can get quite disheveled and the box can more easily tear, during transit. Please remember to pad it a bit and tape the box -- both on the bottom and top. 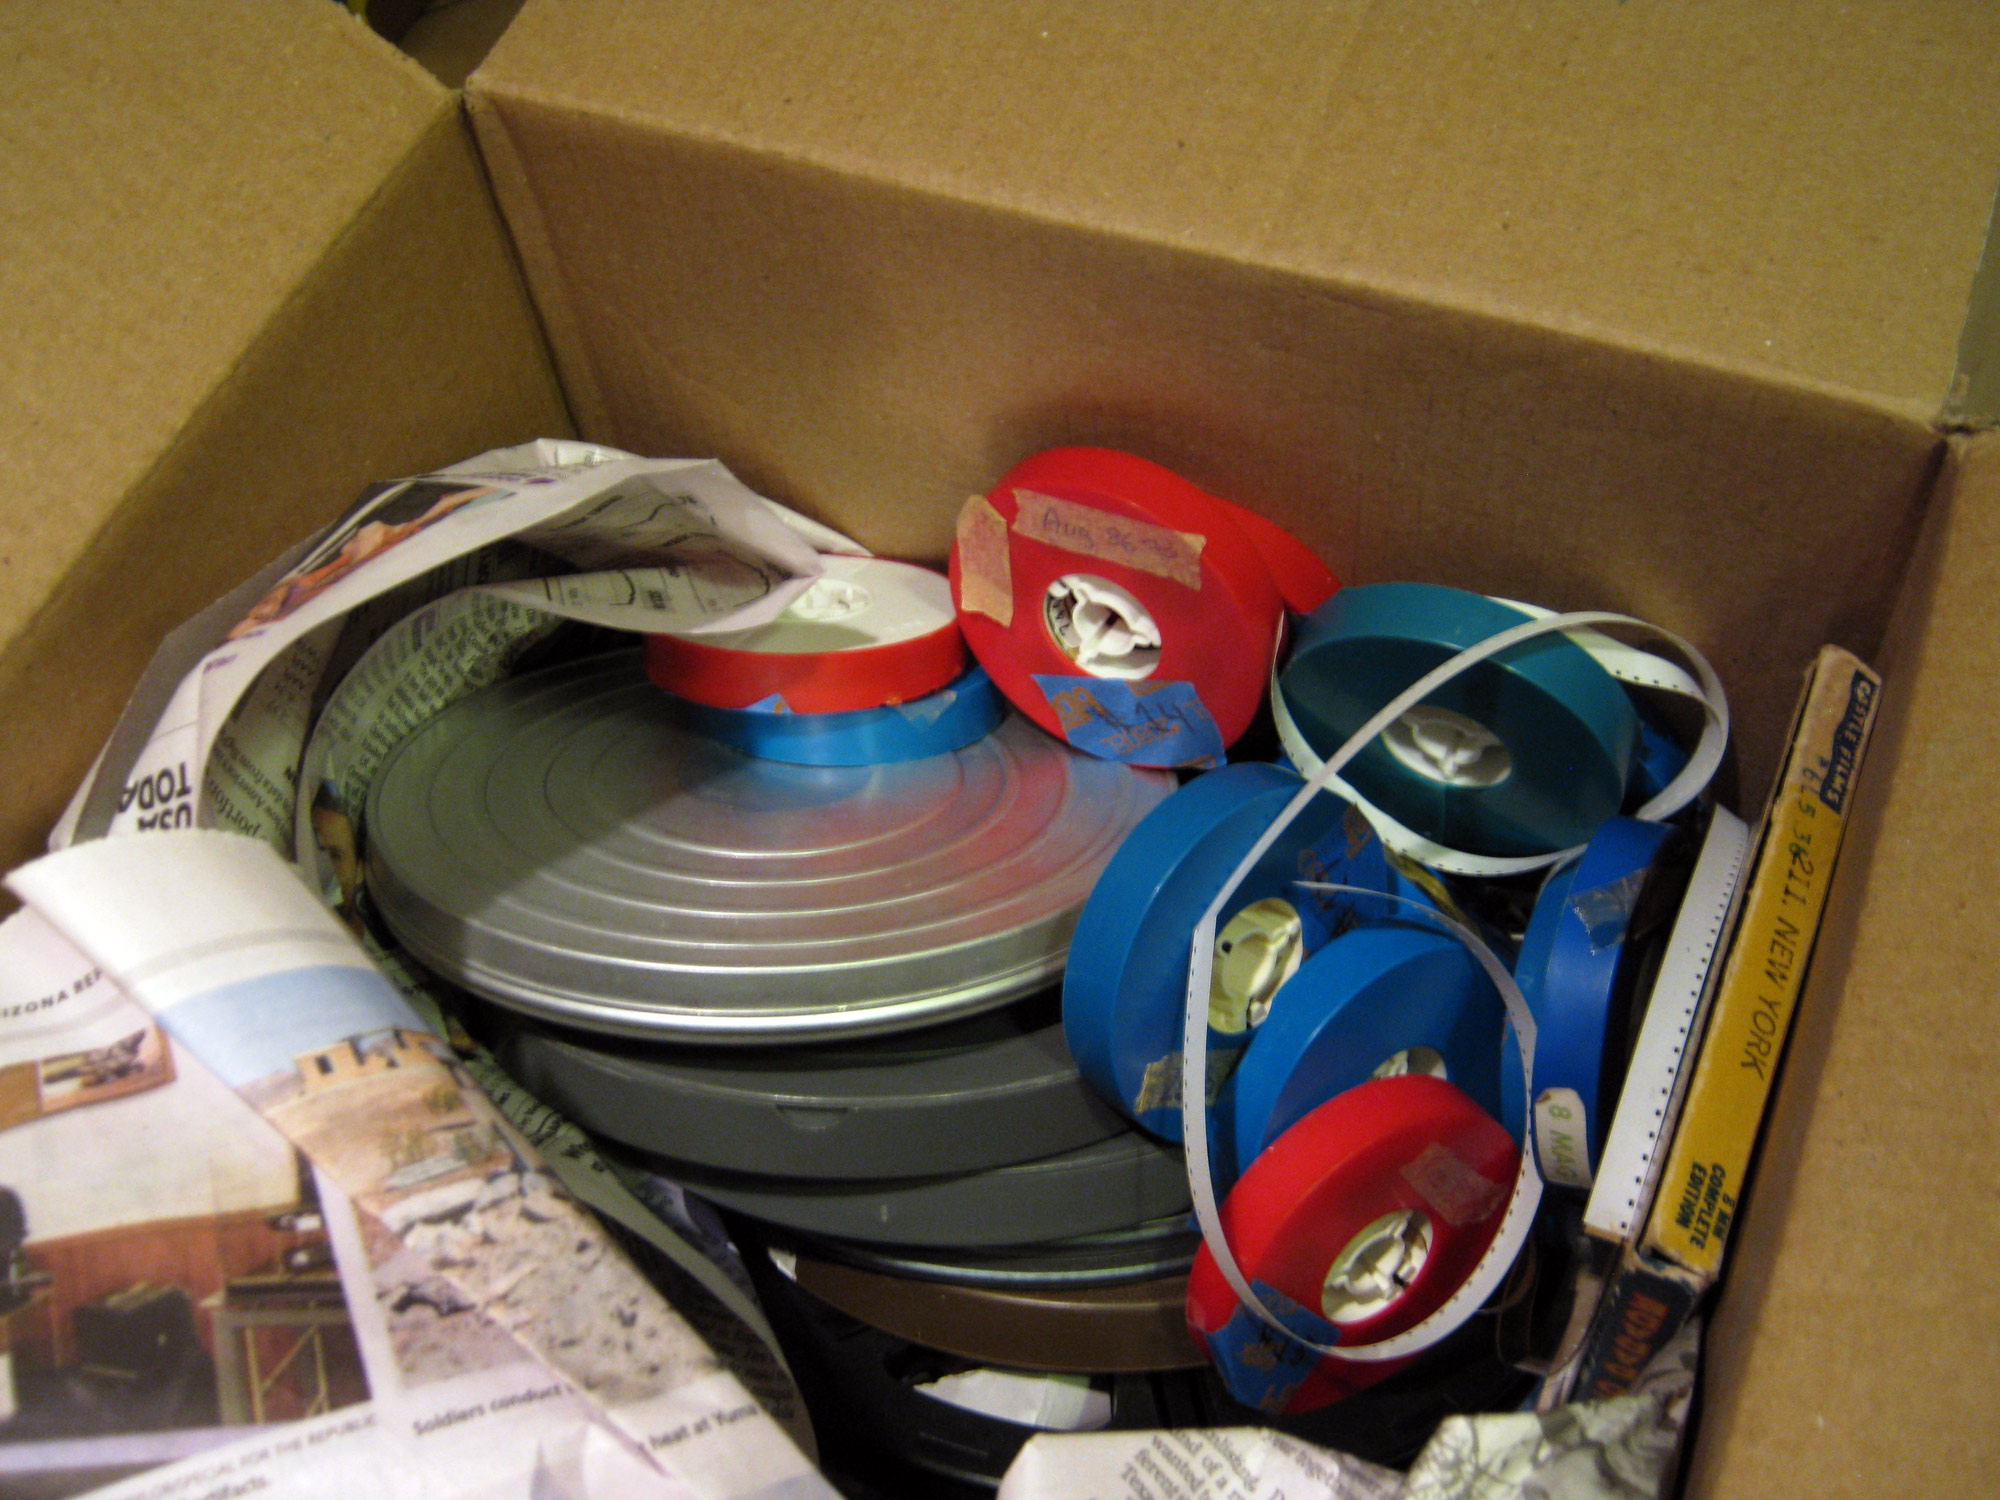
Please add a little padding so this doesn't happen. We very carefully pack all return shipments! When a shipping box has some "play" inside, the box's structural integrity suffers. It's inevitable that during transit boxes get tossed about a bit. Sometimes we receive them with tear in the corner or side of box. If you pad out those corners and edges some, it both helps protect your material and adds some fortitude to the box. Rest assured -- in our history no box has been so damaged that any precious family memories have fallen out of the package or gotten notably damaged, during their trip to us. FILMFIX seems to be a special name and the carriers really do take note of the contents! In fact, we have a 100% track-record for receiving every package sent to us in all our years in business, when using a carrier that provides a "tracking number." That's an astoundingly reassuring record, we think! of 1 small, 3-inch reel Which of These Does Not Belong?
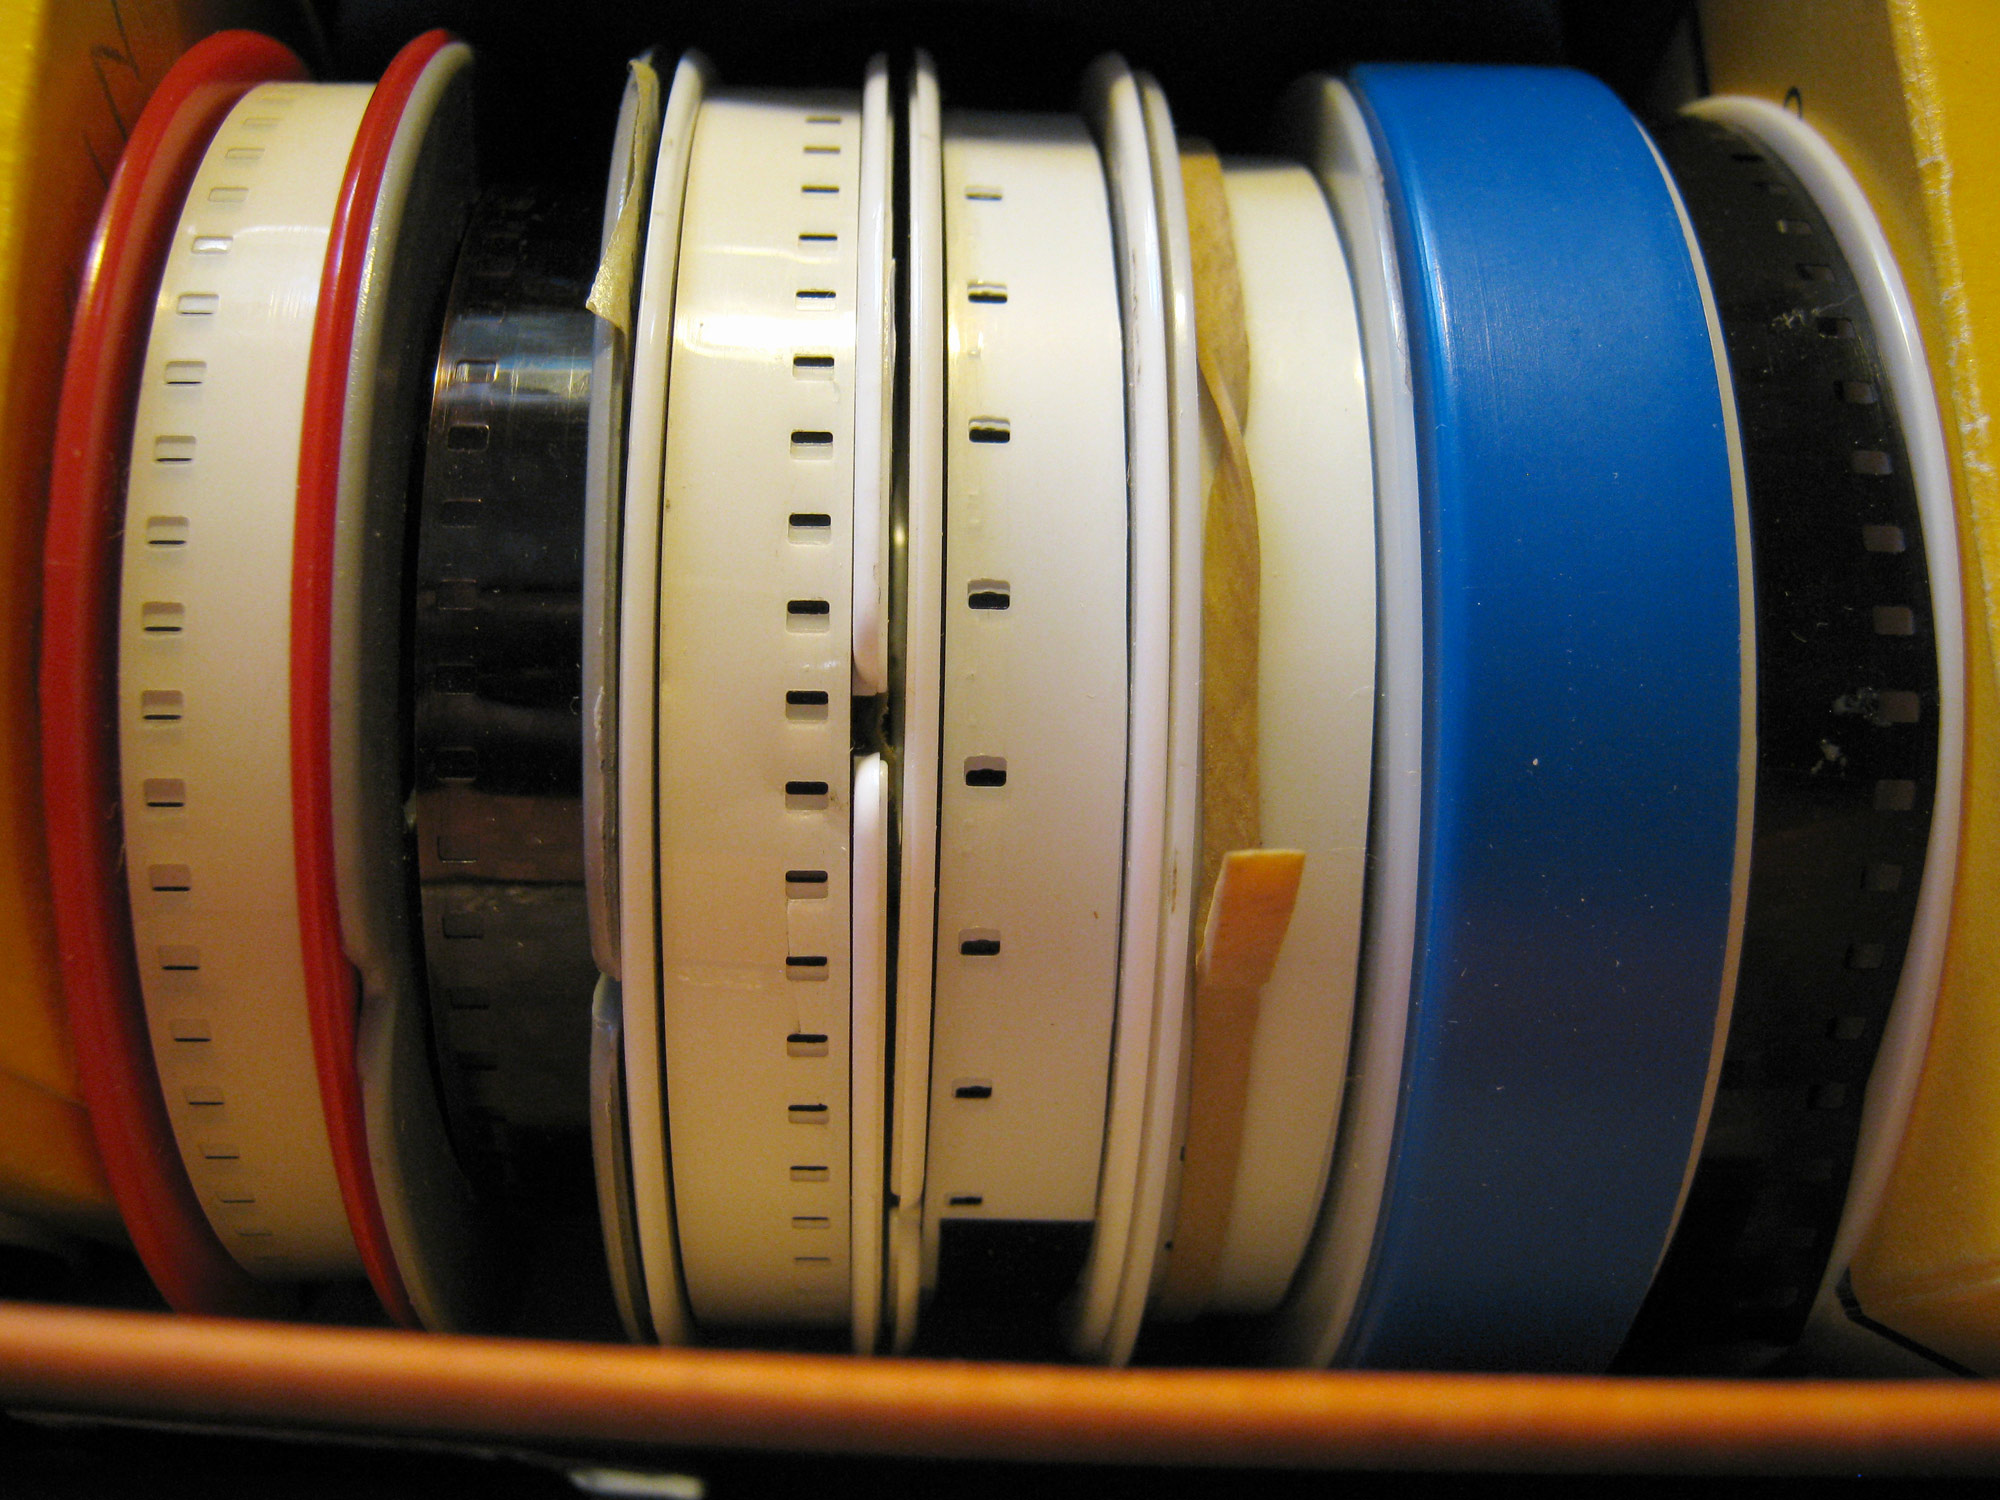
One of these reels is not an 8mm film. It's 16mm leader. The fourth reel from the left is quite an odd sight to see. That's because it's a leader of 16mm film - cut in half. This is something that was sometimes done with double perforated 16mm leader but never with regular perforated leader. The leader cannot be projected as it is, because every second perforation hole is missing. of 1 small, 3-inch reel Is It Regular 8 or Super-8 Film?Here is a little puzzle: Try to figure out which of these two reels has Regular 8mm and which has Super-8 film wound onto its reel. One can determine what kind of film is wound onto each of these reels just by noting the difference in the way the wound film appears. However, a prerequisite is knowing how the film was processed, at the lab. Hint: Observe the difference in how the light reflects off the edge of the film. 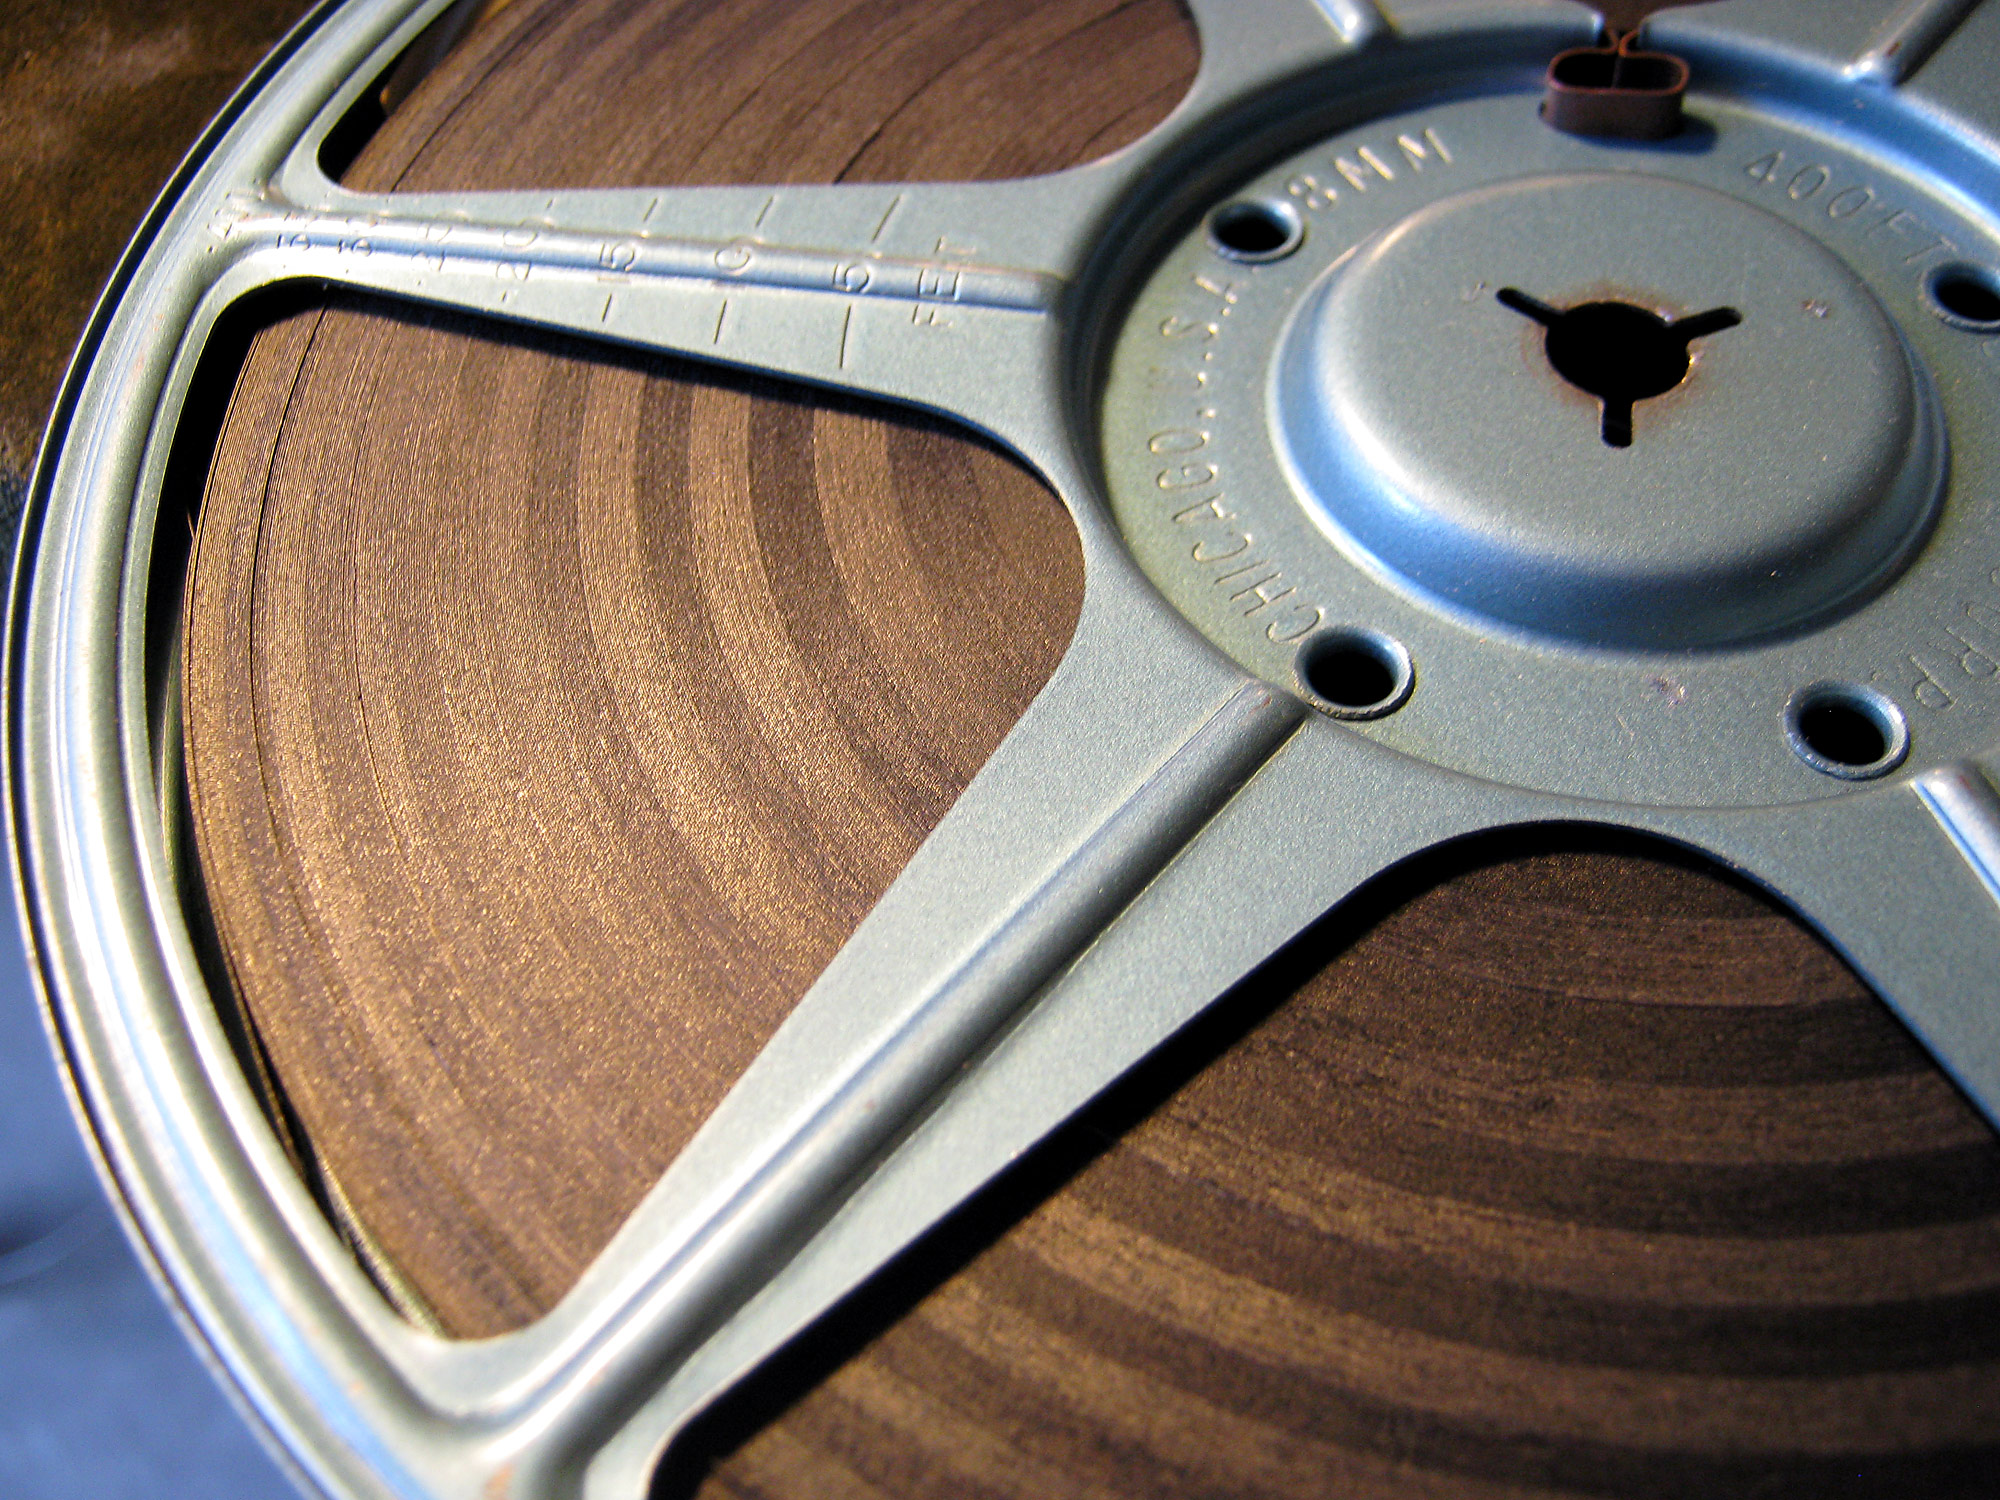
Do you see the striped pattern? These revealing measured alternating bands of light reflection will give you the answer. The smaller hole in the center of the film reel can also be a clue -- but careful, see below.
Now, look at this reel and note the light reflecting off the film's edge. The notable meaured line pattern is missing; and the center hole is much larger. Did you figure out which is which? Answer:The top image is Regular 8 film (a.k.a. "Double 8" or "Normal 8"), and the bottom image depicts Super 8 film. The Regular 8 film has these measured alternating patterned, banding sections, of 25 feet in length, because after processing at the lab, the original film gets cut in half. The lab then wound it onto the reel and it showed up in this fashion. More detail - here. As for the reel's center hole size: Regular 8mm film has a smaller center hole than does Super 8mm film. Yet, there is something to keep in mind: Either type of film format can be mistakenly wound onto the wrong type of reel. That's why it's so handy to know how to discern the perforation hole size difference (or, that distinguished alternating, patterned banding of Regular 8 film, as described above.) of 1 small, 3-inch reel Curling 8mm FilmWhen film gets old it can start to curl, because it is shrinking. The shrinkage amount will depend upon what type of base the film was made of and in what conditions the film was stored. Fluctuating temperatures and changes in humidity affect the outside edge of the film, and in time, will cause shrinkage of that outside edge of the film, as seen in this image below. 
curling 8mm film Don't wait until your film has curled and become moldy - transfer it now! This outer part can no longer be transferred and will break if a transfer is attempted. Using a special solution of "FilmRenew" helps some film regain elasticity, but the outer third of this film is beyond repair. The inner two-thirds could be helped by soaking the film in "FilmRenew." Still, there is no guarantee what image quality will be achieved. 
Here's some curled 8mm film. One third is damaged but some was saved!
of 1 small, 3-inch reel
|
||||||||||||||||||||||||||||||||||||||||||||||||||||||||||||||||||||
|
©
all rights reserved www.super8site.com www.filmfix.ch reseller program powered by poweryourpoint.com website admin |
|||||||||||||||||||||||||||||||||||||||||||||||||||||||||||||||||||||


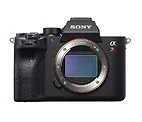