4K vs 2K 8mm Film Transfer
Hearing customers ask us, "Do you transfer in 4K?" has inspired me to write this somewhat technical blog. If you are considering getting an 8mm-to-4K film transfer — or if you just like reading geeky film stuff — you might want to peruse this information.
Let us first establish how much detail 8 mm film grain can hold, and also cover some of the 2K vs 4K technical aspects (camera limitations and transfer workflow considerations). Then, let us explore if offering upscaling from 2K to 4K is something that FilmFix should consider.
8 mm Film Resolution
Due to its very small size, 8 mm film cannot physically hold more detail than 2K holds. So, by going with 4K — hoping to extract more detail from your image — you will only achieve more detailed grain, but not a better image. (A different story applies for the larger format films of 16 mm and 35 mm sizes.)
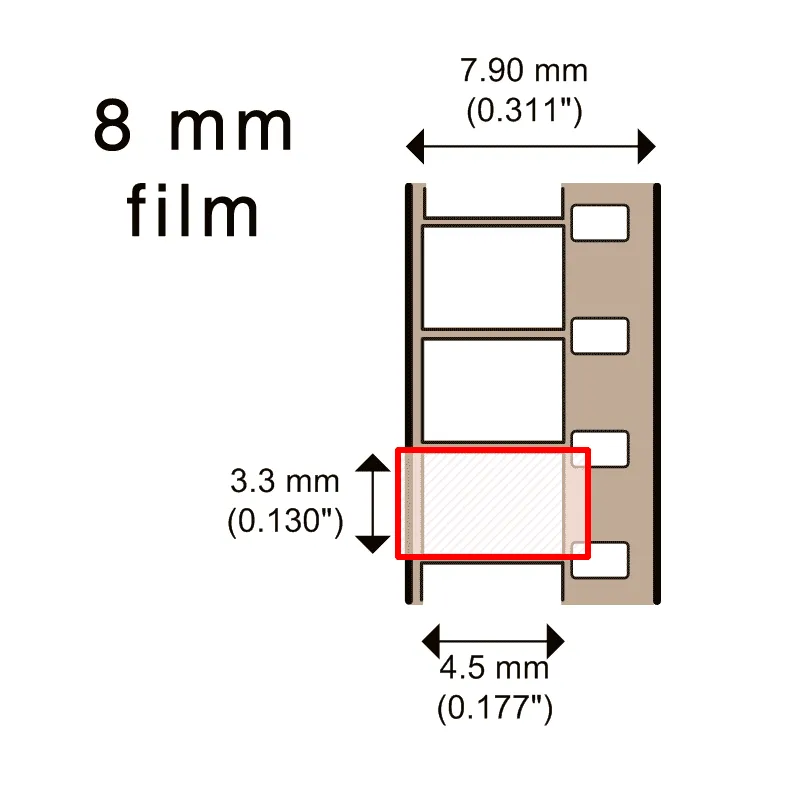
In the illustration below, the red rectangle represents a section captured during a transfer. A 2K transfer has a frame ratio of 16-to-9, containing 1920 by 1080 pixels.
Now, let us calculate the DPI (Dots Per Inch) of that section. (For our purposes, consider “dots” and “pixels” to mean the same thing.) This way we can check if, with 2K, we can accommodate all the granular detail that the film can hold.
Under ideal circumstances, film can hold up to 4,000 DPI of information. (Learn more about film resolution.)
The first generation of 8 mm film (aka "Regular 8" (R8), “Normal 8” (N8), or “Double 8”) has a very small image size.
Learn more about various film formats.
We will base our DPI calculation on the height of that red frame, because that is where we hit the image’s limit: Zooming in will crop out parts of the image, while zooming out will reveal parts of the film frame. We need to avoid both loss of image content and inclusion of non-image film content when we make the transfer.
(Side note: A few years ago, it became fashionable among serious and professional photographers to include the film edges in prints of their images. This practice sent two messages to the viewer:
1. “I have not cropped this image. See: I composed it perfectly in camera.”
2. “I am using a large- [or medium-] format camera, proving that I am a serious photographer.”
Nowadays, in this era of digital photography, that practice has mostly fallen by the wayside; but it never would have applied to 8 mm film, in any case.)
(A Transfer Setup Note: Before we transfer a reel, we need to fine-tune the film’s positioning, in order to achieve proper framing. So, at the start of every new reel, we calibrate our equipment to accommodate your film’s frame height. The position can vary, because the exact positioning of the camera's pull-down claw can vary. Also, film shrinkage affects positioning.)
Now we can do the math. Remember that we are basing our DPI calculation on the film’s frame height. Notice in the illustration above that 8 mm film has a frame height of 0.130 inches. For a 2K transfer, the digital rendering of your image will hold 1080 pixels of information per 0.130 inches of film frame height. 1080 pixels ÷ 0.130 inches yields approximately 8,300 DPI. Remembering that film holds only 4,000 DPI, at best, these results show that a 2K transfer contains over twice the information that the original 8 mm film held.
With Super-8 film, we have a bit bigger frame to work from than we do with 8 mm film. This larger frame area yields slightly better image quality than Normal 8 mm film could offer. Let us check to see if a 2K transfer can still hold that extra information.
The second generation of 8 mm film is Super-8 film (aka S8), and it has a bit larger frame.
In this case, Super-8 film has a frame height of 0.158 inches. The 2K digital transfer of a Super-8 film frame will still contain 1080 pixels of information in the vertical dimension. Thus, we can calculate the transfer resolution as follows: 1080 pixels ÷ 0.158 inches yields approximately 6,800 DPI. This result still puts us well above our film’s 4,000 DPI capacity.
These simple calculations show that 2K transfers from 8 mm film offer more-than-adequate image resolution, and that upgrading to 4K could not extract greater detail from your 8 mm film.
In the old days of 8 mm film transfer, we used to say that 8 mm is fully captured using the smaller 1280 × 720 HD camera standard. This is why the very first professional film flash scanners were equipped with a 720p camera. Only later did manufacturers start offering 2K transfer systems.
Let us check to see if 720p can hold an 8 mm image. We use the same math to calculate 720p transfer quality as we did for 2K transfers. Thus:
• For Normal 8 mm film, 720 pixels ÷ 0.130 inches yields approximately 5,500 DPI.
• For Super-8 film, 720 pixels ÷ 0.158 inches yields approximately 4,500 DPI.
Super-8 film at 720p is starting to push the limits, but it is still within what is considered acceptable. (Remember that 4,000 DPI is the highest resolution that film can deliver under ideal conditions.) Some transfer houses transfer all their film at 720p, because doing so allows for more productivity: they can transfer it all at high speed. After that, they upscale your transfers to 2K, and you never know about their trick. We do not do it that way. We capture in 2K from the outset.
(Important side note: a "Wolverine", or "Reflecta", is not a Professional Film Transfer System. It is a lower-end consumer transfer unit. The file that it records is a highly compressed 8-bit MP4 file. It still produces a 1920-by-1080 pixel frame size, but with inferior image quality. We will discuss the difference between pixel count (the empty vessel) and image quality (the vessel’s contents) in another post. For now, just remember that it is what is put into the file — the quality of that stored image — that counts, not just the pixel count of the frame.)
4K Monitors and UHD TVs
Over the years, monitors keep growing in size. These days, Netflix requires all shows to be shot in 4K. In order for you to see that higher 4K resolution, you need a 4K monitor, and you need to pay Netflix extra for that better image quality.
Once these monitors found their way into our living rooms, naturally our customers started inquiring about 4K transfers.
A long time back I did some 4K camera research. Just for curiosity’s sake, I started looking to see what is out there in the way of new consumer 4K cameras. Technology keeps improving, while people's film in storage keeps deteriorating.
4K Cameras with a CCD sensor
Researching the topic, I found that I would lose the extended 10-bit color depth capability if I used a 4K prosumer camera. Those with a CCD 4K sensor only offer 8-bit color depth. This is not good! I knew that this would not work for me, because I rely heavily on 10-bit color-depth during the color grading process, which I do by hand. Ten bits of color depth is critical to improving the color and exposure issues of strongly discolored film.
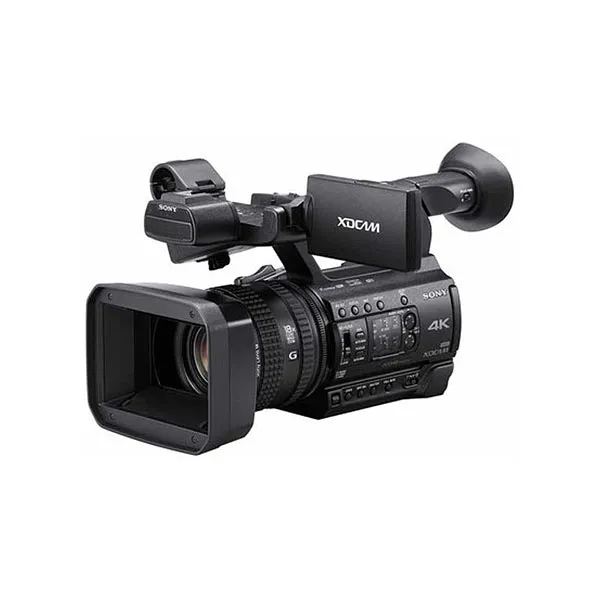
The above 4K video camera offers 10-bit color depth, but only when using a highly compressed 50Mbps file format, which does not yield a favorable image. Besides that, its sensor is a CMOS sensor, not a CCD sensor. For a flash scanner like we use, we require at least a CCD sensor, or — better yet — a 3-CCD sensor, like ours.
I continued researching, and found myself looking into $28,000 - $35,000 cameras that have some interesting 4K capabilities, but they would not permit me to perform the workflow that I need for your transfers.
In short, while these expensive cameras do capture 4K at 10-bit, using one of them for film transfer applications would add so many workflow steps that I would need to charge over 4 times what I am currently charging for transfers. Worse, the expensive camera could only capture the initial footage. All the tasks after the capture would then require much more intensive computer time, because jumping from 2K to 4K does not double the data volume, but quadruples it. Moreover, all the remaining processing and copying of data would take 4 times longer.
Video Newscasters Upscale 2K to 4K
Later, I found myself reading about what some professional newscasters do. In one of their forums, I learned that — still today — a lot of them are shooting in 2K. Since the broadcast stations require all footage to be delivered to them in 4K, the videographers then upscale their 2K footage to 4K prior to delivery. This revelation brought me to a FULL STOP.
Upscaling! I have a lot of experience with upscaling.
We have been offering upscaling of video tape transfers — to bring SD (Standard Definition) to Full-HD — for years now. Upscaling from 2K to 4K can be configured in the same way as upscaling from SD to HD. Moreover, upscaling is more efficient than 4K capture, because no de-interlacing is required when processing two progressive images.
Upscaling 2K to 4K doubles the image pixel count in both height and width.
I found myself reevaluating each and every step of my transfer process, as I described here on our website From RAW to FINAL. Sure enough, I found an instance where I could, conceivably, justify a 4K up-scaling.
When is it best to upscale to 4K?
You will probably notice that this topic is a bit technical, but nonetheless worthy of perusal.
During the image stabilization process, the image's grain gets seriously remapped. Here is the reason for that "remapping": The image stabilization process necessitates temporarily enlarging the image by 4% — from 100% to 104%. Later that enlarged image's border gets cropped off back to 100%. To finalize the image stabilization process, a very light sharpening is required to retain the grain's sharpness.
If applied during this image stabilization process, upscaling might retain some of the image’s very fine grain structure.
In order to test this idea, I produced two clips, and I placed them side by side.
How the 4K vs 2K images stabilization sample was made
For the 4K side, I performed the image stabilization process within a 4K project.
For the 2K side, I performed the image stabilization outside the 4K project, within a separate 2K project.
Here are the steps in detail:
4K side
I created a 4K project, into which I imported a 2K clip. The 2K clip was automatically upscaled to fill out the larger 4K frame. Then I applied the image stabilization process to the clip, including some light sharpening.
2K side
In a separate 2K project, I performed the image stabilization and light sharpening.
• Later, I opened the above 4K project, into which I imported that already pre-processed 2K image-stabilized clip.
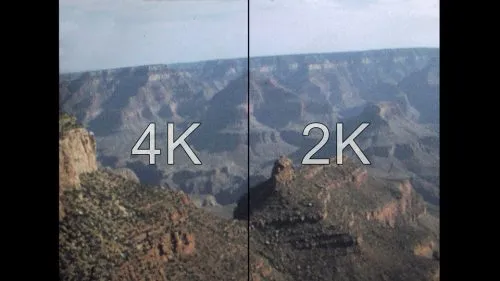
• I then upscaled the 2K project and placed the 4K and 2K side by side, as seen below.
A side by side 4K / 2K composite is a large 611 MB file — the file is a 4K resolution size (3840 width by 2160 height). Note that the quality of very fine grain can really only be judged in a video clip that is being played back in real-time. A still image does not work ideally for this demonstration.
Click and zoom in to see the image in full 1:1 pixel display. Note that these large frames double the grain size, making the grain look splotchy. You might notice that the 4K image looks slightly less cloudy.
In theory, one would expect the 4K side to have kept more of it's finer grain structure — but to my summation, it turned out to be insignificantly better.
How can I assess the difference without a 4K monitor?
One can only discern the difference of this 4K sample by viewing it on a 4K monitor. Since most people do not have a 4K monitor hooked up to their desktop computer, I decided to provide you with a link to the file so that you can download it onto a USB stick. If you have access to a 4K monitor, use it to compare the two transfers.
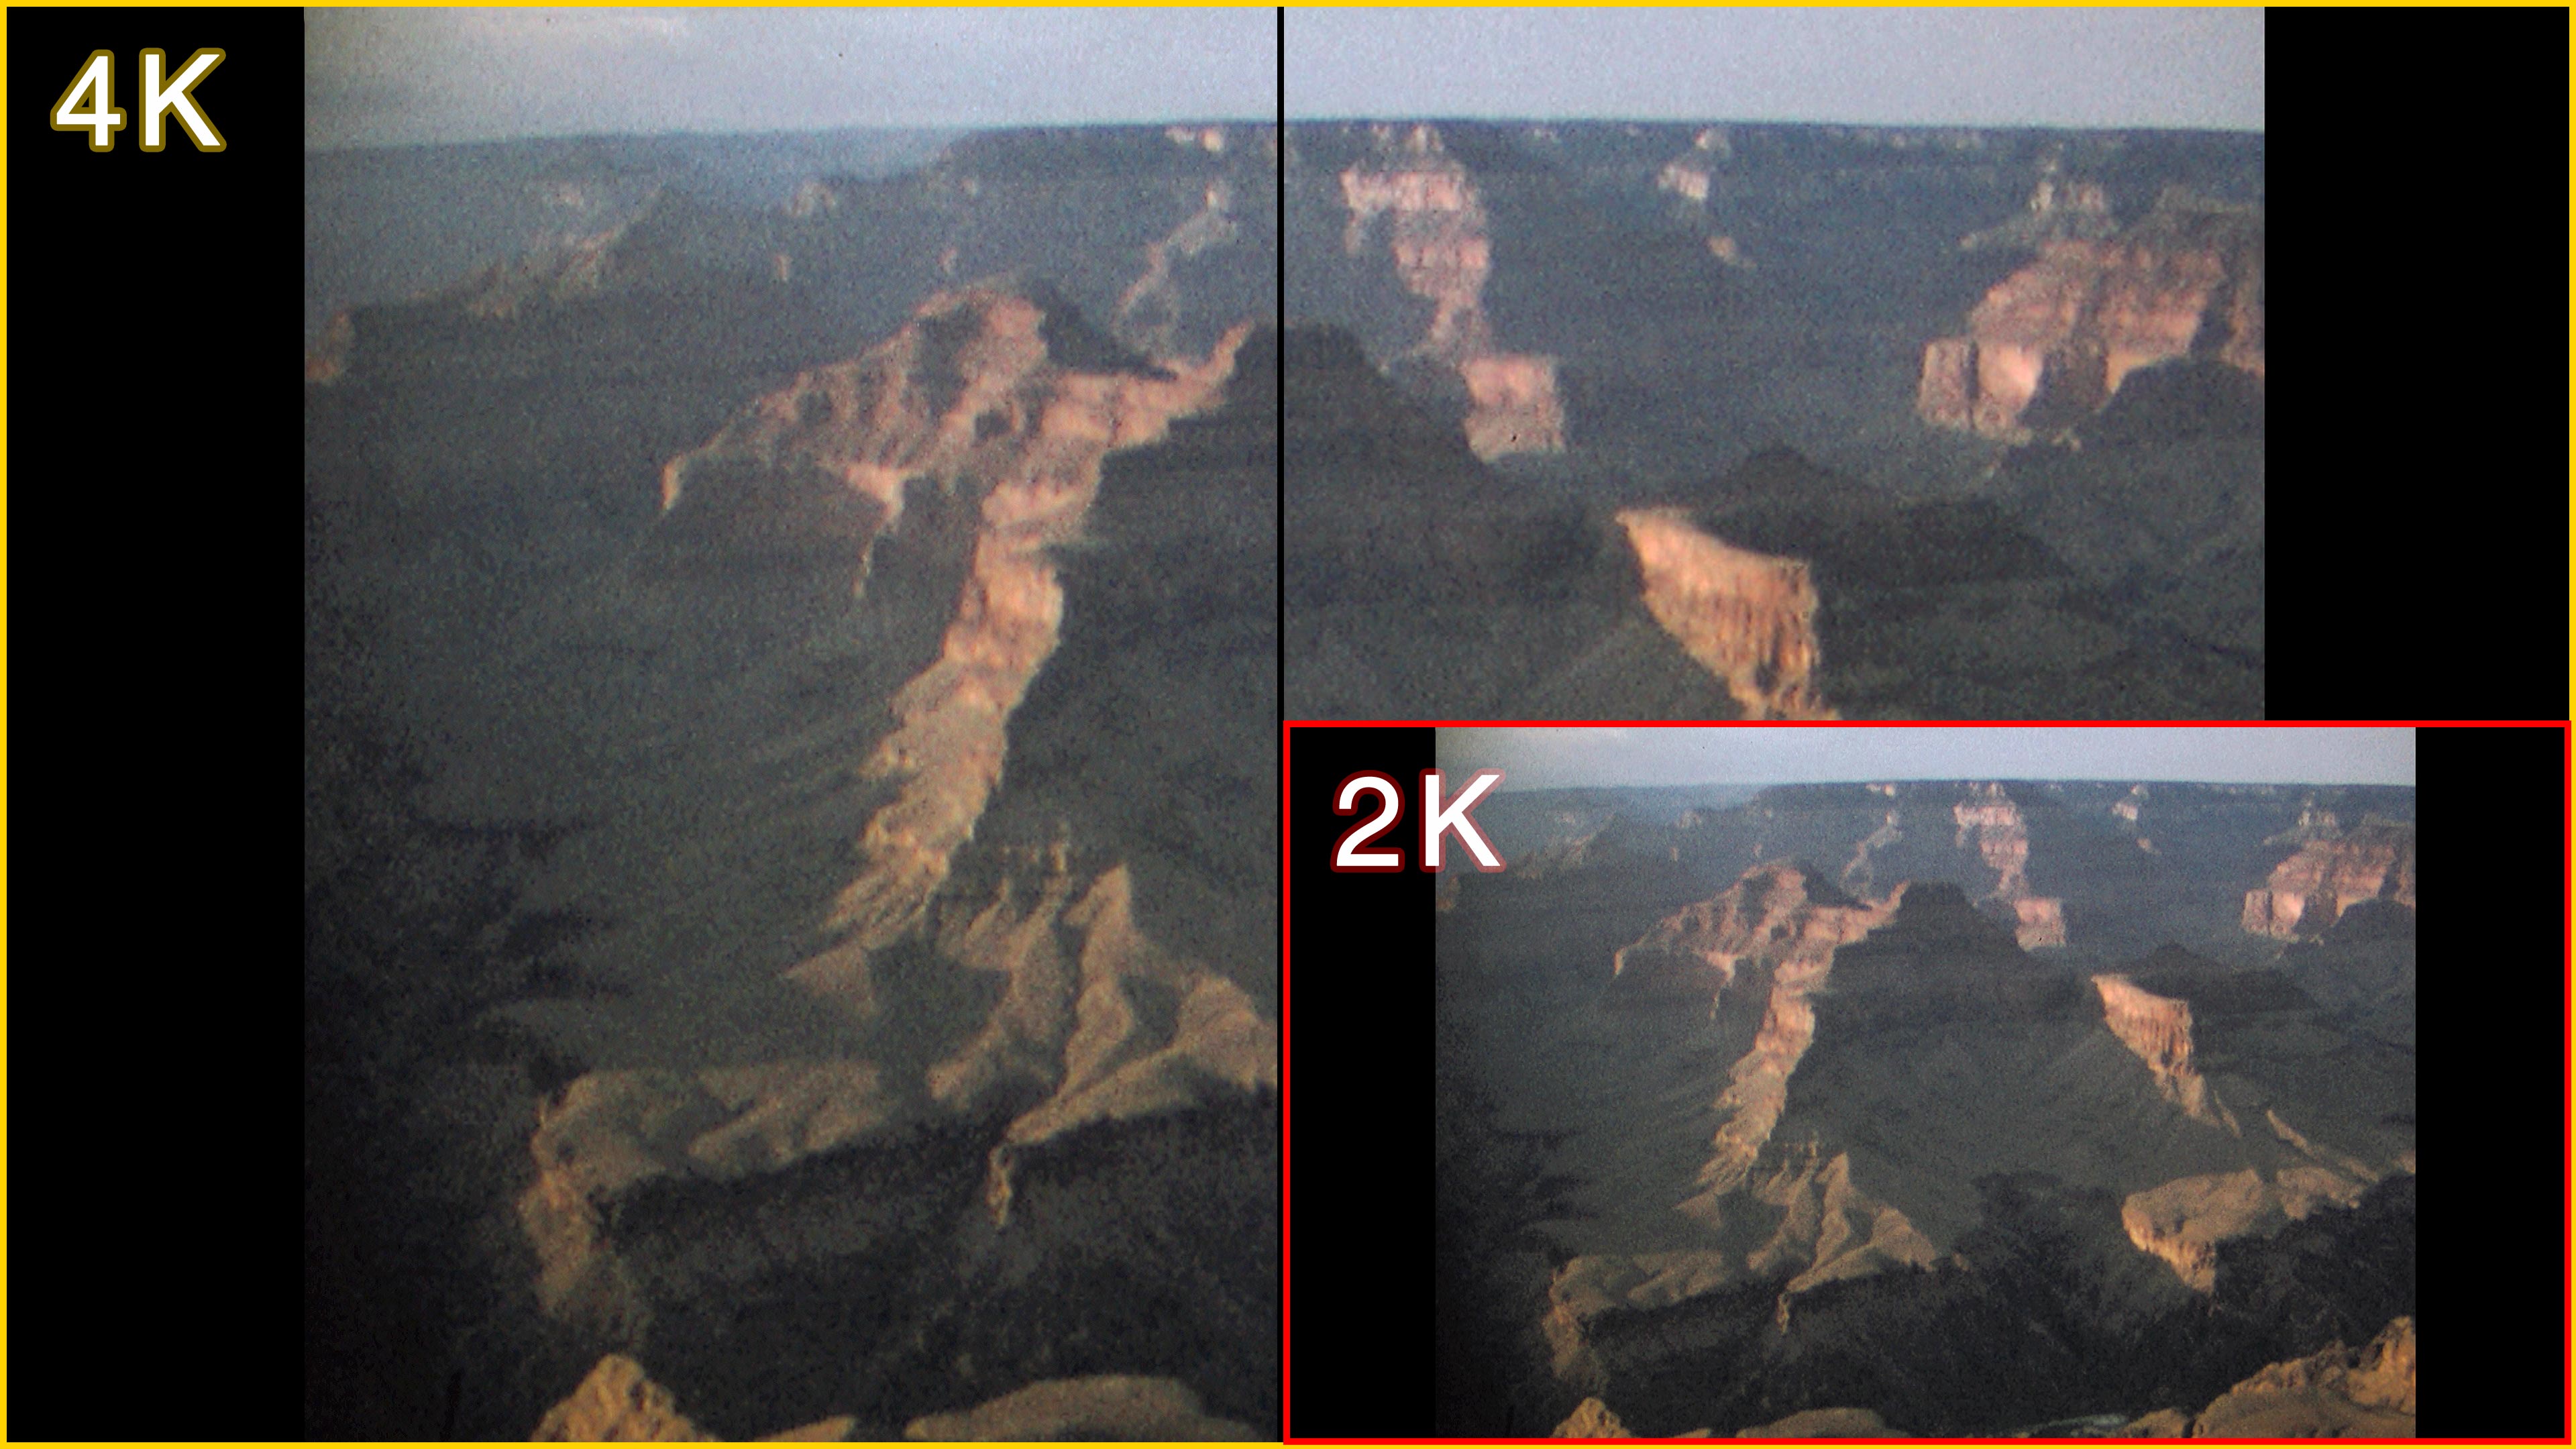
If you only have access to your computer's monitor, here is a 1920 × 1080 frame center portion of the 4K file. It is the red rectangle seen in the image below. You can play this clip on your desktop to compare the difference in grain. The grain is the same as what you would see on your 4K monitor.
The sample below is only a zoomed-in, close-up portion of what you will see on your screen. The final transfer will not look like this. However, this sample will give you an idea of the difference between a 4K transfer and a 2K transfer. The 4K transfer does bring more crisp edges, but it adds substantial blotches of grain patches during live playback. It looks busier than the 2K version, and the induced crispness actually distracts the viewer.
The red section is cropped to 1920 × 1080 pixel size for viewing on a desktop monitor.
Download MP4 Sample
To download the center, zoomed-in, 2K section of the 4K sample, click here. It is 303 MB, so it will take some time to download.
To download the full-size, 4K sample clip, click here. (Again, this is a 611 MB file)
These sample clips have been encoded using the new "High Efficiency Video Codec" aka H.265 codec. Some older players might not be able to play back this type of mp4.
Considerations and Conclusions
Bottom line: If you have 8 mm film, we do not recommend that you get a 4K transfer.
1 - The benefit of getting a transfer in 4K is not very noticeable. Only a trained eye might see a difference, and it costs twice our regular price.
2 - If you will be considering our image enhancement option of grain reduction — “debris removal”, as we now refer to it — you do not want a 4K transfer. Since with a 4K transfer you are after the grain, we would not apply any grain reduction to the file.
3 - If you are going to want to share this large file, it will first need to be highly compressed. In that compression process you will lose all the benefit of the grain captured in a 4K transfer.
4 - If you want to be mindful of your carbon footprint, 4K transfer is not a good choice. It takes a tremendous amount of electricity to process these very large files.
Conclusion: A 4K transfer will not benefit the image captured from 8 mm film. The finest grain might look a bit sharper; but — for all the reasons explained in detail above — the slight improvement in grain quality does not usually justify the extra cost.
Still, if you have your heart set on a 4K file, we can deliver it … at a premium price. We would capture your film’s information in 2K (RAW Lossless, instead of using the HQX SuperFine codec), and import that file into a 4K project. There, all the color-grading and image-stabilization work would be performed. This 4K transfer varies from our usual processing, as explained in our step-by-step breakdown of our transfer process: From RAW to FINAL.
Author: Nathaniel Courtens